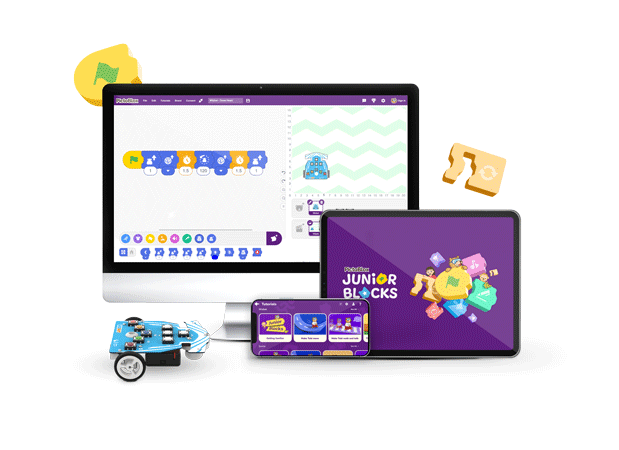
Wizbot offers two distinct interactive coding experiences: Button Coding for screen-free engagement and Picto Coding for visual, block-based programming, enabling you to code Wizbot using laptops and mobile devices. Here, we will deep dive into Wizbot Picto Coding.
Getting Started with Wizbot Picto Coding
How to Set Up Wizbot for Picto Coding?
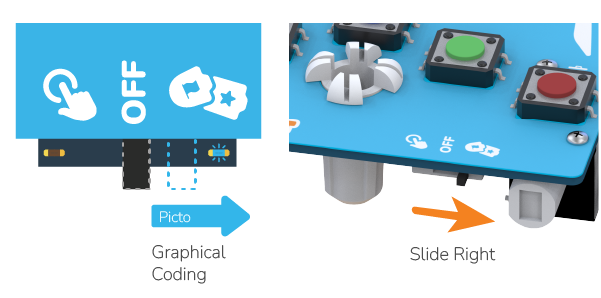
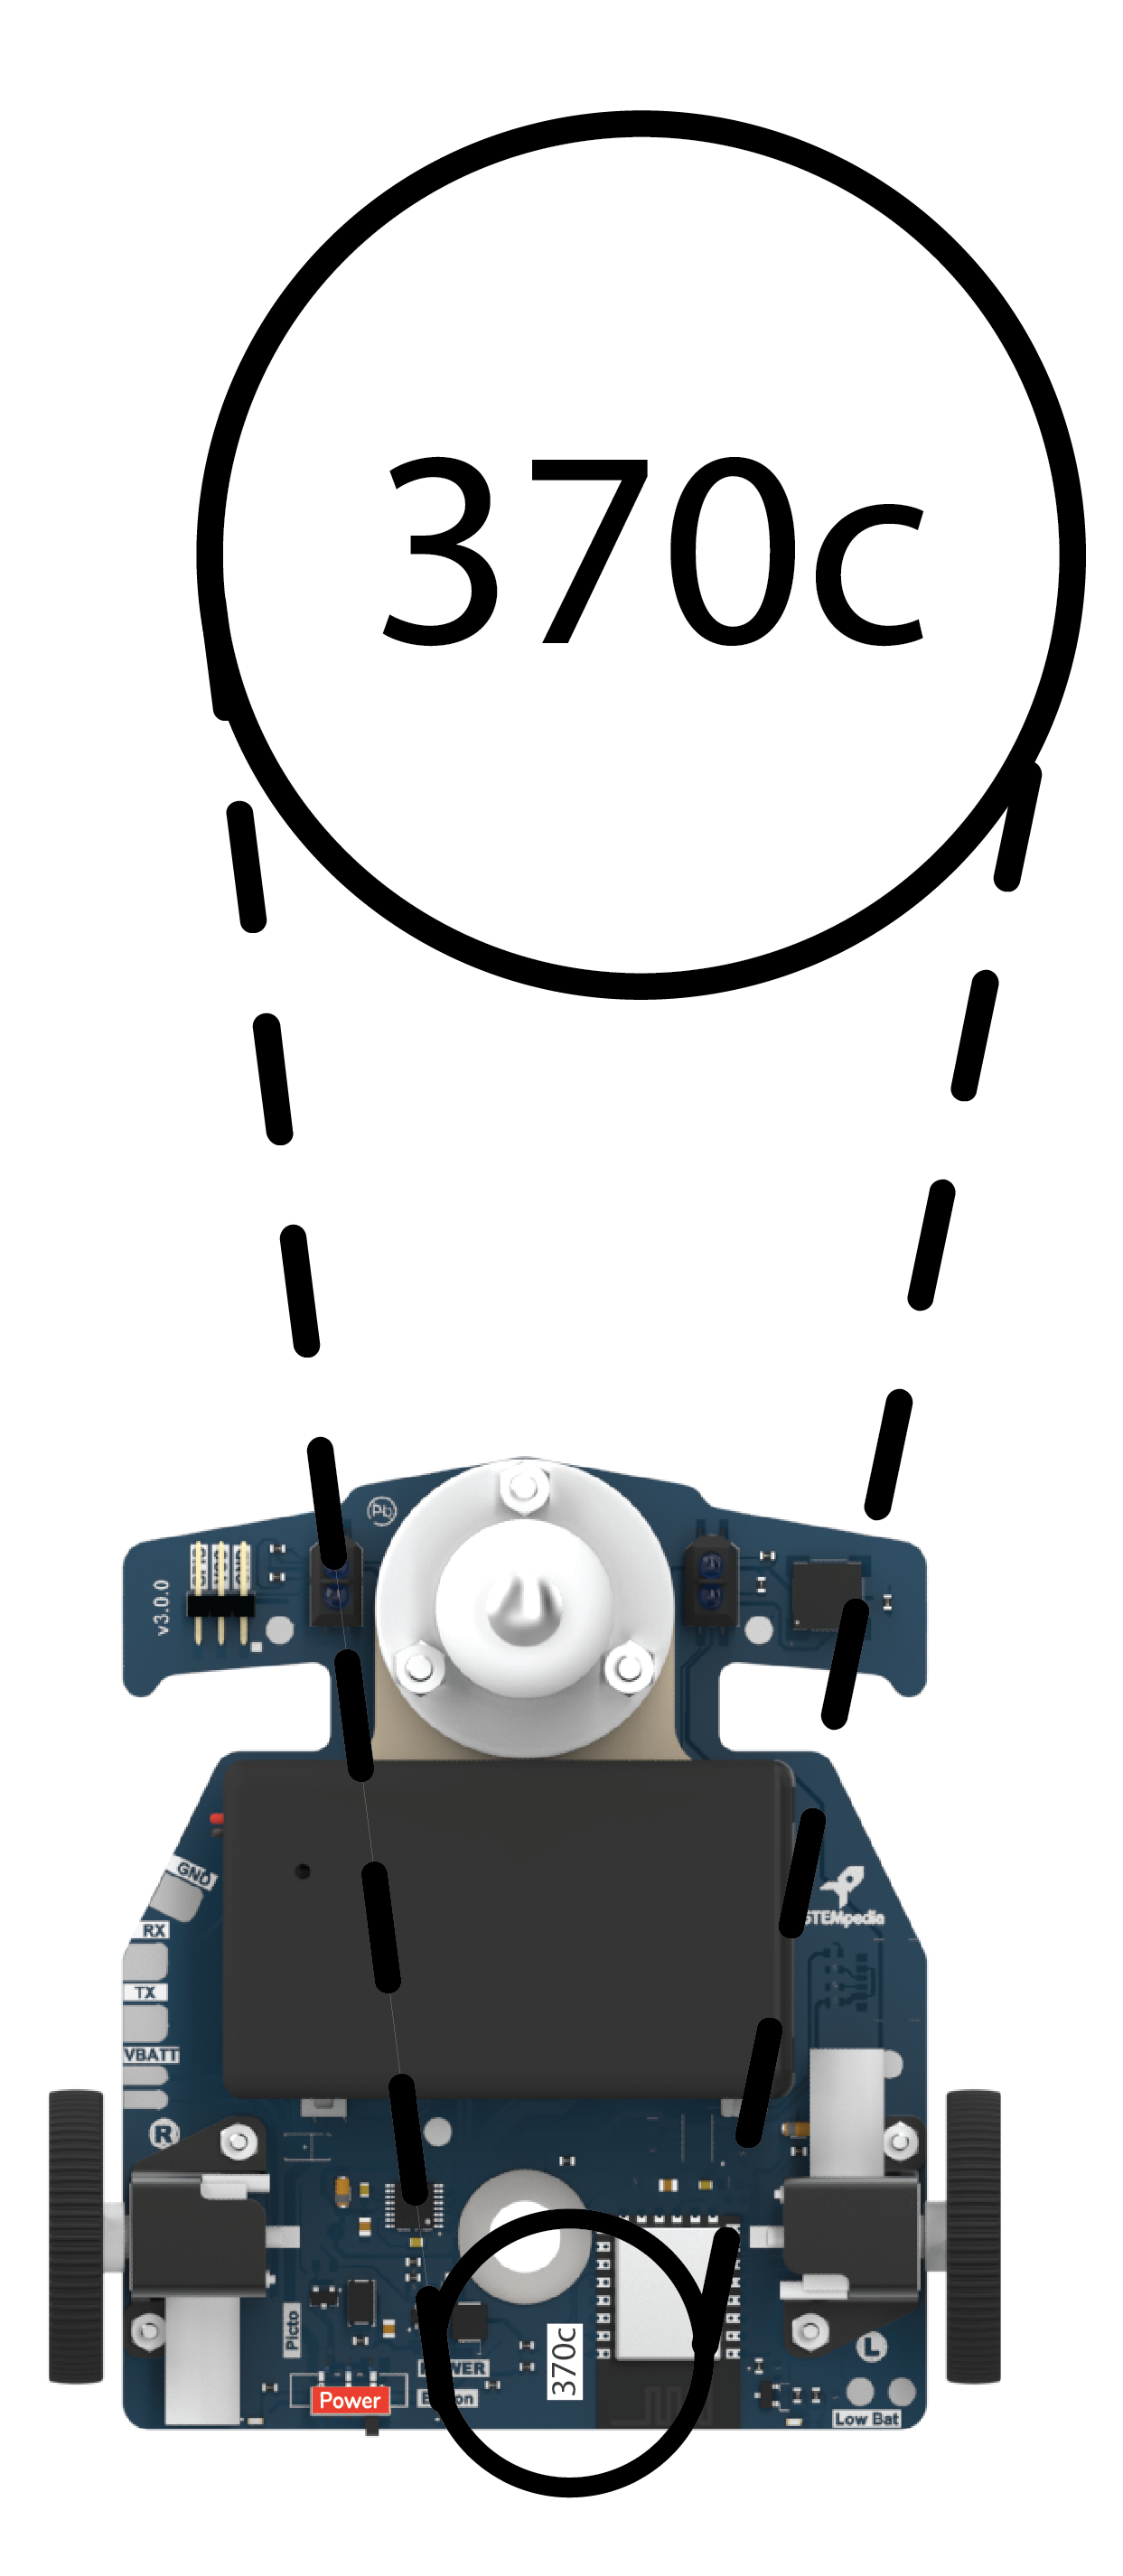
Step 1: Slide the Power Button to the right as shown in the image below.
Step 2: You will observe a blue LED light up, indicating that Wizbot is now ready for Bluetooth connection.

Download and Install PictoBlox Junior Blocks
If you are new to PictoBlox, you will need to install the software.
- For PC users (Windows, Mac, Linux): PictoBlox software can be downloaded from: PictoBlox.
- For Android devices: The PictoBlox Junior Blocks app is available for download from the Play Store.
- Online Access: Alternatively, you can use PictoBlox online via pictoblox.ai.
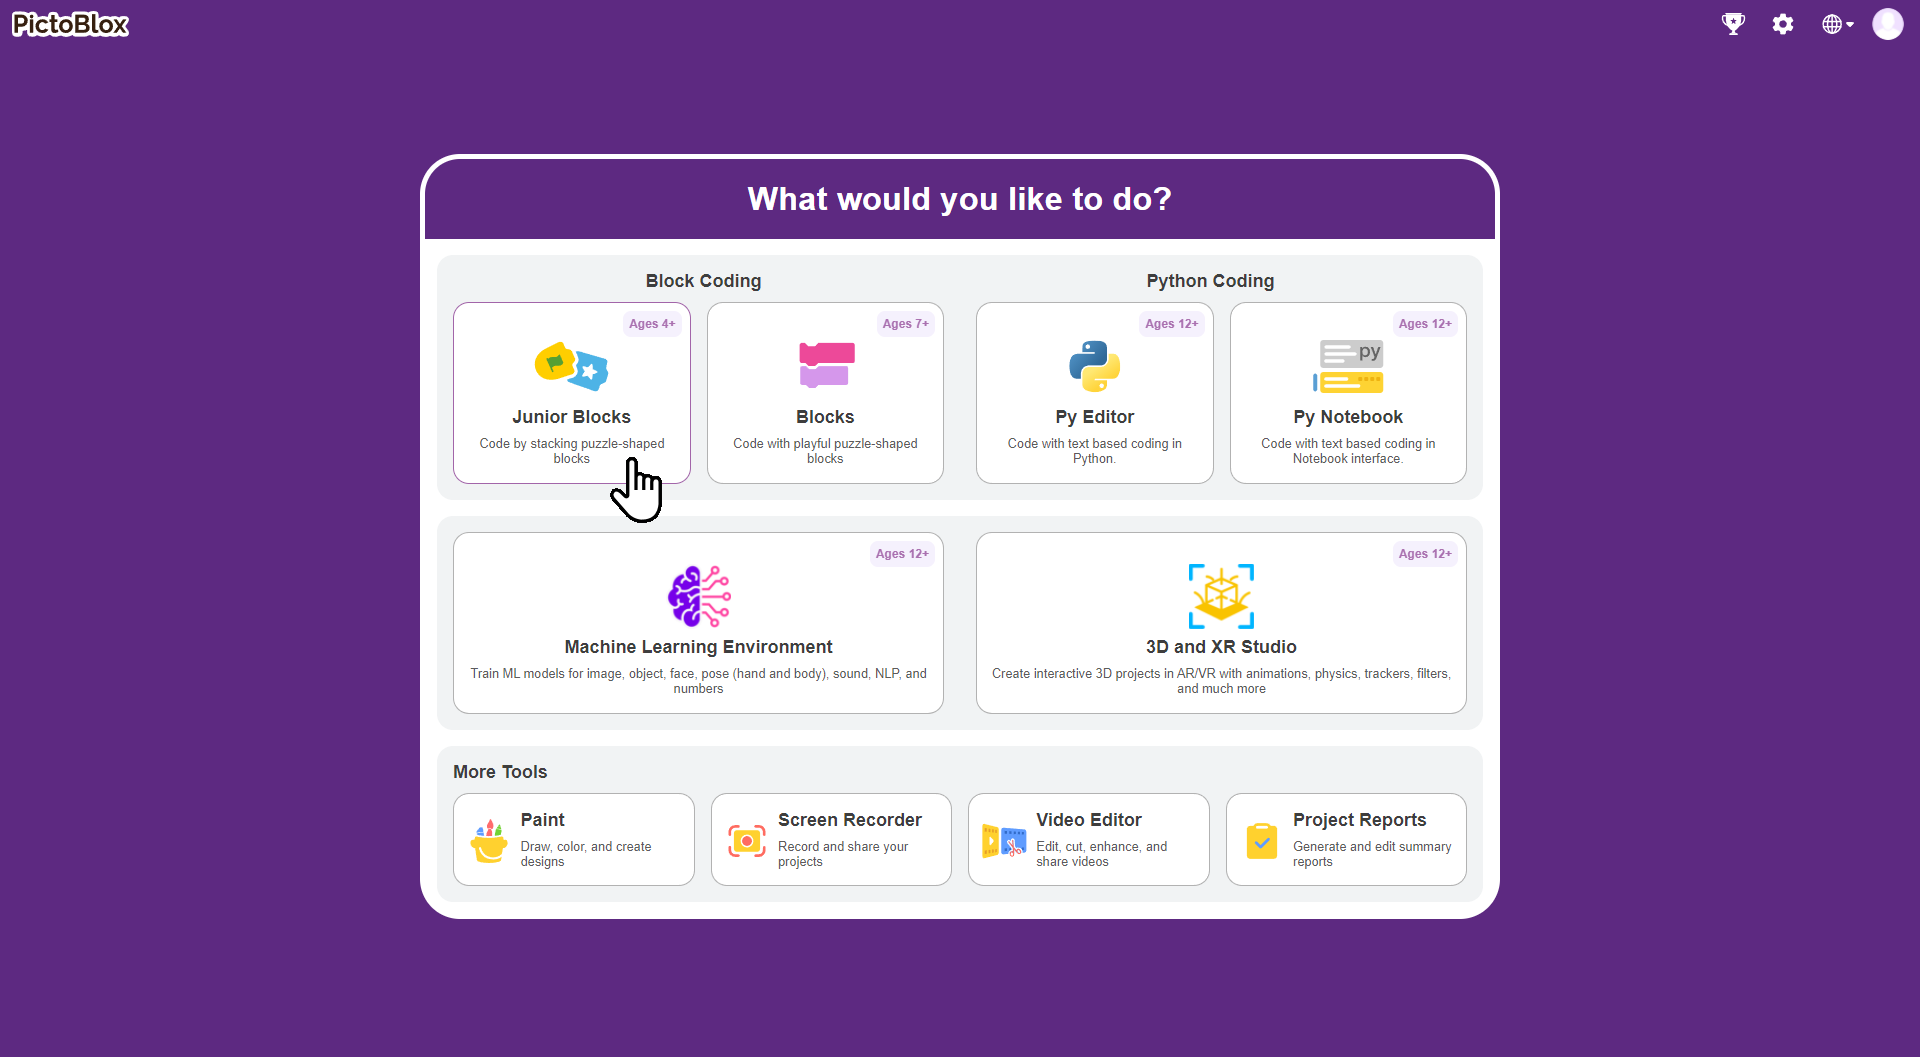
Upon opening PictoBlox, select Junior Blocks. First-time users will be guided through an overview of the interface.
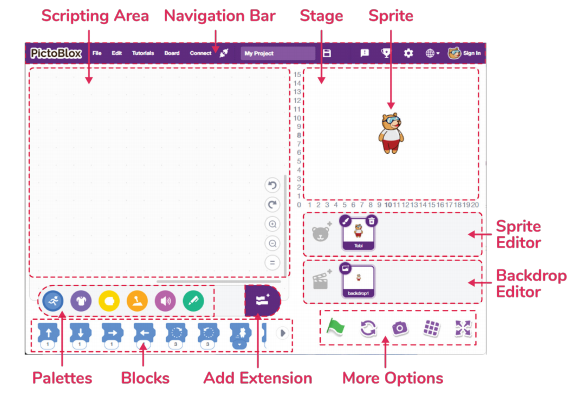
Junior Blocks Interface Overview:
- Sprites
A sprite is an object, or a character, that performs different actions in the projects. It understands and obeys the instructions given to it. The bear you see in the image is a sprite. His name is Tobi. He will be your coding buddy in PictoBlox- Junior Blocks!
A sprite has costumes, which are one of the many appearances of the sprite. Some sprites have multiple costumes, and you’ll use blocks to perform actions.
- Stage
The stage is the area where the sprite performs actions according to your program. The stage has its own scripts and sounds. You can decorate the stage using images; these images are called backdrops. You can choose a backdrop from Junior Block’s inbuilt library, paint one yourself, upload an image from your computer or even click a picture.
- Script
A script is a program or a code in PictoBlox/Junior Blocks lingo. It is a set of ‘blocks’ that are arranged below one another in a specific order to perform a task or a series of tasks. You can write multiple scripts all of which can then run simultaneously. You can write the scripts only in the scripting area which is in the center of the screen.
- Blocks
These puzzle-piece-shaped objects contain predefined commands, by simply dragging and dropping them below one another in the scripting area. They are connected horizontally to form a program in the scripting area.
There are other varieties of block palettes that can be loaded from the Add Extension button located at the right side of the palette
How to Connect Wizbot with Junior Blocks?
Once you are in Junior Blocks and have created a new project, you will enter your play space.
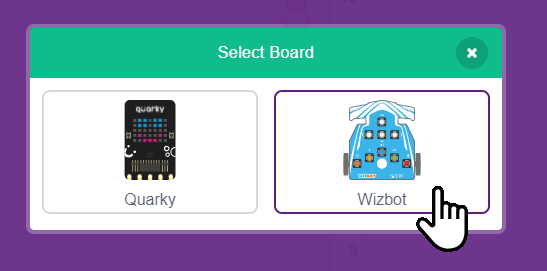
Step 1: First, select Wizbot from the list of available boards.

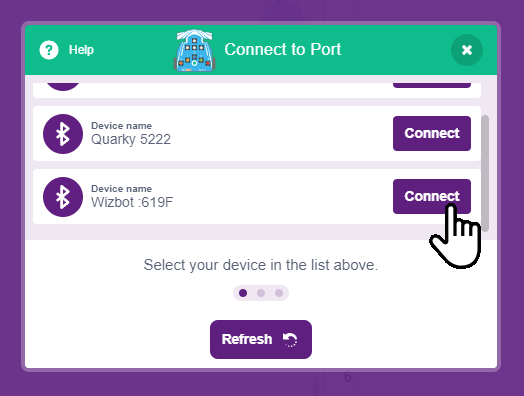
Step 2: Click on Connect. Ensure that Bluetooth is enabled on both your Wizbot and your device.
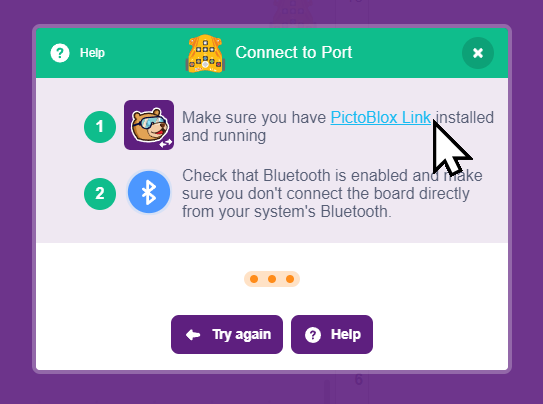
Step 3: For PC users, A ‘PictoBlox Link’ software is required for Bluetooth connectivity and can be downloaded from the website.
Step 4: You will then be presented with a list of unique Wizbot numbers. Select the number corresponding to your Wizbot.
Step 5: Upon successful connection, a buzzer sound will be emitted from the Wizbot.
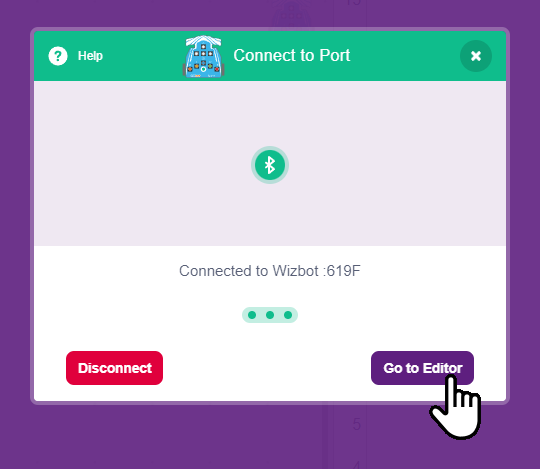
You will now notice a new Wizbot icon appearing in your interface.
Understand Wizbot Coding Blocks
Click on the new Wizbot icon to explore its dedicated blocks:
- Modes
The Modes feature enables seamless switching between Grid Mode and Draw Mode. This function allows users to adapt the programming environment to their specific task, whether it’s executing precise movements on a grid or creating freeform drawings. - ‘When Button Pressed’ Block
The Button Assignment section provides the capability to configure Wizbot’s physical buttons. Users can select and assign specific, custom functions to these buttons within the Junior Blocks programming interface, tailoring the robot’s controls to their project needs. - Directional Command Blocks
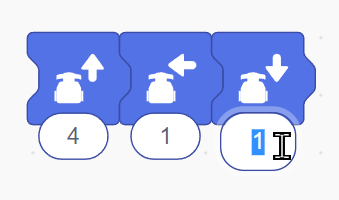
These blocks correspond to the physical directional buttons on the Wizbot. They are used to program fundamental movements, including forward step, reverse step, left turn, and right turn, providing direct and intuitive control over the robot’s motion.
- LED and Sound Blocks
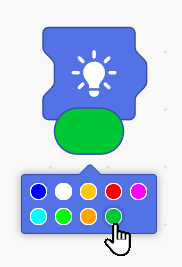
Set LED Block: This block facilitates the programming of Wizbot’s onboard LEDs. Users can choose from a range of color options to create diverse light patterns and visual effects.
LED Off Block: This command is used to deactivate the Wizbot’s LEDs, effectively turning off any active light combinations.

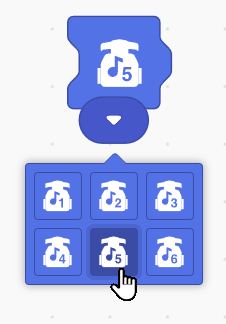
Play Sound Block: The Play Sound Block triggers a sound from Wizbot’s integrated buzzer, allowing for the incorporation of auditory cues into programmed sequences.
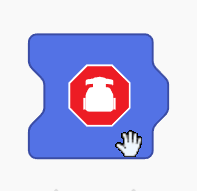
- Stop Command
- Stop Robot Block: This essential block serves as a universal command to halt all active movements and actions of the Wizbot. It provides a reliable method for emergency stops or for ending a programmed sequence.
Your First Picto Coding Project: Drawing a Square
Let’s begin with a simple task: coding Wizbot to draw a square!
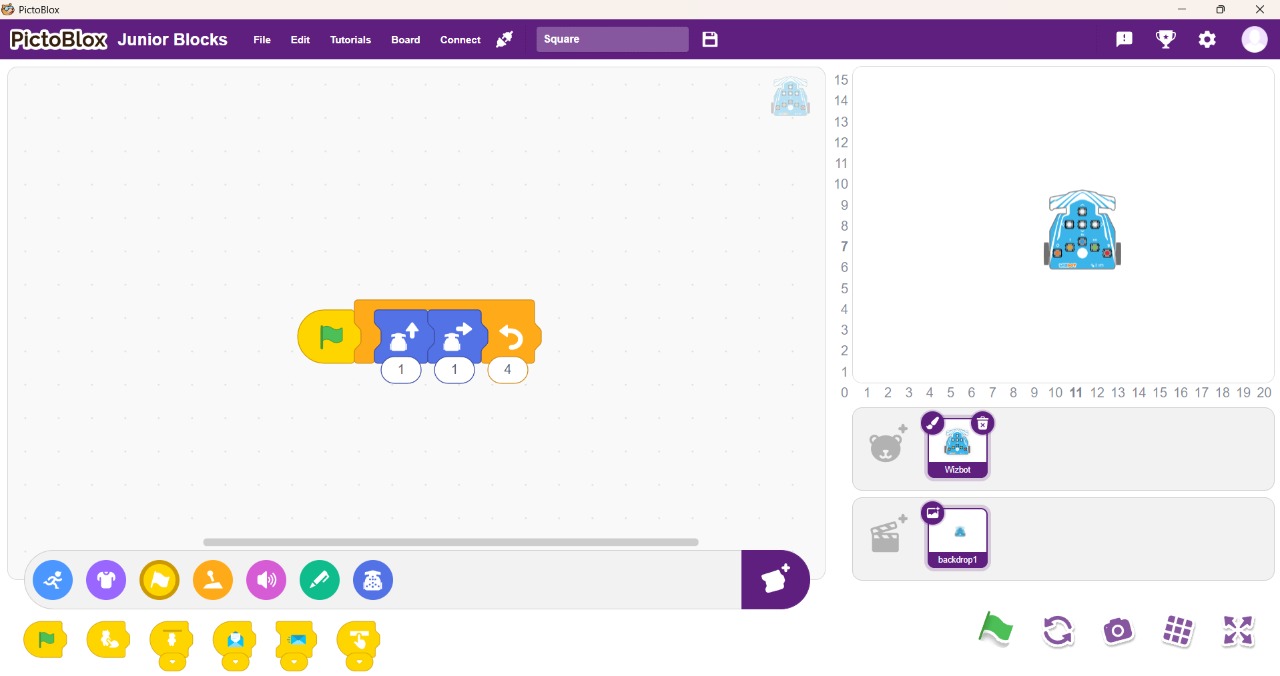
Step 1: Under the Wizbot icon, select the forward step block and set it for one step.
Step 2: Then, add a right turn block.
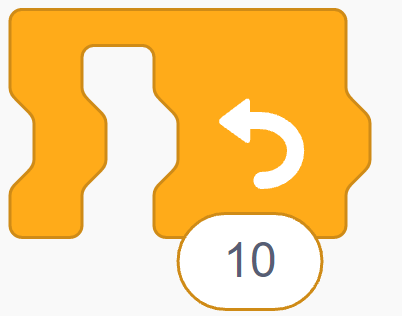
Step 3: To repeat this sequence, navigate to the Control blocks icon and select the repeat block. Insert this block around the forward step and right turn blocks, setting the repeat count to 4 times (for a square).
Step 4: Finally, add the flag block from the ‘Events’ category. This means the program will execute when the flag icon is clicked.
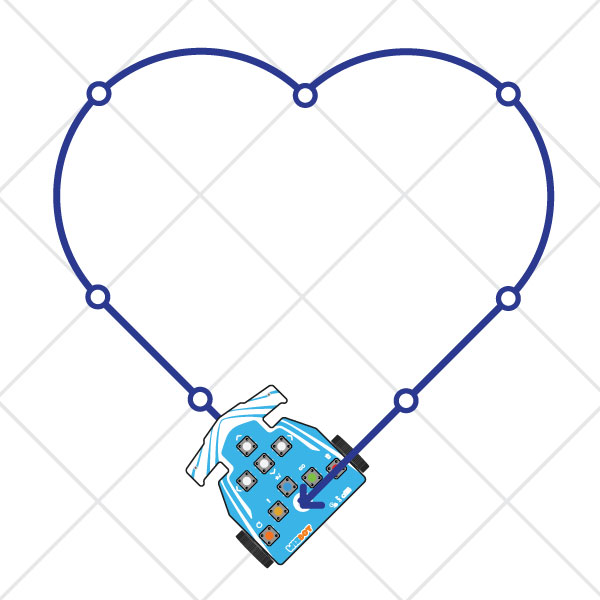
Recreate Shapes: Draw a Heart with Wizbot.
Regarding the heart shape previously created using button coding, we will now replicate this design using Junior Blocks.
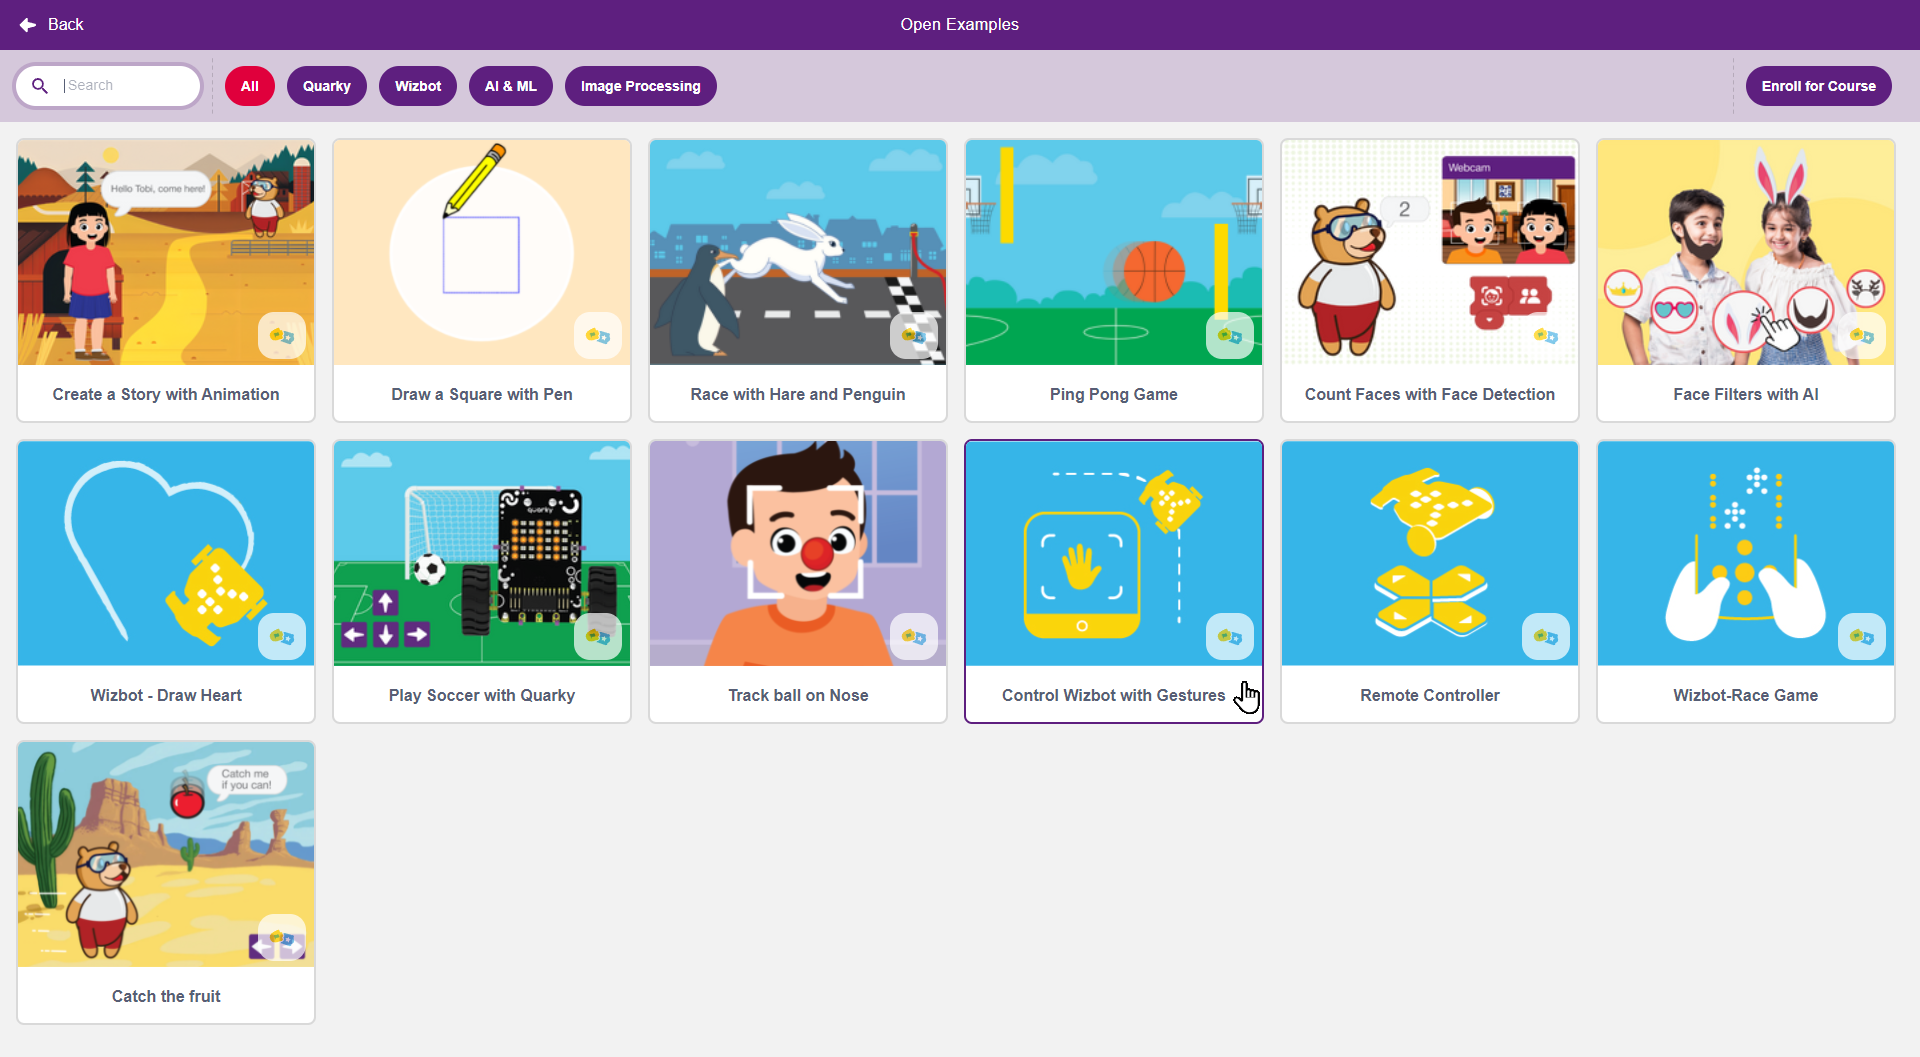
Step 1: From the ‘Files’ menu, open ‘Examples’.
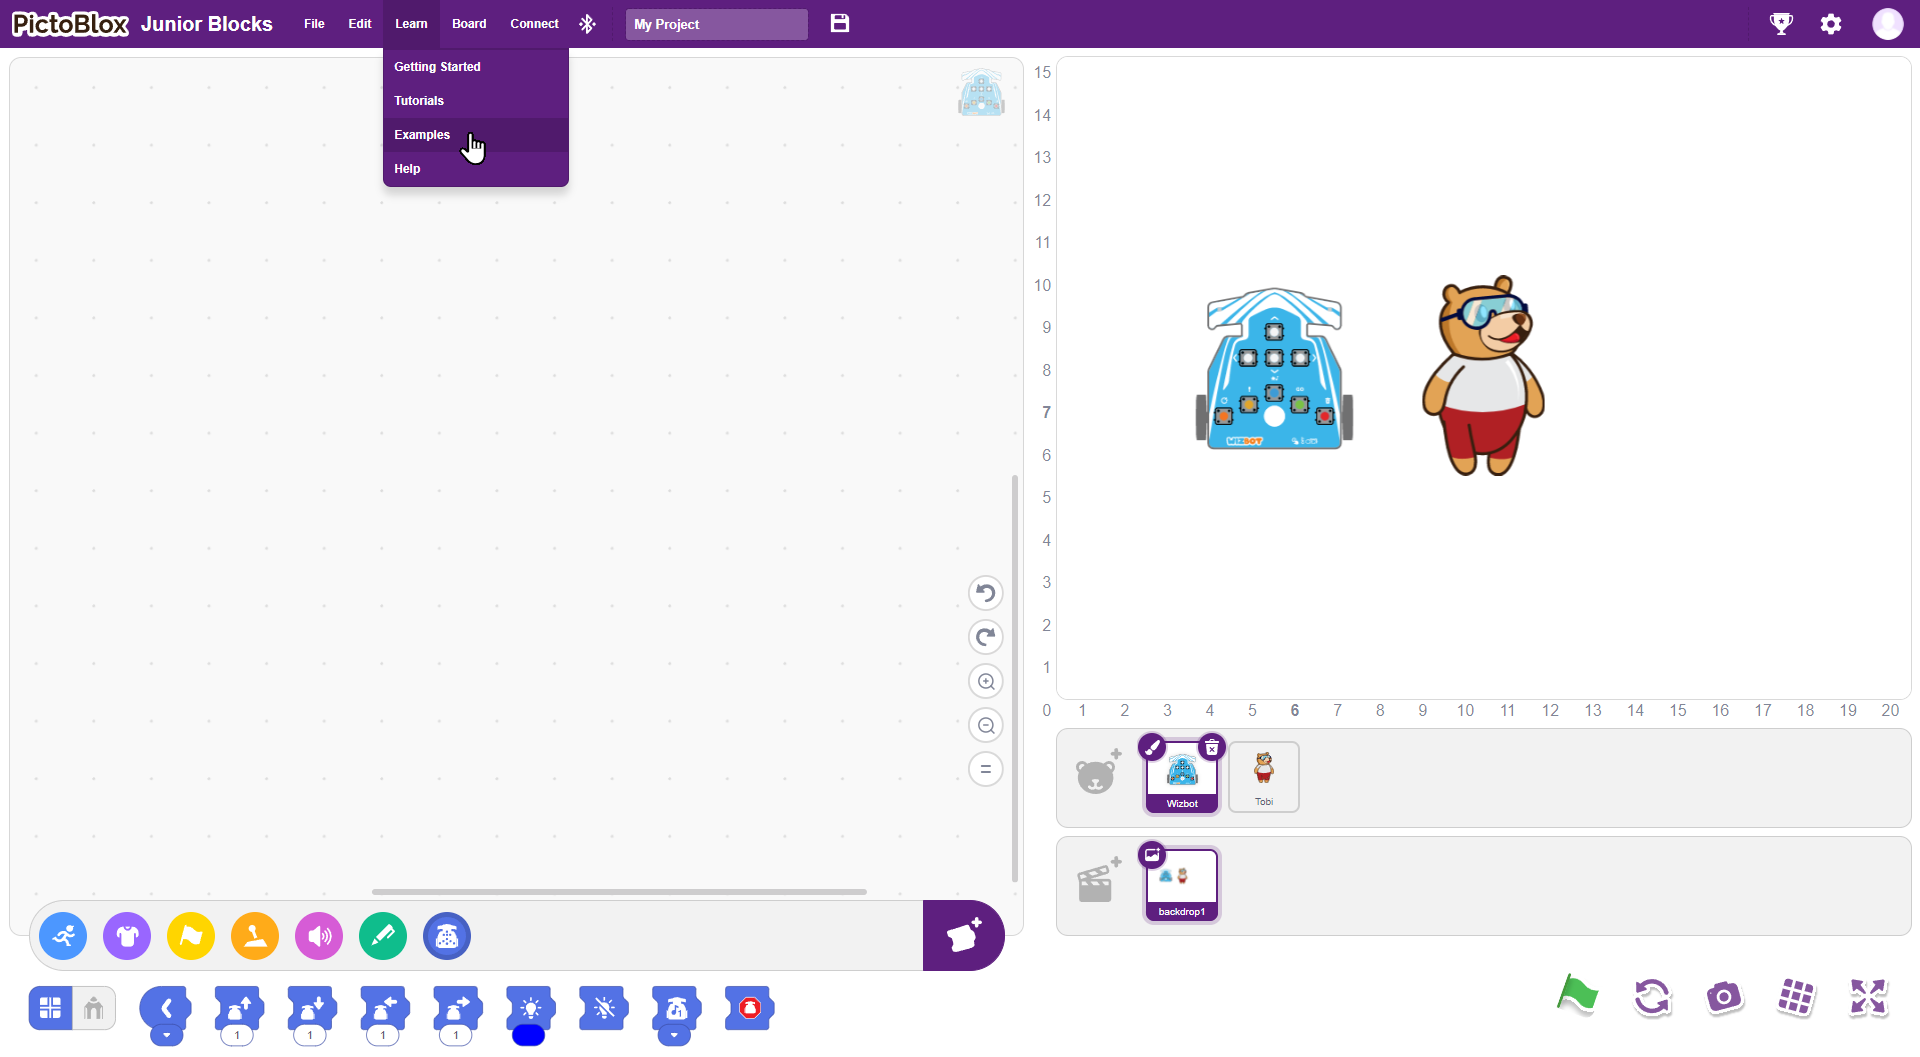
Step 2: Navigate to ‘Wizbot’, then select ‘Draw heart with Wizbot Example’.
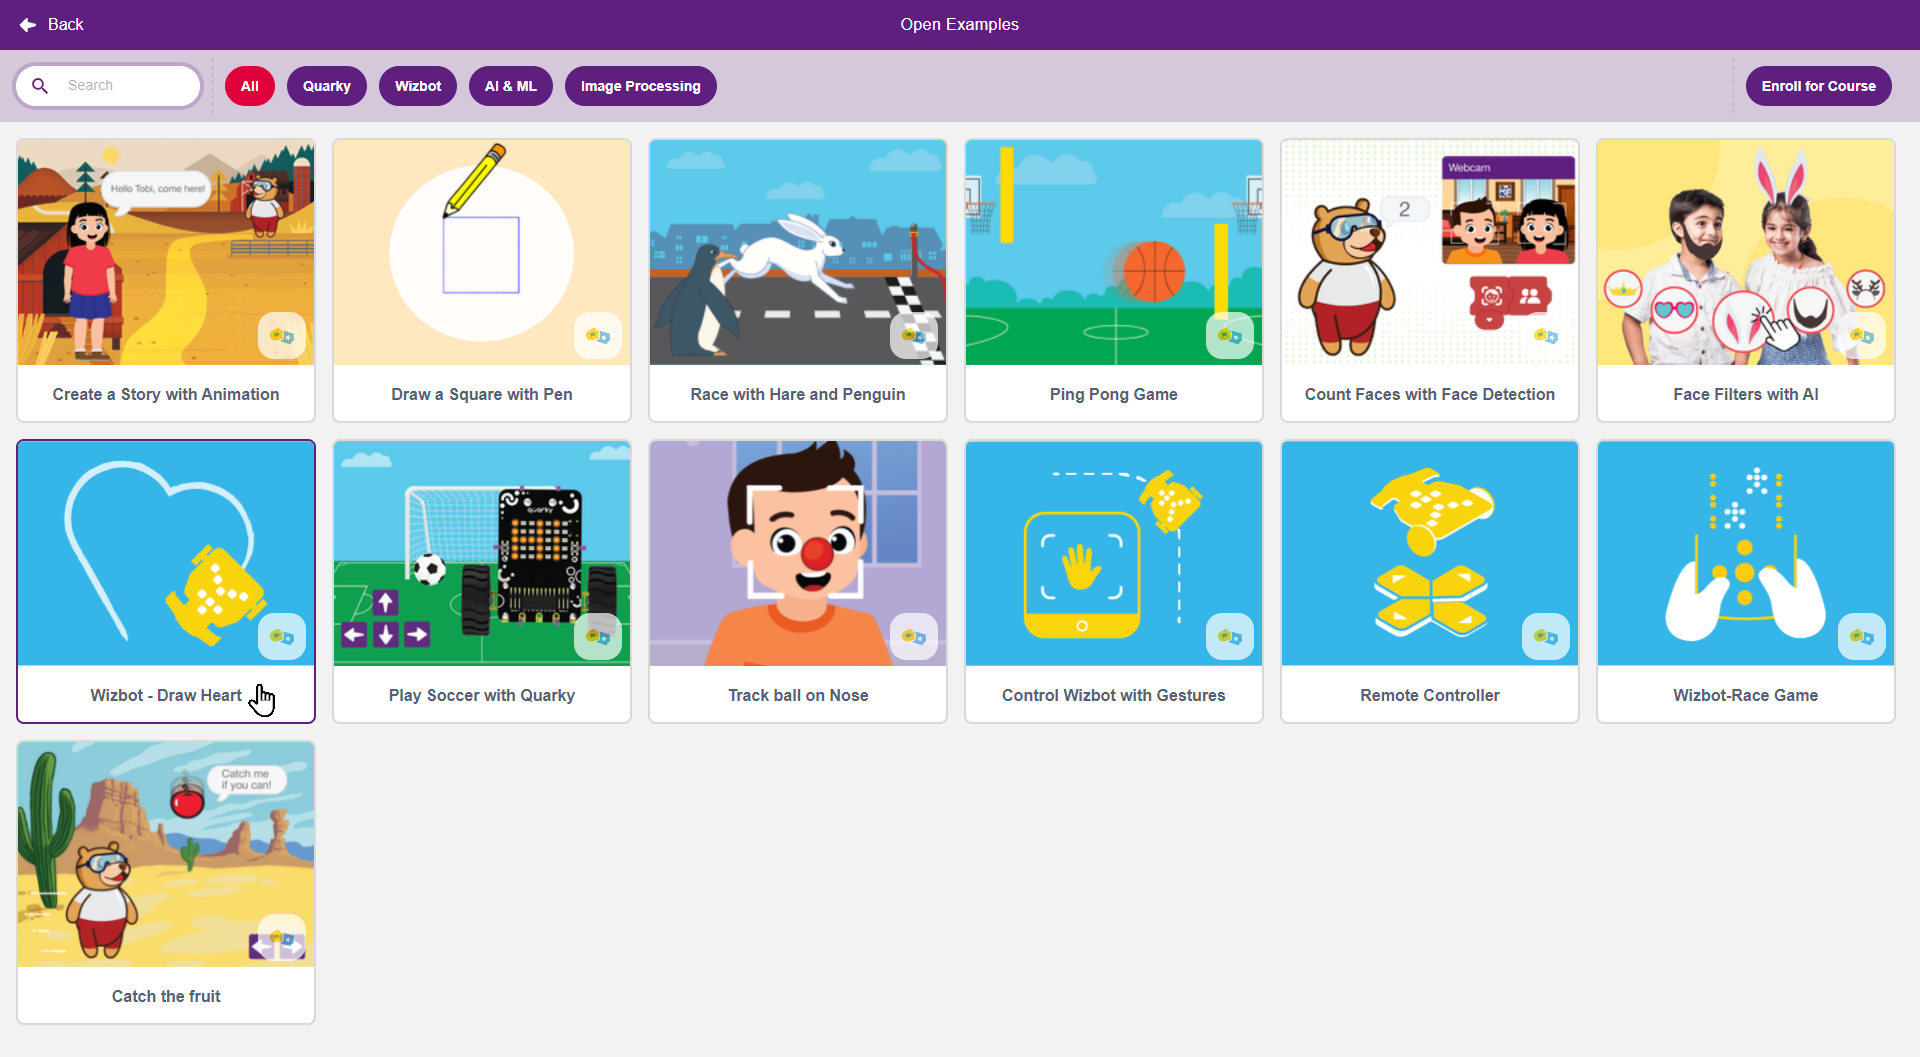
Step 3: Exploring this example will provide insight into the underlying logic of the code.
You may notice a new icon: Wizbot Advance Blocks. These blocks offer more precise movement control and advanced functions. To access them, click on ‘Extensions’ and choose ‘Wizbot Advance Blocks’. We also have Wizbot Line Following extension blocks, which will be explored in subsequent videos.
Now, let’s proceed to create our heart shape:
Step 1: Toggle Wizbot to Draw Mode.
Step 2: Do not forget to insert the brush pen.
Step 3: Click the flag icon to run the code.

Control Wizbot with Hand Gestures
Now, let’s explore more ways through which we can control the Wizbot. Wouldn’t it be cool to move Wizbot with hand gestures? Let’s do that!
Activity: Swish, Swoosh and Run!
How to Control Wizbot with Gestures
Step 1. From “Examples”, select “Control Wizbot with Gestures”.
Step 2. Tap on the “Green Flag” Icon
Step 3. Now, control your Wizbot by the direction of your thumb.
Exercise
Draw a square using hand gestures.
How to:
Step 1. Attach your sketch pen.
Step 2. Control your Wizbot with a hand gesture to move, turn and make a square.

Now, you can explore and make more shapes.
Conclusion
To learn more about Junior Blocks and become proficient with its interface, please refer to the additional modules provided.


