Let’s dive in and get to know your Wizbot better and get started!
First, we will have to understand how to power Wizbot and switch it ON.

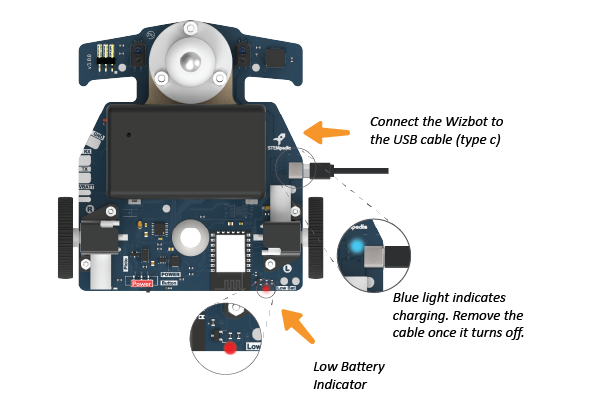
How to Charge Your Rechargeable Wizbot Variant?
Step 1: Locate the charging port on your Wizbot.
Step 2: Plug one end of the USB-C cable into the charging port on the Wizbot.
Step 3: Plug the other end of the USB-C cable into a power source (such as a computer or a wall adapter).
Step 4: A charging indicator LED will light up to show that the device is charging.
Step 5: Unplug the USB-C cable from the Wizbot and the power source.
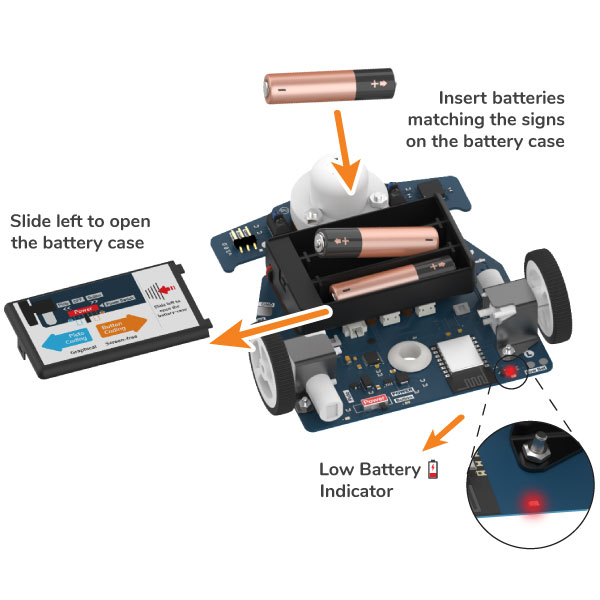
How to install AAA batteries in Wizbot AAA variant?
Step 1: The battery holder is on the back side of Wizbot. Slide the cover of the battery holder.
Step 2: Insert three AAA batteries as per the indicated polarities (positive and negative) and fix the cover back
Note
- Please ensure to use higher-quality Alkaline AAA batteries, preferably Duracell or Eveready, for optimal performance.
- Do not leave the batteries unused inside Wizbot for a long time (months). AAA batteries are likely to corrode the terminals of the battery holder.
- Please turn off the power switch when Wizbot is not in use.
(Wizbot has an automatic power shut-off feature called Auto Sleep, when Wizbot is left idle for more than 5 minutes.) - A low battery indicator LED will start to light up when the batteries are low on voltage. Please replace the used batteries to restore complete functionality.
- Ensure the power is off before replacing the battery.
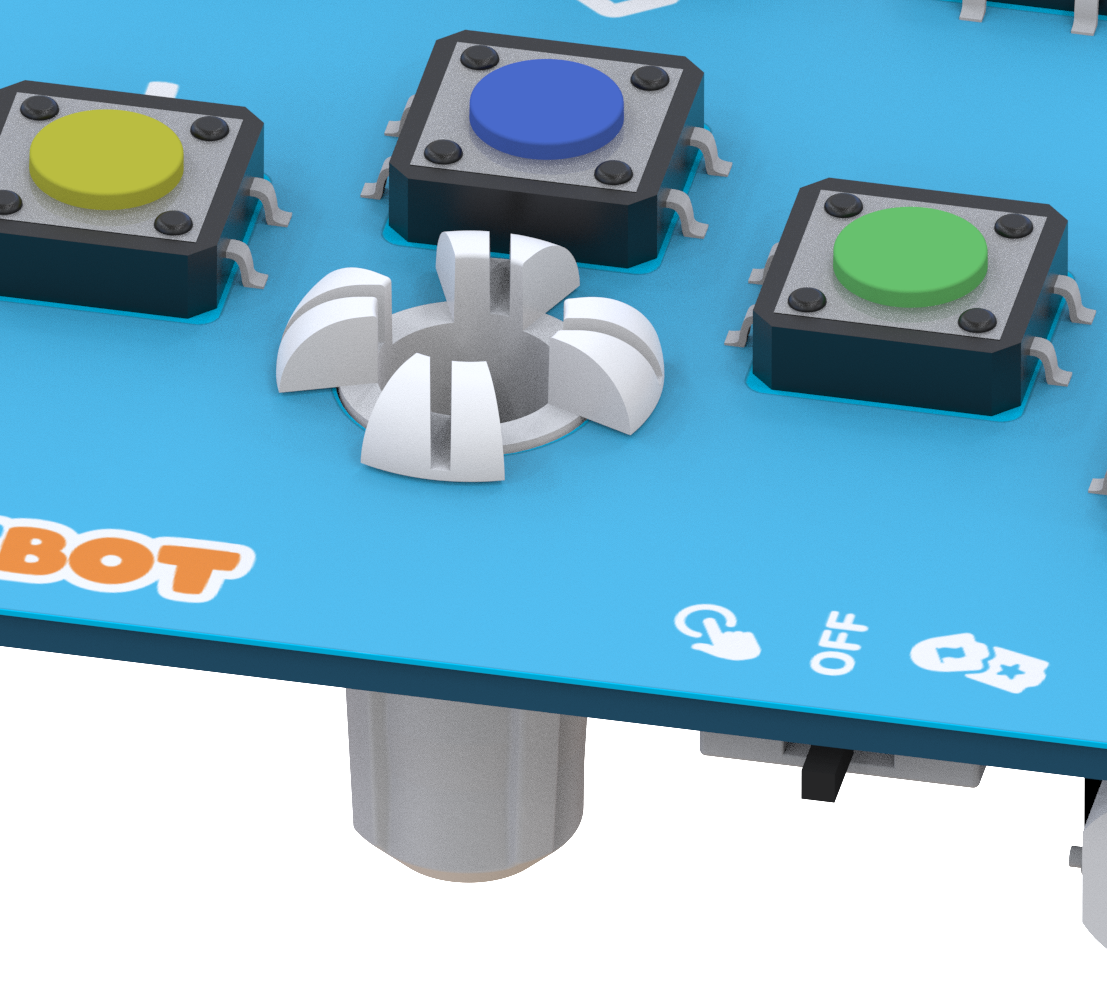
How to Switch ON Wizbot?
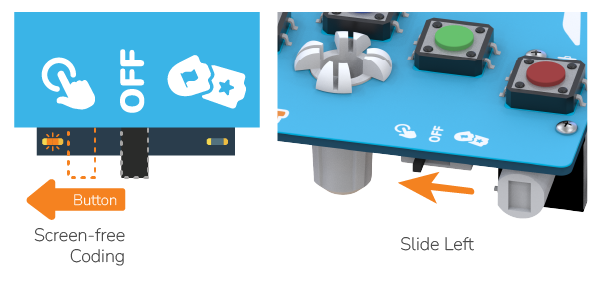
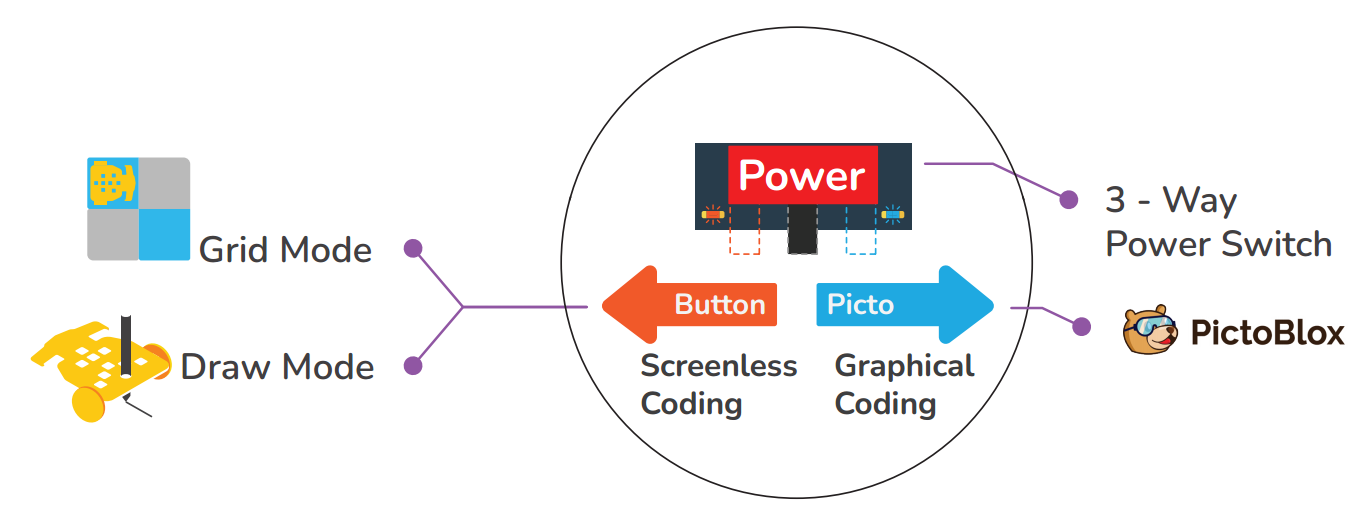 a. Button Coding:
Slide the 3-Way Power Switch to the left side as shown in the image for Button Coding.
When you slide to Button Coding, an orange light will glow on the back side with a “tweet-tweet” buzzer sound.
This allows you to program Wizbot’s movements using its built-in buttons.
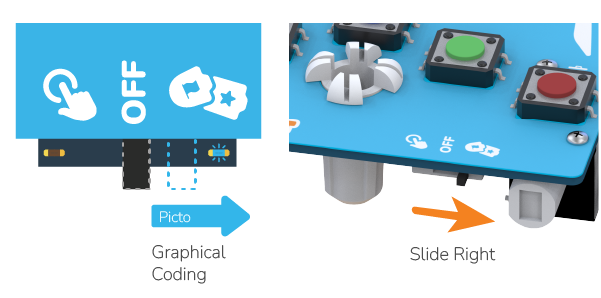
b. Picto Coding:
Slide the 3-Way Power Switch to the right as shown in the image to switch to Picto Coding.
When you slide to Picto Coding, an orange light will glow on the back side with a “tweet-tweet” buzzer sound.
This lets you use a visual, block-based programming interface to code Wizbot.
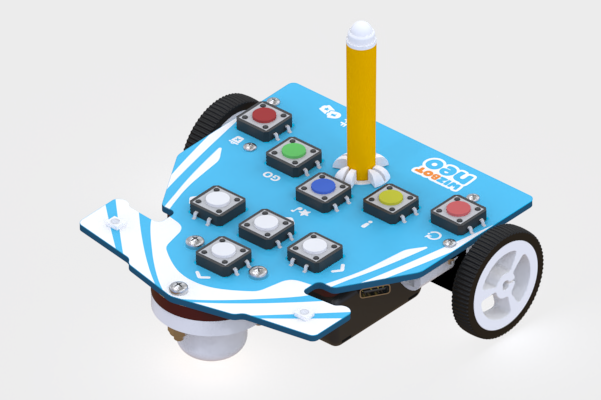
Getting to Know Your Wizbot
Let’s explore the various components of Wizbot.
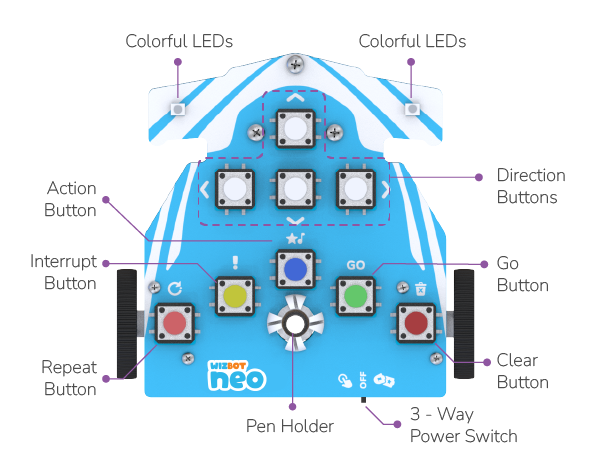
Top Side of Wizbot
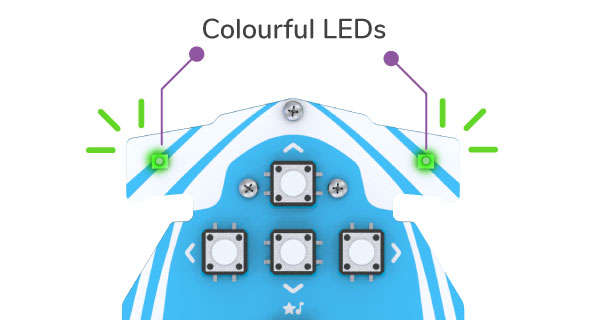
1. Two Colourful LED Lights: These lights provide visual feedback on Wizbot’s actions.
2. Pen and Card Holder: This slot is designed to hold a sketch pen, enabling Wizbot to draw along with slits that can hold picture cards while doing activities.
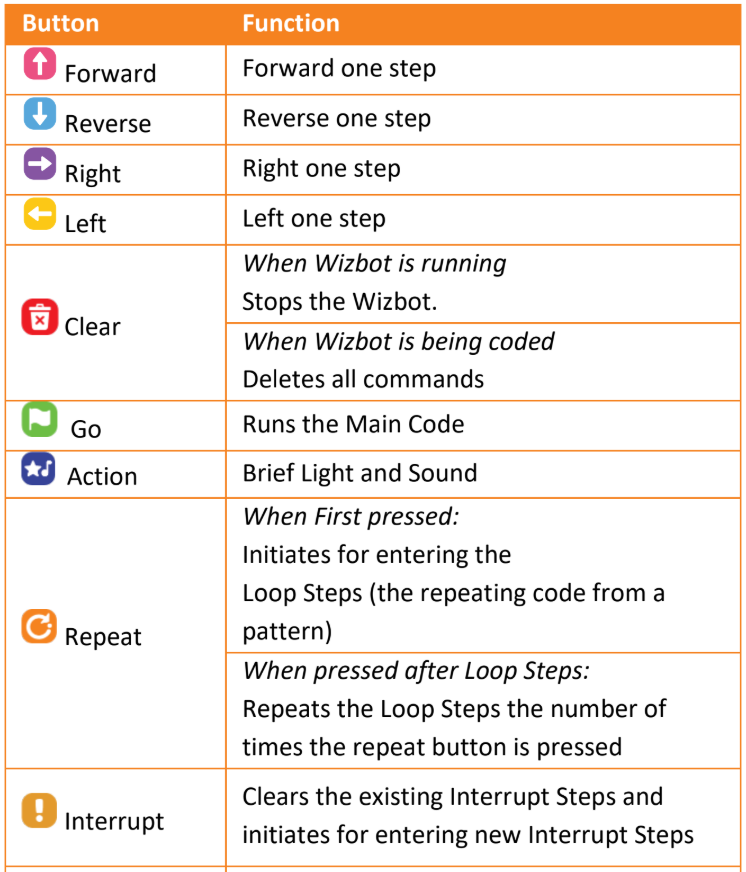
3. Command Buttons:
There are nine command buttons, each with a distinctive output.
On the top side of your Wizbot, you’ll find:
1. Clear Button
![]()
When Wizbot is running: Stops the Wizbot
When Wizbot is being coded or is not moving: Deletes the code
2. Go button
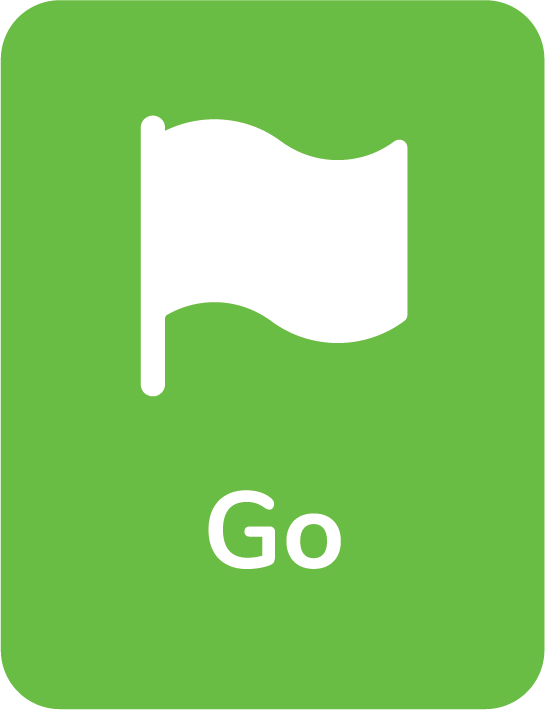
Once the code is added to the Wizbot, Go button runs the command added.
3. Action button

This button instructs Wizbot to activate its lights and produce sounds, adding an interactive element to your codes.
4. Directional button
You will find four white directional buttons for movement control:
a. Forward

Try this:
Move Forward:
1. Press the Clear button.
2. Press the Forward button.
3. Press the Go button.
b. Reverse

Try this:
Move Reverse:
1. Press the Clear button.
2. Press the Reverse button.
3. Press the Go button. Wizbot will move backward.
c. Right (for turning)
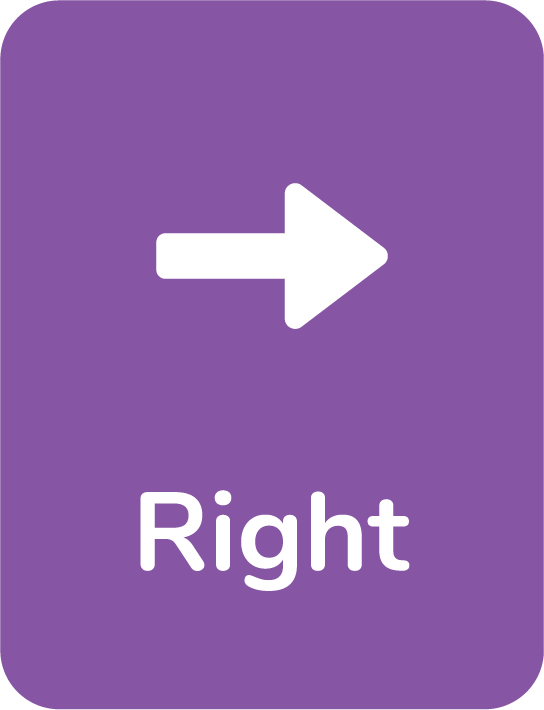
Try this:
Turn Right:
1. Press the Clear button.
2. Press the Right button.
3. Press the Go button. Wizbot will turn 90 degrees to the right.
d. Left (for turning)
Explore: Can you try doing the Left turn?
Activity Time
Let’s learn to use these buttons through an activity: guiding Wizbot from the forest (1C) to the blue farm (4B) in the Land Arena.
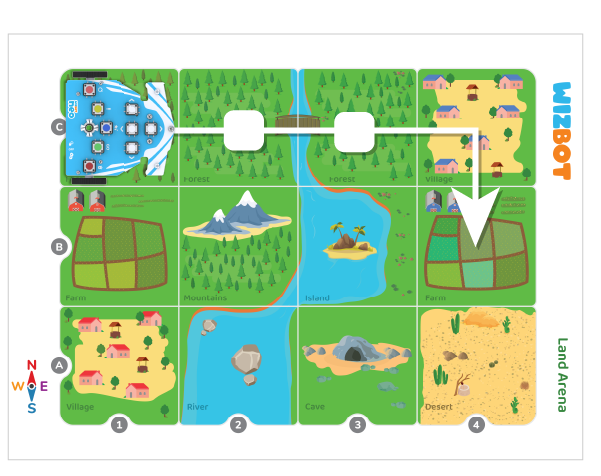
Step 1 : Press the Clear button to trash any previous code.
Step 2: Count and press forward three times, resulting in Wizbot reaching 4C, remember need to get to 4B.
Step 3: Press the right button once to turn toward the right side.
Step 4: Press forward one last time to reach 4B i.e. the blue farm.
Step 5: Press on the action button to make your Wizbot beep and light up once you reach your destination.
![]()
Back Side of Wizbot
Now, let’s turn Wizbot around. On its back, you’ll see:

1. Two Infrared (IR) Sensors: These sensors enable Wizbot to detect black and white surfaces and follow black lines.
2. Buzzer: This component emits a sound after each command, providing audio feedback.
3. Castor Wheel: This small wheel facilitates smooth turns for Wizbot.
4. Battery Holder: This is where the batteries are inserted.
5. Motor with Wheels: These are the primary driving wheels responsible for Wizbot’s movement.
6. Three-Way Power Switch: This switch is used to control Wizbot’s power (on/off) and changes its operational mode.
7. Low Battery Indicator: A light that illuminates when Wizbot requires new batteries or a recharge.
Conclusion
We have now learned the fundamental operations of Wizbot and its button commands.
Ready to practice what you’ve learned? Try coding your Wizbot to move to different places in the arenas and in patterns.


