Introduction
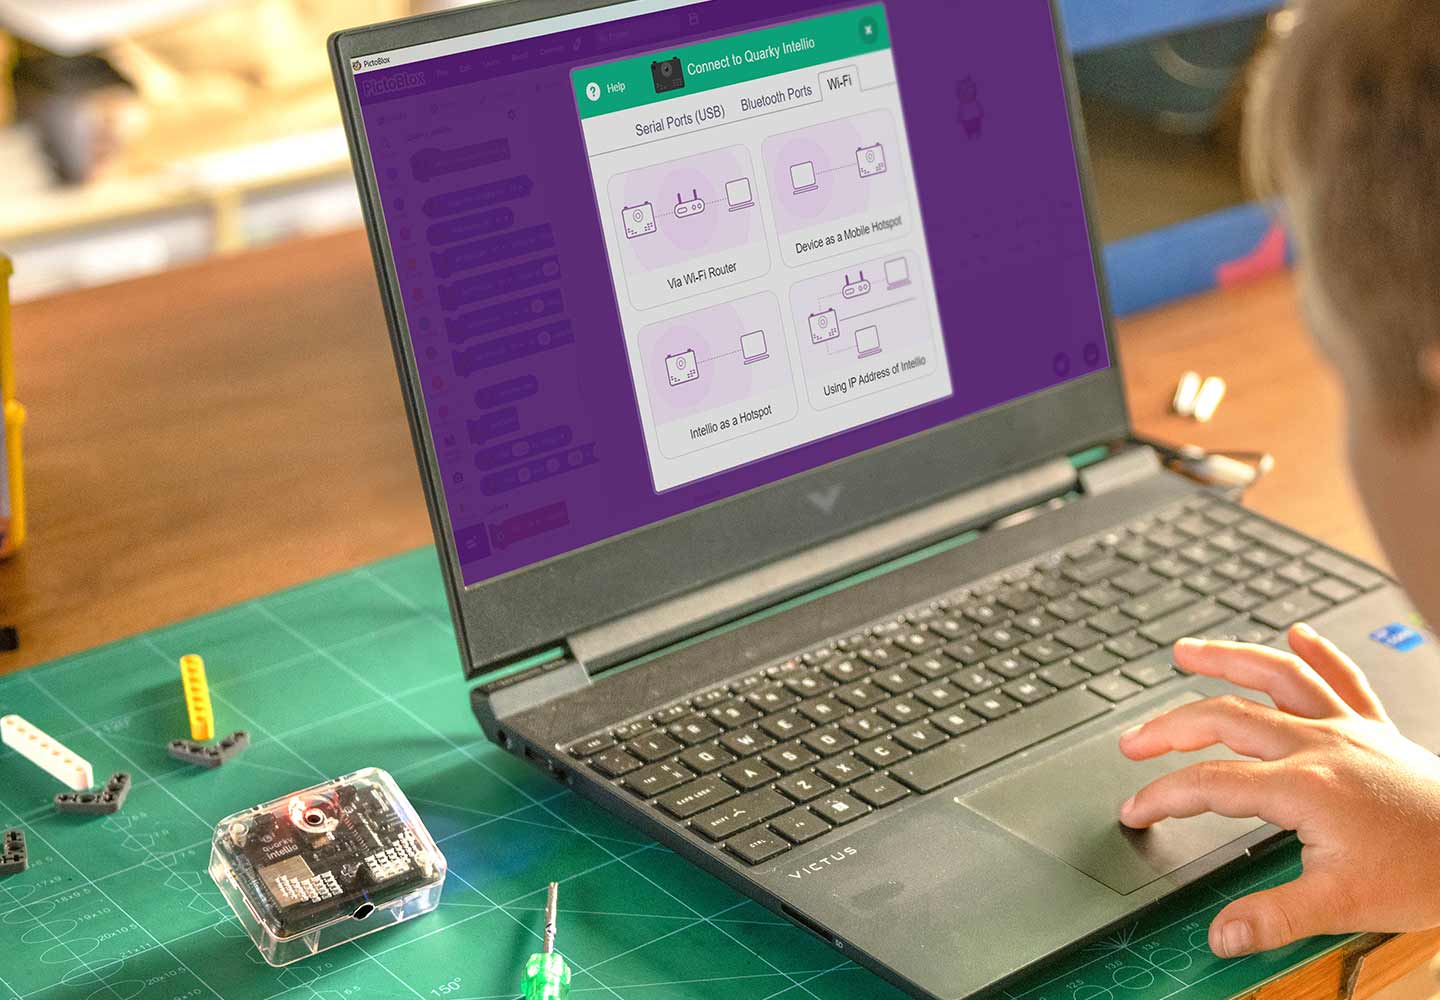
Quarky Intellio communicates with PictoBlox wirelessly over the 2.4 GHz Wi-Fi band. Once Intellio and your device are on the same network, PictoBlox can send code, stream camera feed, and get real-time responses.
This guide explains all available Wi-Fi connection methods and helps you choose the best option based on your device, network availability, and usage scenario.
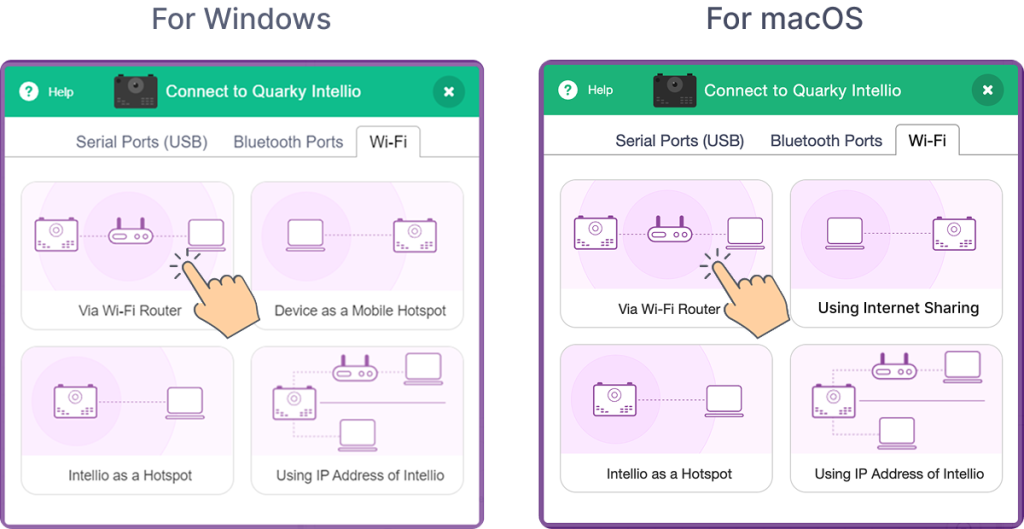
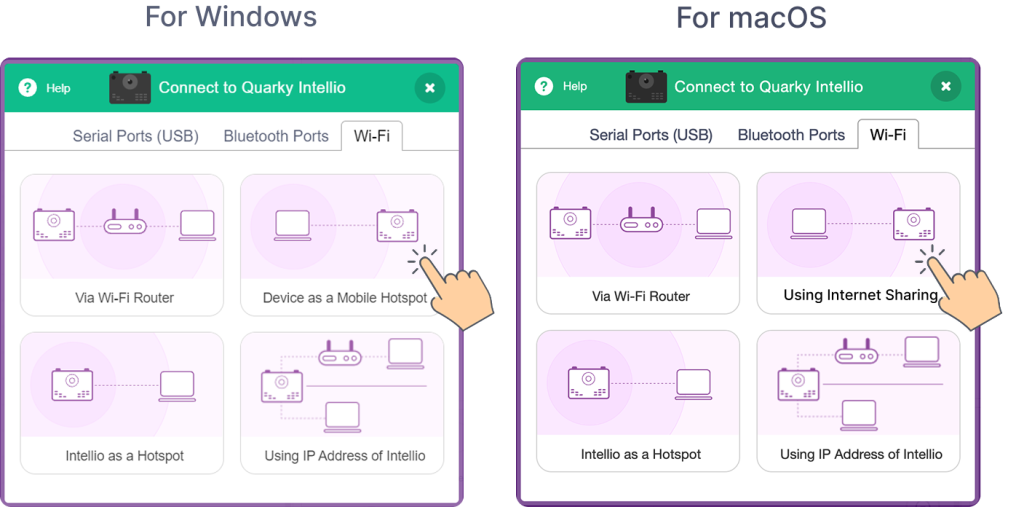
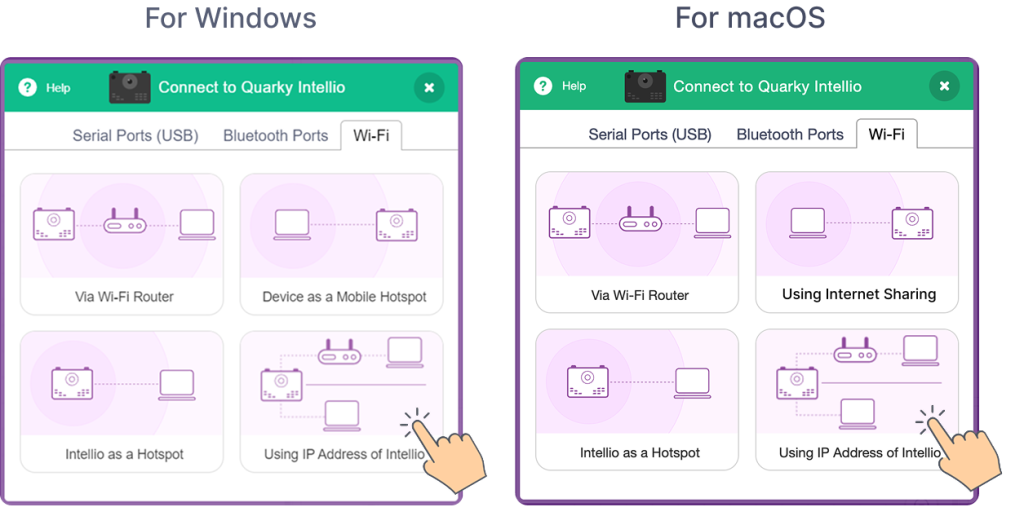
You can connect Quarky Intellio to PictoBlox using any one of the following methods:
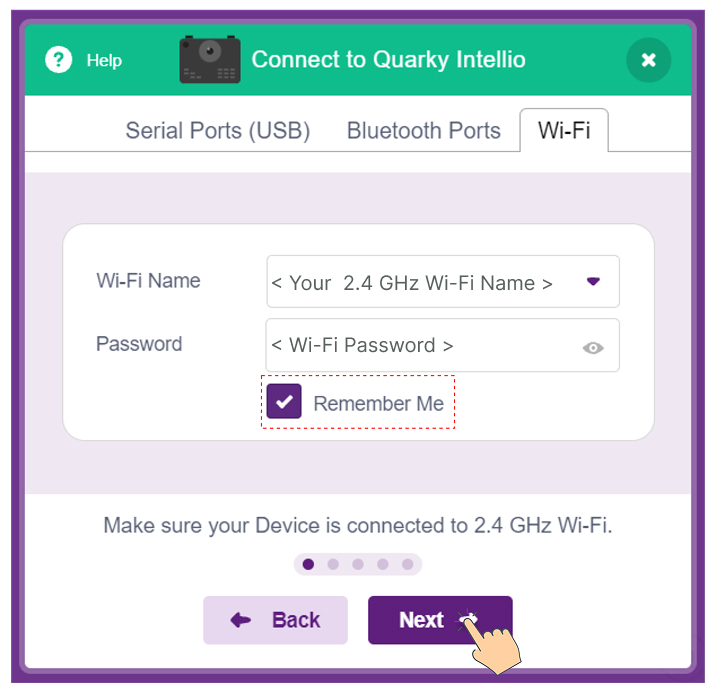
- Method 1: Via Wi-Fi Router
- Method 2: Device as a Mobile Hotspot (For Windows), Using Internet Sharing (For macOS)
- Method 3: Intellio as a Hotspot
- Method 4: Using IP Address of Intellio
Prerequisite
Before choosing any of the connection methods, make sure the following steps are completed:
- Download and Install PictoBlox Software
Ready to explore projects with Quarky Intellio? Start coding with Block Coding or Python. To start coding with Quarky Intellio, you’ll need to install PictoBlox on your device. PictoBlox version 9.1.0 or later is required for Quarky Intellio support. Click Download PictoBlox to visit the download page, select your operating system (Windows, macOS, or Linux), and follow the on-screen instructions to install the latest version. Note: Web browser support for Quarky Intellio on pictoblox.ai is currently under development.
- PictoBlox Configuration Steps
- Open PictoBlox and choose Blocks or Py Editor.

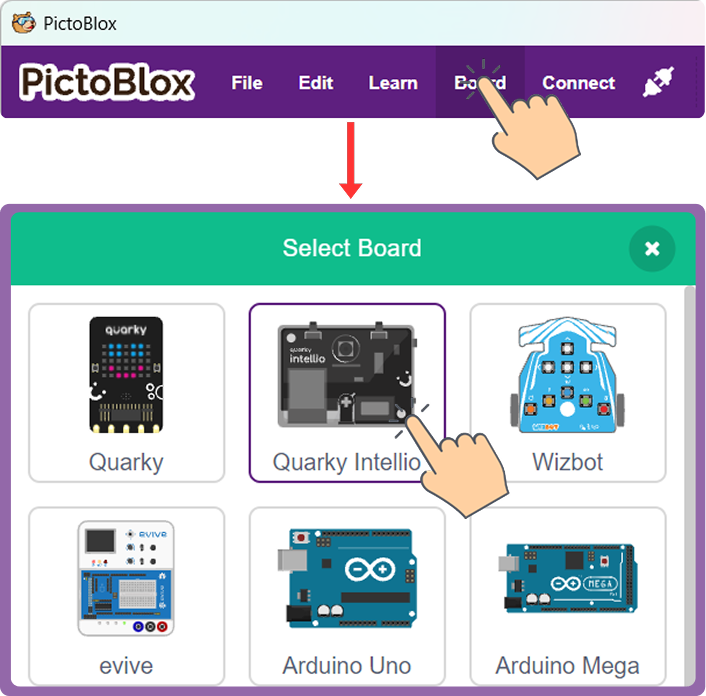
- Go to the Board and select Quarky Intellio.
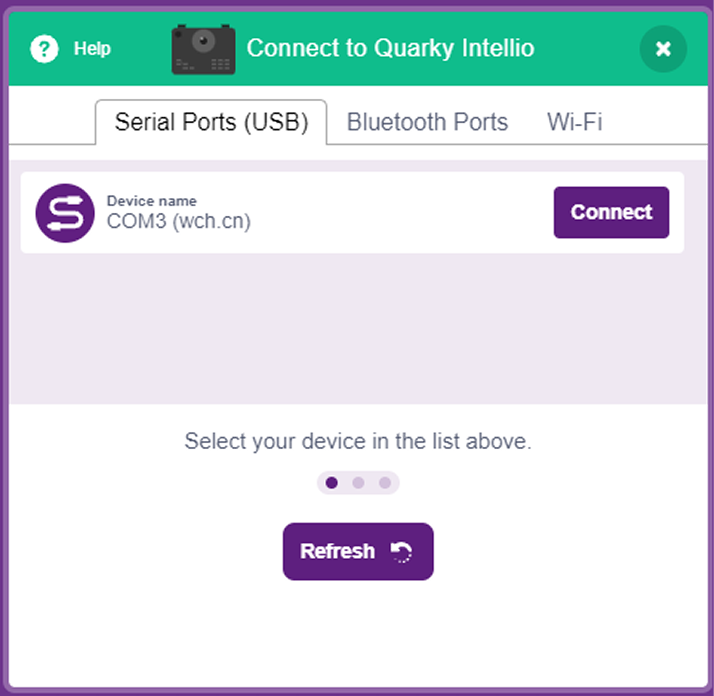
- Select the appropriate Serial Port if Quarky Intellio is connected via USB, then click Connect to proceed.
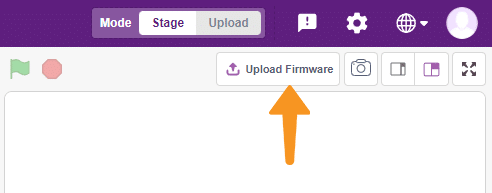
- Click the Upload Firmware button. This will upload the latest firmware to Quarky Intellio.
 Note: If Quarky Intellio already has the latest firmware, PictoBlox will display the message “Firmware is already updated.”
 - Click Connect to begin connecting Quarky Intellio to PictoBlox.

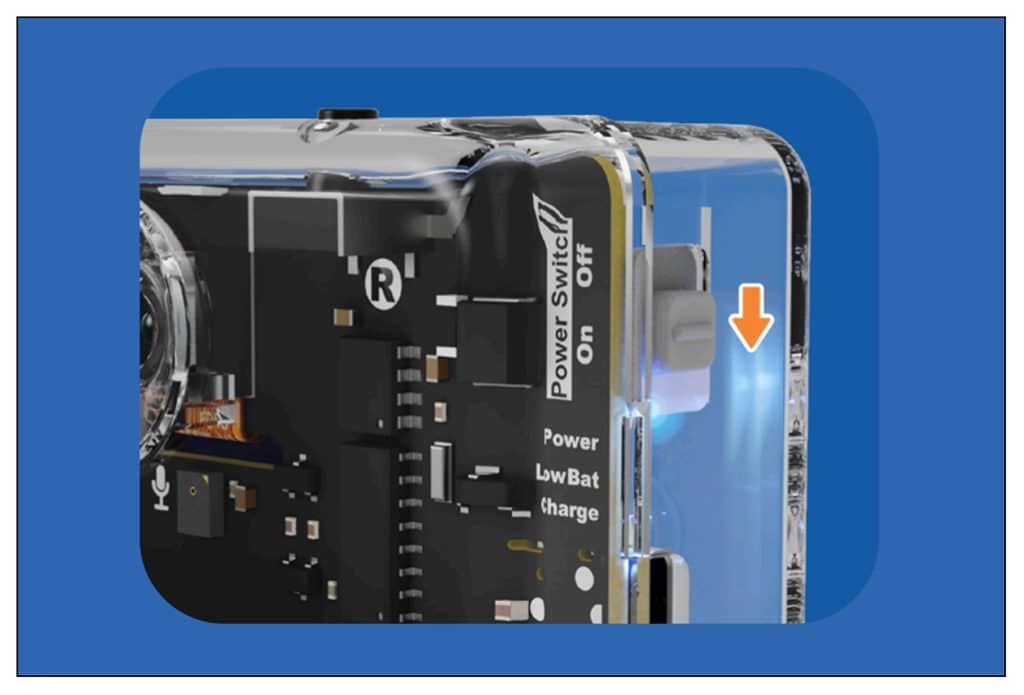
- If Quarky Intellio is not yet turned on, slide the Power Switch to turn it on.
- Open PictoBlox and choose Blocks or Py Editor.

 You’ve successfully connected Quarky Intellio to PictoBlox using the Via Wi-Fi Router method.
Method 2: Device as a Mobile Hotspot (Windows), Using Internet Sharing (macOS)
Use the Device as a Mobile Hotspot method to connect Quarky Intellio to your device’s mobile hotspot, and ensure the hotspot network band is set to 2.4 GHz.
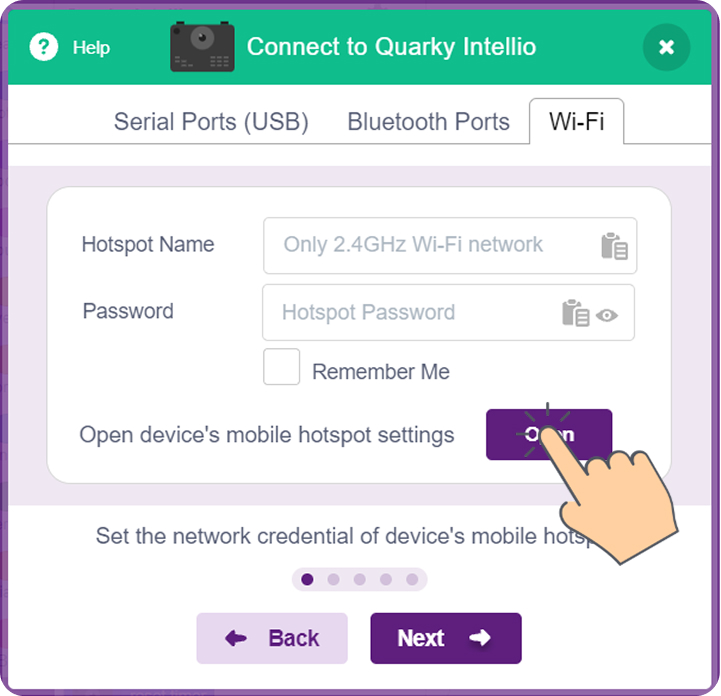
- Select Device as a Mobile Hotspot.
Note: Use the Wi-Fi tab to complete this connection. The Serial Port (USB) is used to upload firmware. Support for connecting via Bluetooth Ports will be available in a future update.
- Click the Open button in PictoBlox to open the hotspot settings on your device directly
Create a Mobile Hotspot in Windows
- In Windows, the Mobile Hotspot settings open directly; simply turn the hotspot ON. In macOS, you need to enable it manually, as explained below.
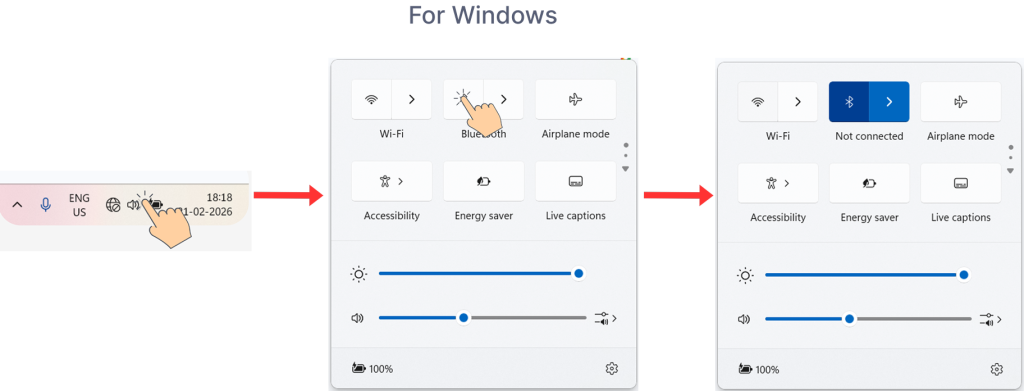
- Open Quick Settings from the bottom-right corner of your taskbar and turn on Bluetooth.
 Note the Network Name and Password from the Mobile Hotspot settings, and enter these details in the Wi-Fi tab of PictoBlox.
Enable Internet Sharing on your macOS
Follow the steps below based on your macOS version:
macOS Monterey (v12) and earlier
Go to System Preferences > Sharing, then follow the steps below:
- Select Internet Sharing from the service list.
- Change “Share your connection from” from Wi-Fi to Thunderbolt Bridge.
- Under “To computers using”, check the Wi-Fi checkbox.
- Click Wi-Fi Options.
- In the Configure pop-up window, change the Channel to 1, 6, or 11, which supports 2.4 GHz Wi-Fi networks.
- Note the Network Name (SSID) and Password shown in this window. You will need these details in the next step to connect through PictoBlox.
- Click OK.
- In the Service List, click the Internet Sharing checkbox to start Internet Sharing.
macOS Ventura 13 and later
Go to System Settings > General > Sharing, then follow the steps below:
- Turn ON Internet Sharing under Accessories & Internet.
- Click Configure.
- Change “Share your connection from” from Wi-Fi to USB 10/100 LAN.
- Under “To devices using”, turn ON Wi-Fi.
- In the Configure pop-up window, change the Channel to 1, 6, or 11, which supports 2.4 GHz Wi-Fi networks.
- Note the Network Name (SSID) and Password shown in the window. You will need these details in the next step to connect through PictoBlox.
- Click OK.
- Turn ON the Internet Sharing toggle, then click Done.
Find and Connect your Quarky Intellio
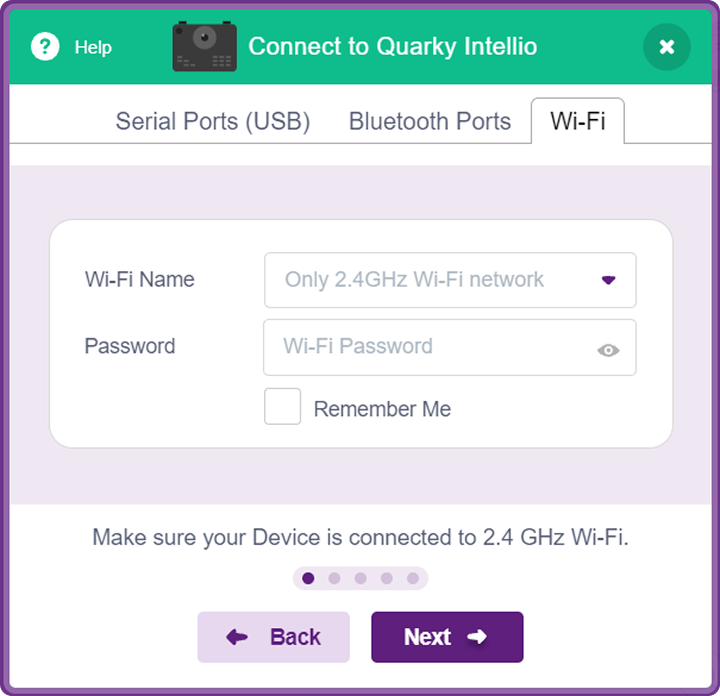
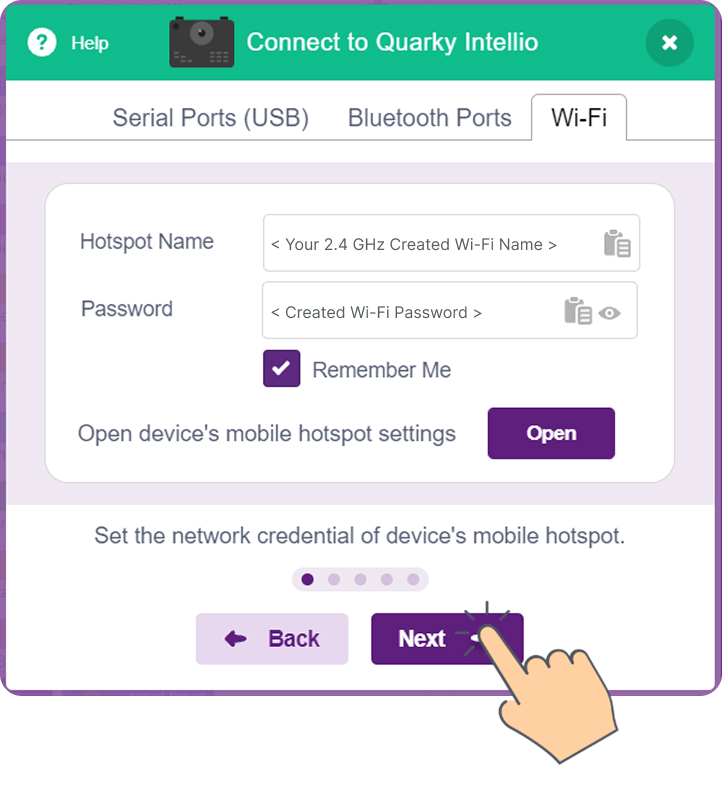
- Enter the Network Name and Password from the Mobile Hotspot settings, then click Next.
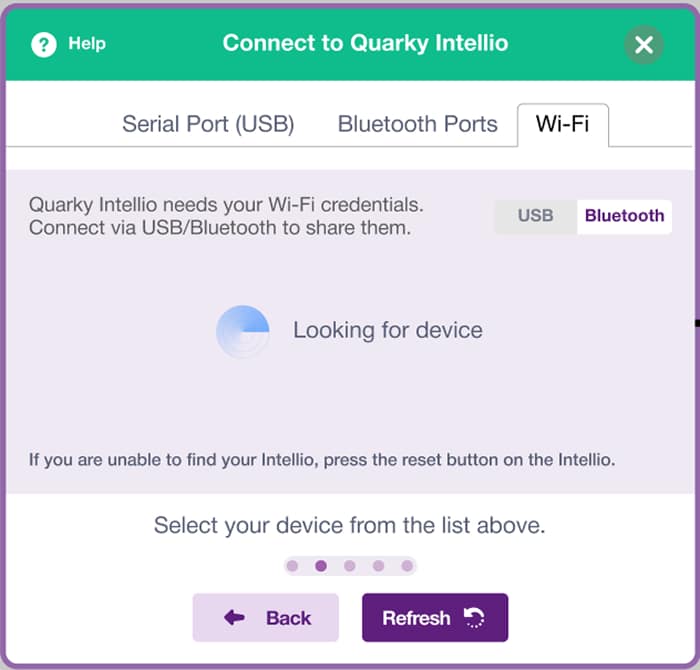
- PictoBlox is searching for your Quarky Intellio.
Note: Can’t find your Quarky Intellio? Ensure Bluetooth is turned ON on your device, then press the Reset button on Quarky Intellio and click Refresh to scan again.
- Select your Quarky Intellio (for example, Quarky Intellio <****>) and click Connect.
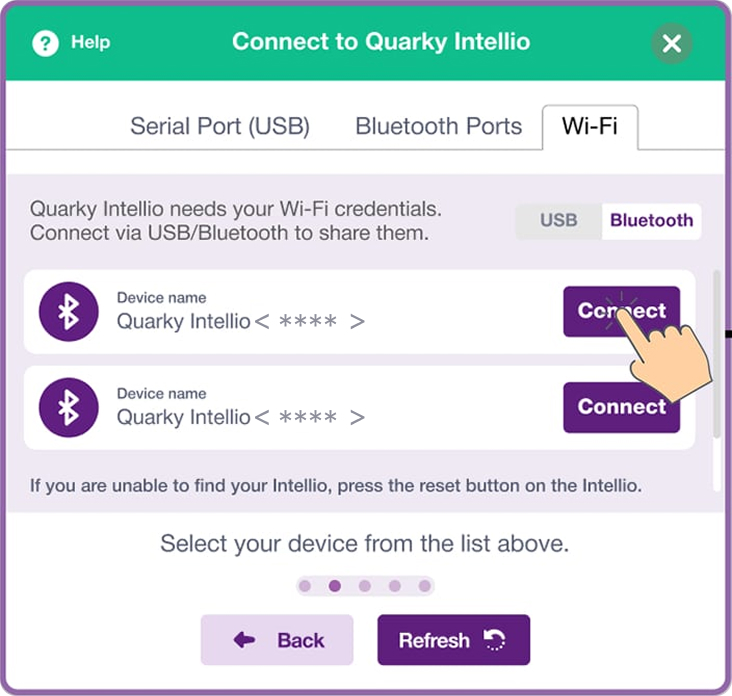 Note: You can find your Quarky Intellio Name (For example, Quarky Intellio<****>) printed on the right side of the device, as shown below.
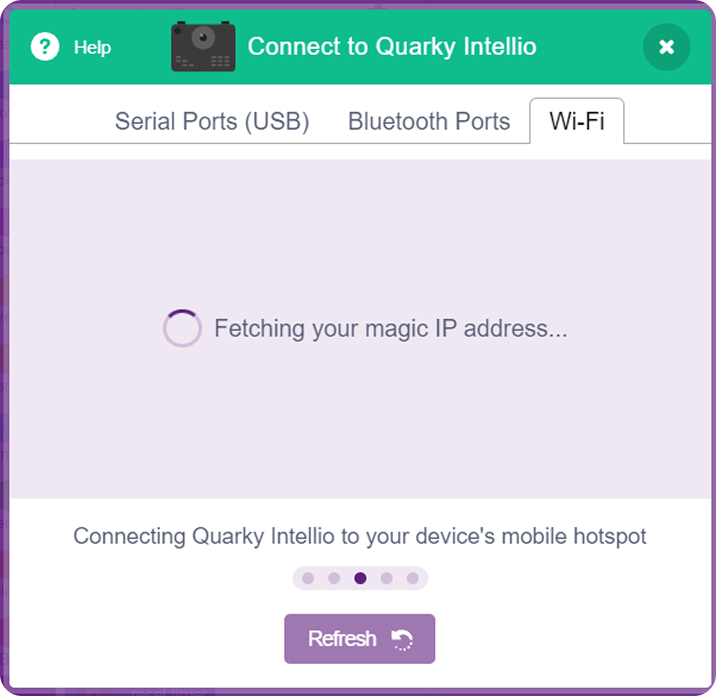
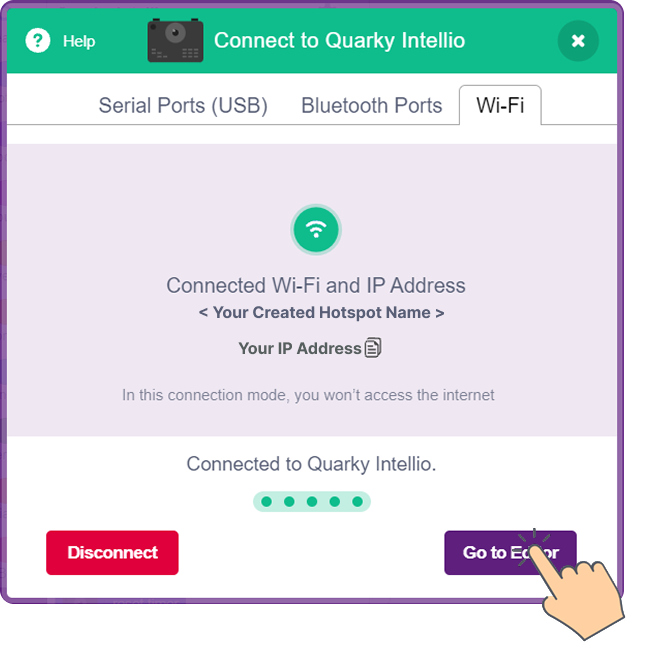
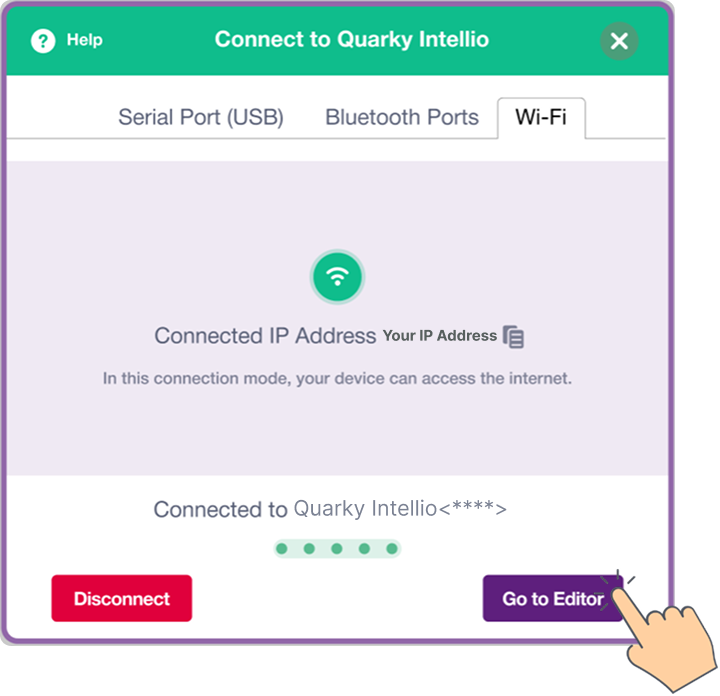
- Fetching your IP address.
- Once you reach this screen, click “Go to Editor” to close the pop-up and continue coding with Quarky Intellio in the PictoBlox.
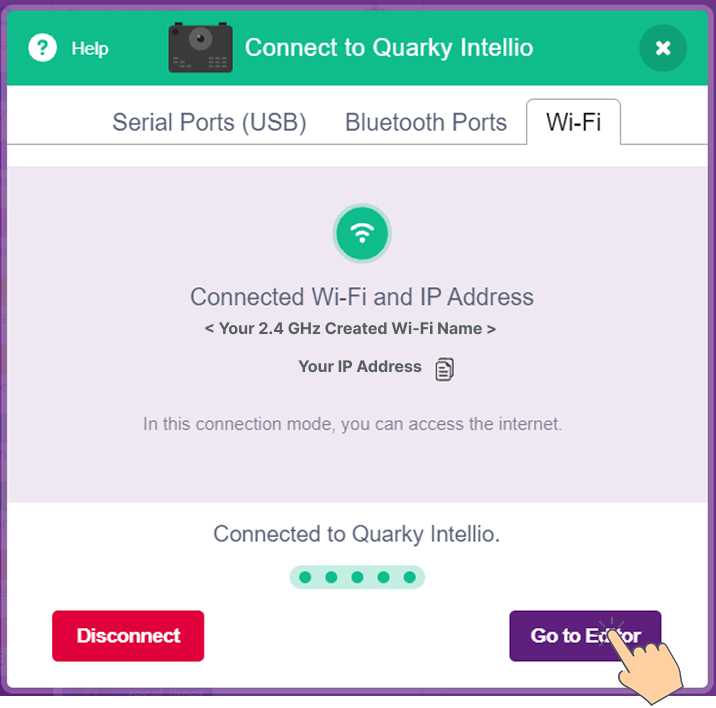
You’ve successfully connected Quarky Intellio to PictoBlox using the Device as a Mobile Hotspot or Using Internet Sharing method.
Method 3: Intellio as a Hotspot
In this method, Quarky Intellio itself acts as a hotspot, creating its own Wi-Fi network that your computer connects to directly, no external router or mobile hotspot needed.
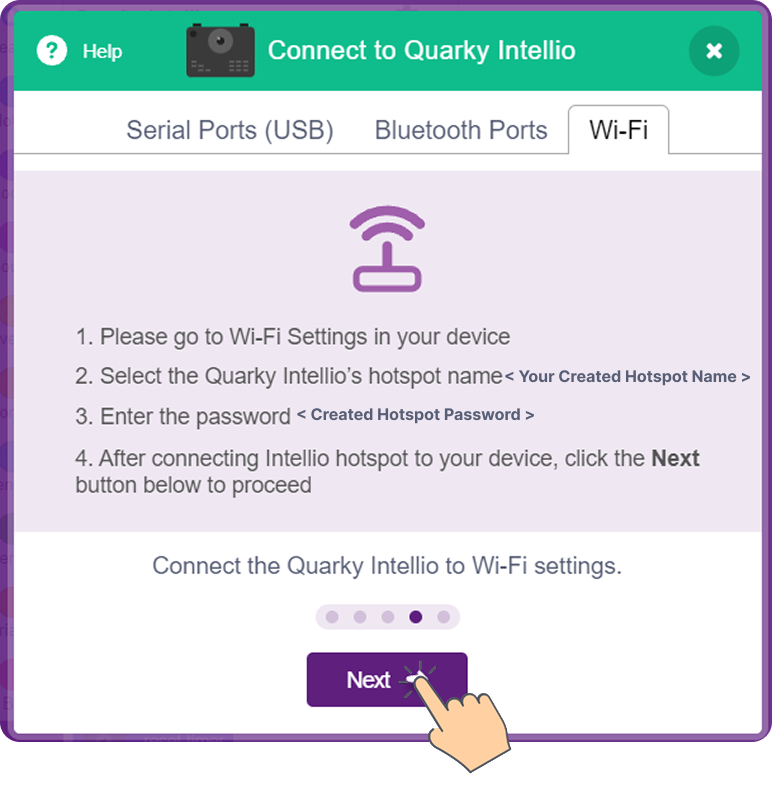
- Create an Intellio Hotspot
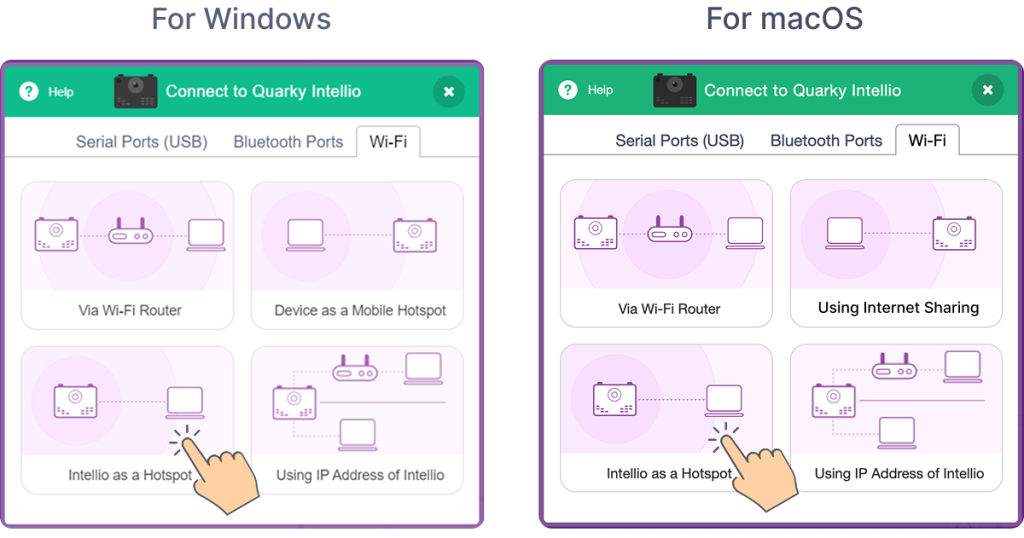
- Select Intellio as a Hotspot as your connection method.
Note: Use the Wi-Fi tab to complete this connection. The Serial Port (USB) is used to upload firmware. Support for connecting via Bluetooth Ports will be available in a future update.
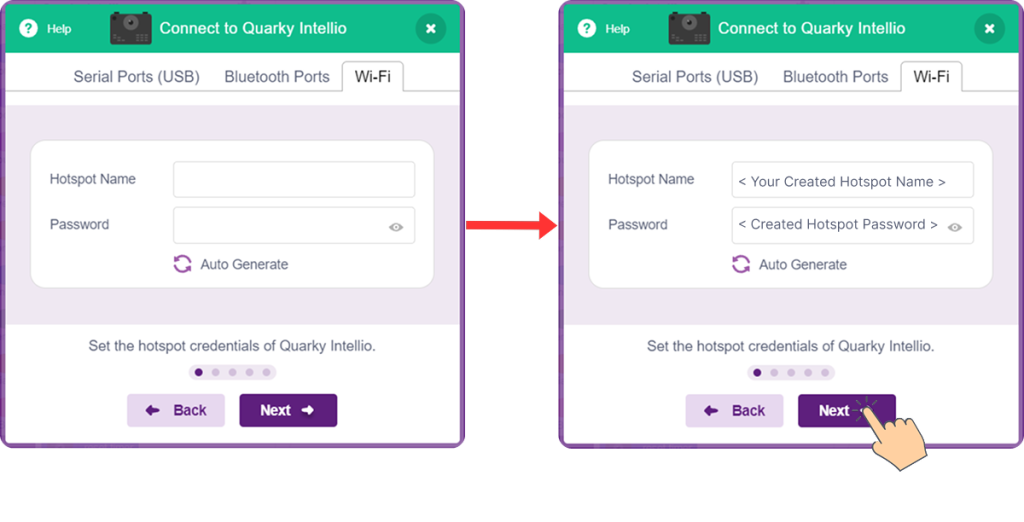
- Create the Hotspot Name and Password as you prefer, or click Auto-Generate to automatically create a hotspot name and password for Quarky Intellio.
- PictoBlox is searching for your Quarky Intellio.
Note: If you are unable to find your Quarky Intellio, press the Reset button on Quarky Intellio or click Upload Firmware to update it, and ensure Bluetooth is turned ON on your device.
- Select your Quarky Intellio (for example, Quarky Intellio <****>) and click Connect.
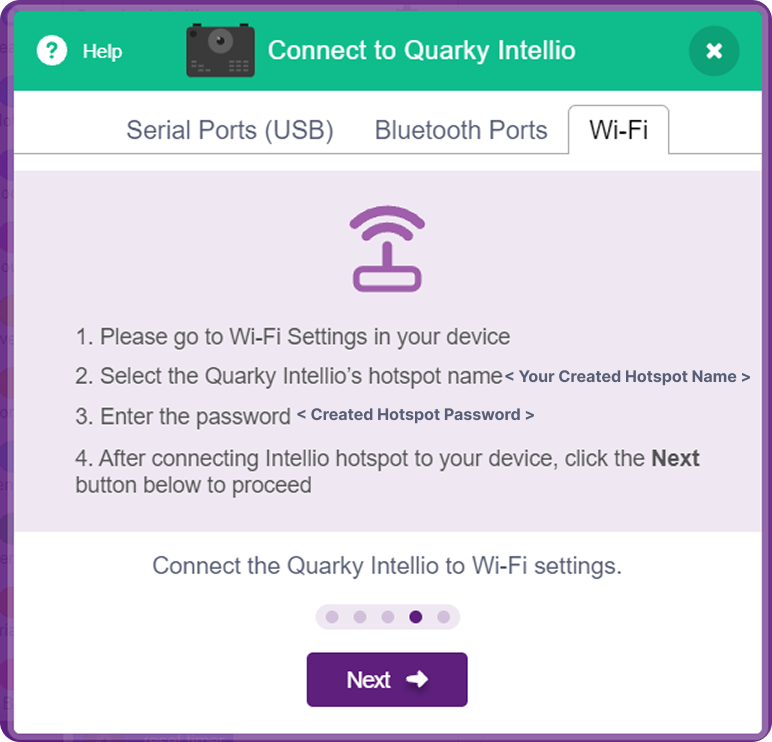
Note: You can find your Quarky Intellio Name (For example, Quarky Intellio<****>) printed on the right side of the device, as shown below. - Follow the instructions on the screen to find and connect to your Intellio hotspot.
- Select Intellio as a Hotspot as your connection method.
- Connecting to a Previously Created Intellio Hotspot
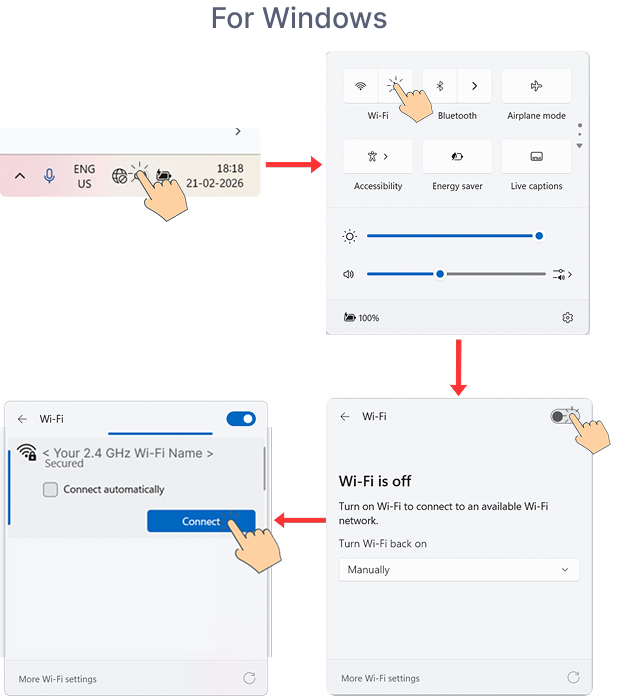
Follow the steps below based on your operating system to connect to a previously created Intellio Hotspot.- For Windows
- Open Quick Settings from the bottom-right corner of your taskbar and connect to the Intellio hotspot network created previously.
- Open Quick Settings from the bottom-right corner of your taskbar and turn on Bluetooth.
- Open Quick Settings from the bottom-right corner of your taskbar and connect to the Intellio hotspot network created previously.
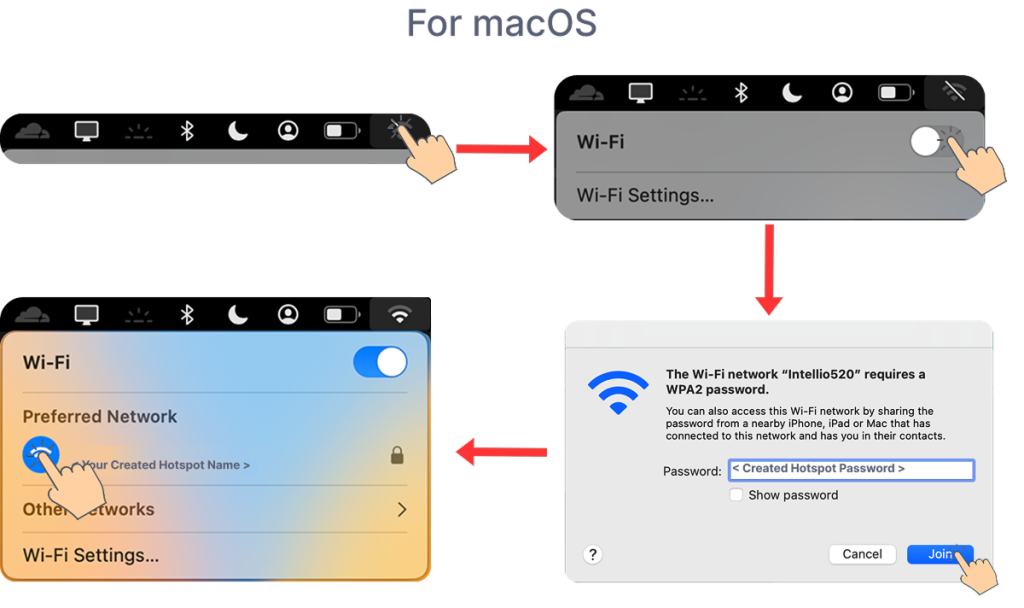
- For macOS
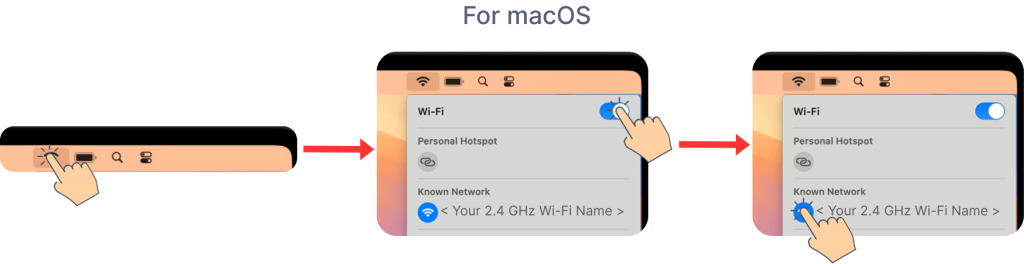
- Click on Wi-Fi from the top-right corner of your menu bar, turn on Wi-Fi, and select your Intellio hotspot network created previously.
- Enter the Password created previously and click Join.
- For Windows
- Go to PictoBlox and click Next.
- Once you reach this screen, click “Go to Editor” to close the pop-up and continue coding with Quarky Intellio in the PictoBlox.
You’ve successfully connected Quarky Intellio to PictoBlox using the Intellio as a Hotspot method.
Method 4: Using IP Address of Intellio
This method allows you to connect to Quarky Intellio directly over a network using its IP address. It is useful when Quarky Intellio is already connected to a Wi-Fi network, and you want to reconnect or establish communication without re-pairing.
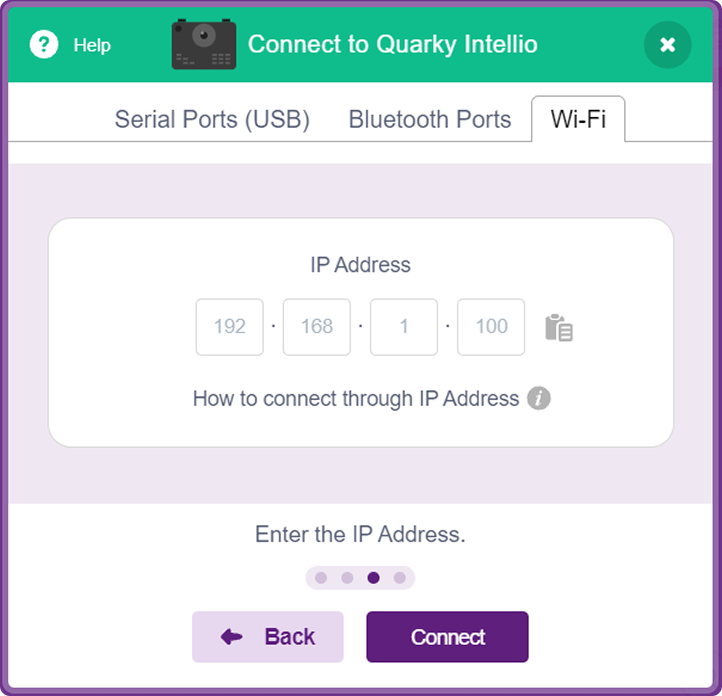
- Open the Wi-Fi tab and select “Using IP Address of Quarky Intellio” as the connection method.
 Note: After reaching this screen, follow the instructions shown in the (i) button. Here, you can also check the previously connected network using Wi-Fi (Via Wi-Fi Router or Device as a Mobile Hotspot) or Hotspot (Intellio as a Hotspot).
 - If Intellio was connected earlier, the IP address is automatically fetched from the previous connection.
- Ensure your device is connected to the same network that was previously connected.
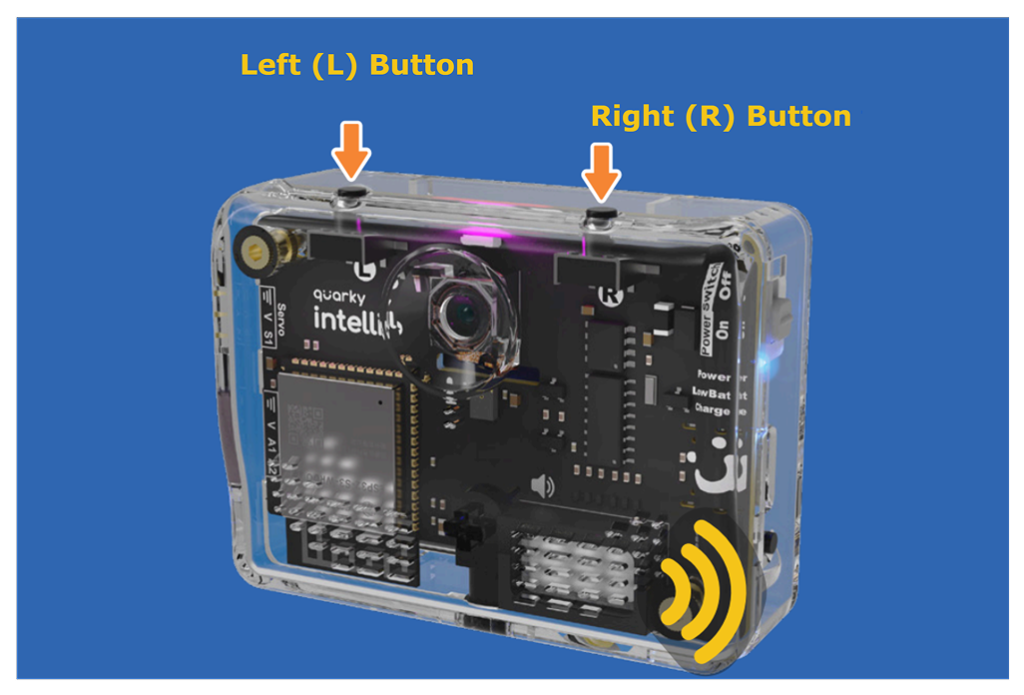
- Press and hold the “L” button on Quarky Intellio until the LED starts blinking yellow if you are using the Via Wi-Fi Router or Device as a Mobile Hotspot method previously.
- Press and hold the “R” button if you are using the Intellio as a Hotspot method previously.
- If you previously connected using Intellio as a Hotspot, once the yellow light stays ON (no blinking), connect to the previously connected Intellio hotspot from your device’s Wi-Fi settings.
- Your IP address is automatically fetched from the previous connection, and then click on Connect.
- Once you reach this screen, click “Go to Editor” to close the pop-up and continue coding with Quarky Intellio in the PictoBlox.
You’ve successfully connected Quarky Intellio to PictoBlox using the Using IP Address method.