Introduction
Sensors, as the name suggests sense the surrounding weather and either record it or indicate it. There are a number of sensors that detects different surrounding factors like proximity, light, temperature, humidity, noise, and much more.
Today, we are going to see how can we integrate sensors i.e an IR sensor to Arduino projects using PictoBlox, our graphical programming software. An infrared (IR) sensor is a proximity sensor, or a ‘nearness’ sensor that senses whether there is an object near to it or not. If it detects an object, the sensor will turn ON; if not, it will remain OFF.
An IR sensor has two small LED indicators – one for power, which is ON the entire time the sensor is ON; the other is the Signal LED which shows the status of the detection. 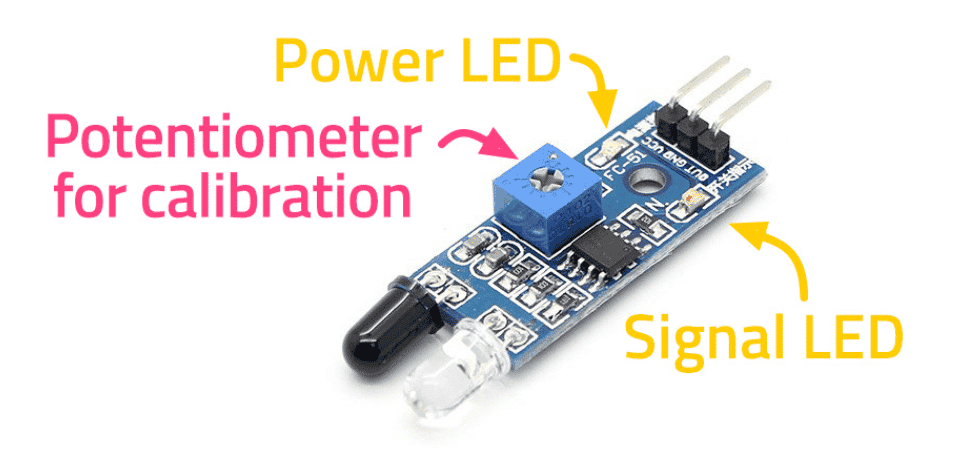 The signal LED has two states or situations:
- ON (Active) when it detects an object
- OFF (Inactive) when it doesn’t detect any object
Let’s begin!
Interfacing the IR Sensor
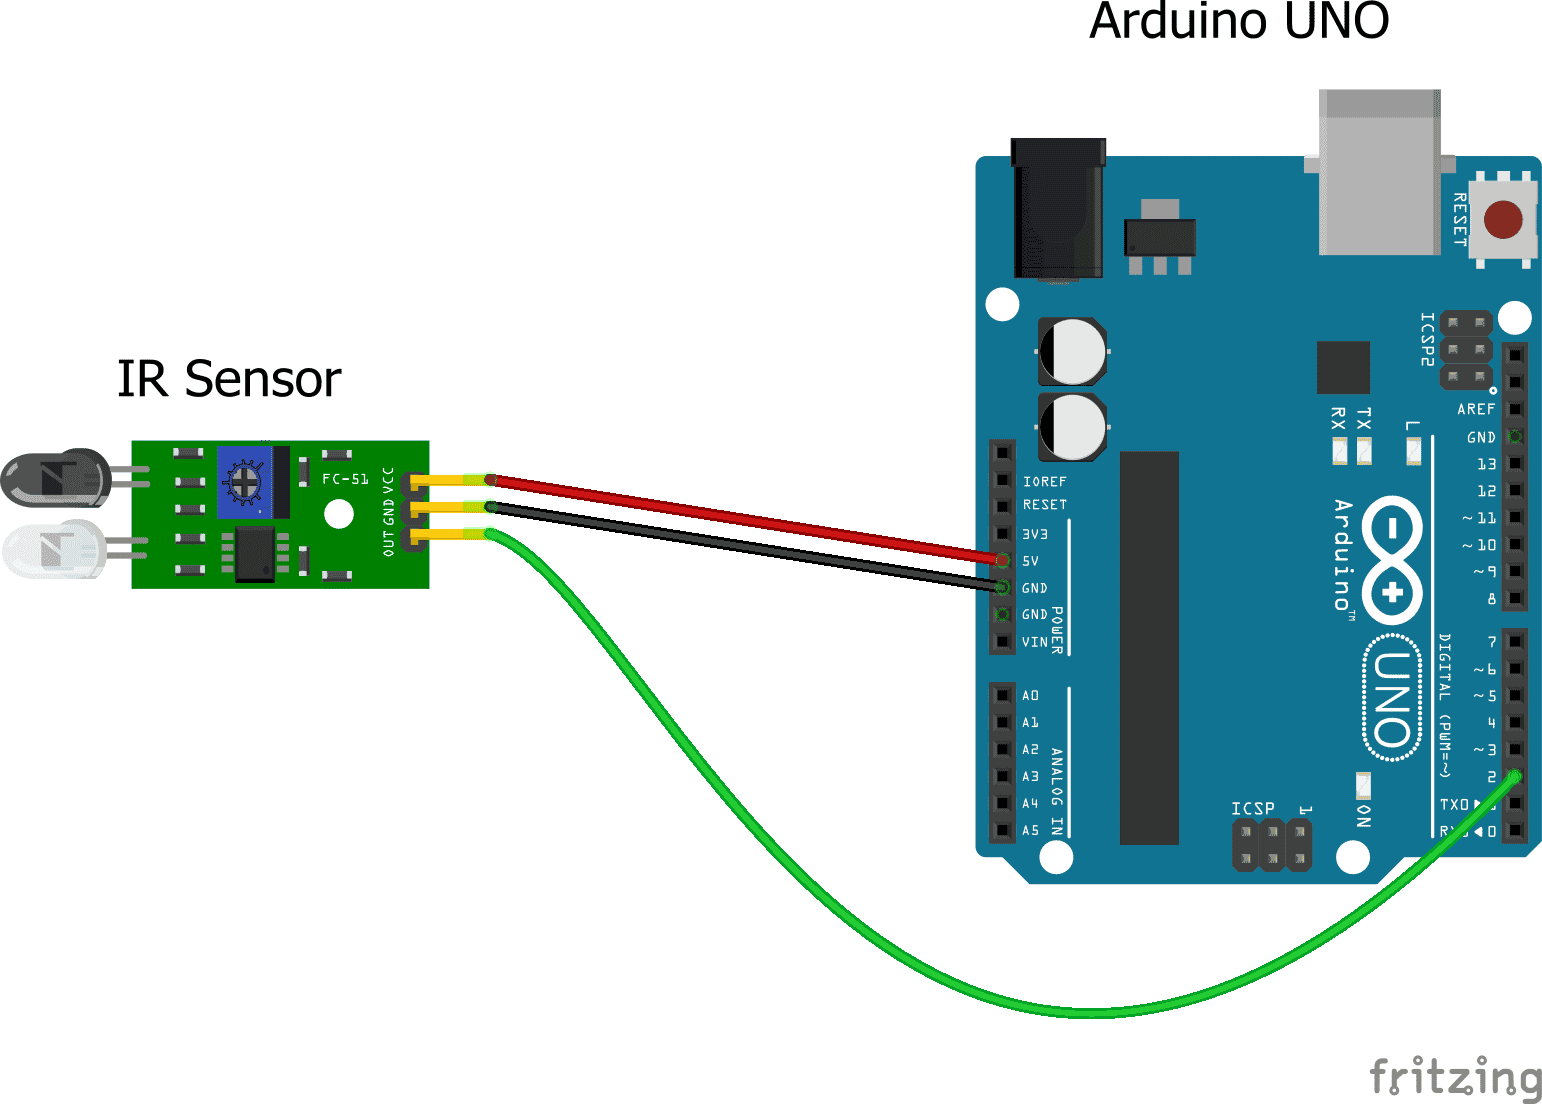
Firstly, connect the IR Sensor to Uno.
- Connect the sensor’s VCC pin to Uno’s 5V pin using a red male-to-female jumper cable.
- Next, connect the sensor’s ground pin to Uno’s ground pin using a black male-to-female jumper cable.
- Then, connect the sensor’s out pin to Uno’s digital pin 2 using a green male-to-female jumper cable.
Connect Uno to your computer with the help of a USB cable.
- Click on the Board button in the toolbar and select Arduino Uno from the drop-down menu.
- Then, click on the Connect button and select the appropriate port.

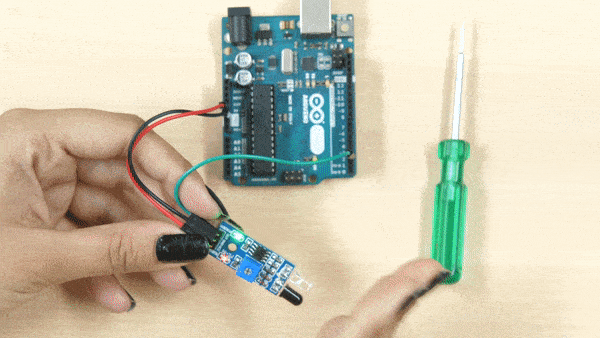
Calibrating the IR Sensor
If the LED turns ON when you bring your hand near to the IR Sensor and turns OFF when you take your hand away, indicates that the IR Sensor is working properly. What if the LED does not turn ON or OFF when necessary? Then, it’s the time when you need to calibrate your IR Sensor.
Follow the steps given below:
- Keep your hand at some distance from the Sensor approximately 15cm. If the LED is OFF, then you need not do anything. Otherwise, turn the potentiometer using a screwdriver in the anti-clockwise direction until the LED turns OFF.
- Similarly, keep your hand close to the IR Sensor approximately 5cm. If the LED is ON, the sensor is perfectly calibrated. Otherwise, turn the potentiometer clockwise till the LED turns ON.
- Repeat the above two steps until your IR works perfectly fine.
Testing the IR Sensor
We will make our sprite Tobi, say out loud the sensor reading. As we are writing the test code, we won’t be uploading it to Uno. Thus, we will be working in Stage Mode. It lets you interact with the sensor in real-time or without uploading the code.
- First, drag and drop the when flag clicked block from the Events palette.
- Then, drag and drop the forever block from the Control palette.
- Next, from the Looks palette, drag and drop the say block inside the forever block.
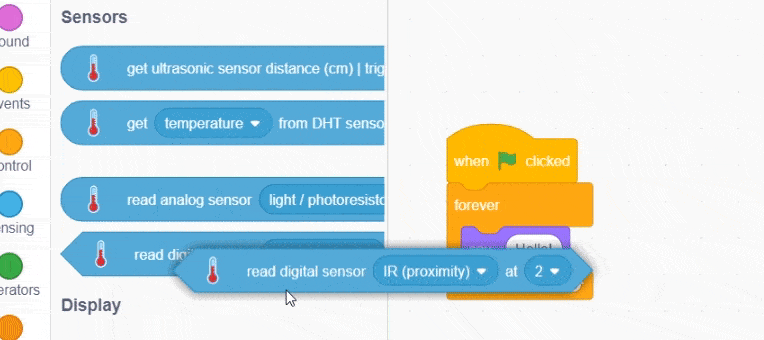
- To check whether the IR sensor is ON or not, we’re going to use the read digital sensor block from the Sensors palette. There are blocks to other sensors, like the ultrasonic sensor, as well.

- Drag and drop the read digital sensor block inside the space of the say block and select IR from the drop-down menu.
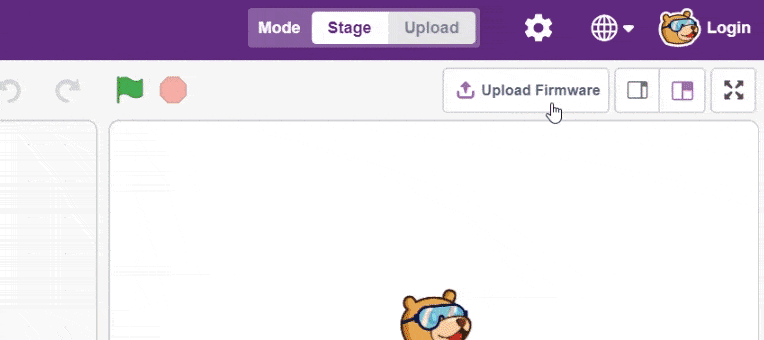
- Now, to work with Uno in Stage mode, we first need to upload a Firmware to it. For that, click on the Upload Firmware button above the stage.
- Once the firmware is uploaded(next), click on the green flag above the stage and take your hand close to the sensor.
Its signal LED will turn ON and Tobi will say ‘zero’. It will turn OFF when you take your hand away. Meanwhile, Tobi will say ‘one’. This means the sensor is working properly.
Activity: Control Pin 13 LED of Uno
In this activity, we will control the Pin 13 LED of Uno by the signals received from the IR Sensor. The pin 13 LED should turn ON when we bring our hand close to the IR Sensor. Similar, it should turn OFF when we take our hand away. Let’s start writing the script for the same.
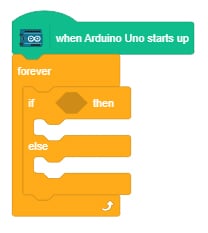
- Since we’re going to upload the code to Uno, we need the When Arduino Uno starts up hat block. So, remove the when flag clicked block and drag and drop the When Arduino Uno starts up hat block above the script.
- Now, the LED should turn ON when the sensor detects an object; otherwise, it should turn OFF. For this, we’ll use the if-else block. Go to the Control palette and drag and drop it inside the forever block.
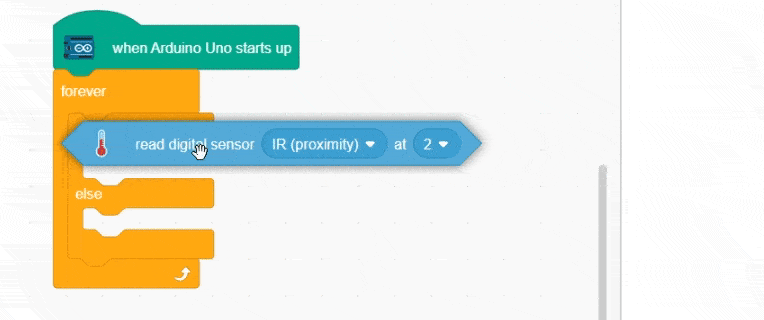
- Drag and drop the read digital sensor block inside the hexagonal space of the if-else block and select IR form the drop-down menu.
- Next, drag and drop set digital pin () output block below the if arm of the if-else block. And set the output to LOW.
- Duplicate this block and drop it below the else arm. Then, set the output to HIGH.
Our script is complete! Let’s upload it to Uno.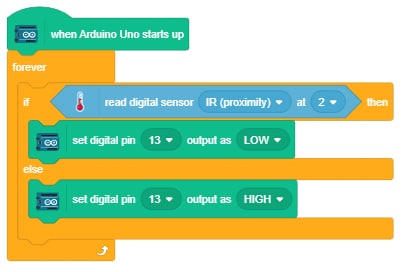
Switch to Upload mode by toggling this button. Click on the Upload Code button to upload the code.
Uno’s Pin 13 LED turns ON when you bring your hand close to the IR sensor and it turns OFF as you take your hand away.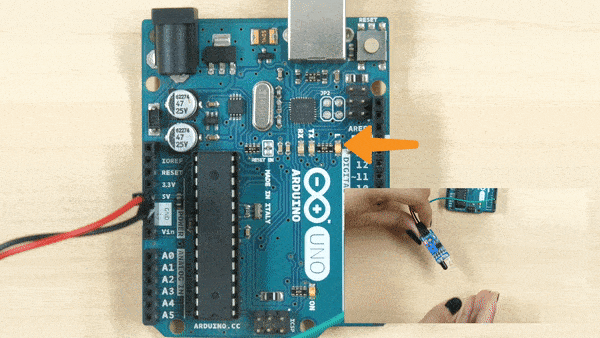

Project
You can try making a small project where you can turn ON the normal LED by connecting it to Uno via the reading of IR Sensor. We have created a small house and have attached an IR Sensor and an LED to it. The LED turns ON when the object comes near the IR sensor and immediately turns OFF when no object is detected. 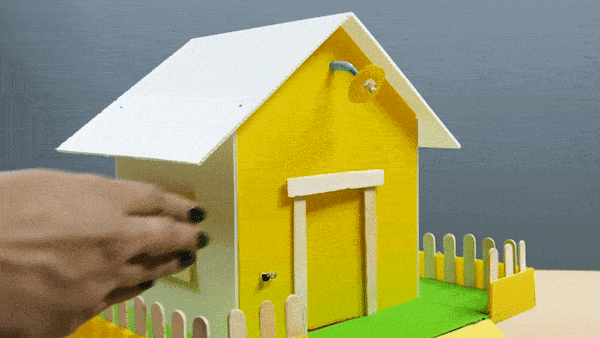
Conclusion
In this tutorial, we saw how we can interface an IR sensor to Uno using PictoBlox.
Hope you had fun! 🙂