Introduction
PictoBlox 3D and XR Studio is an exciting and powerful platform tailored for young learners aged 12 and more. It combines the fun of 3D modeling with the immersive world of extended reality (XR). The user-friendly interface offers both block-based and Python programming, making it easy for beginners and more experienced coders to create amazing projects. With PictoBlox 3D and XR Studio, you can bring your creative ideas to life, building everything from interactive 3D models to engaging XR experiences. It’s a fantastic way to develop essential skills like logical thinking, problem-solving, and spatial awareness while having loads of fun. Whether you’re designing a futuristic cityscape, animating characters, or exploring virtual worlds, PictoBlox 3D and XR Studio makes learning tech skills a thrilling adventure.
Exploring the Surroundings
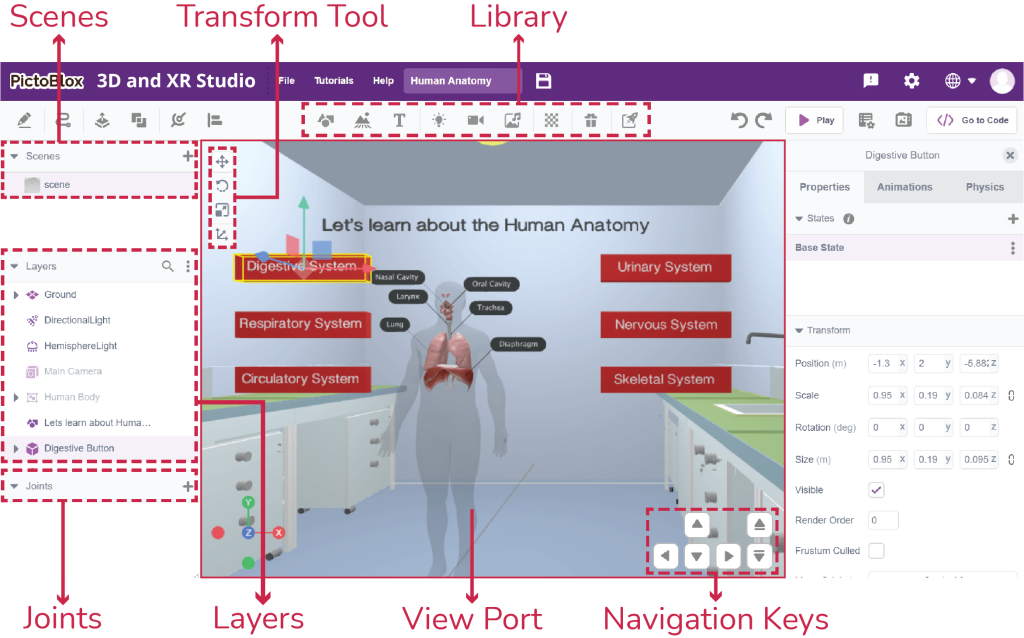

PictoBlox 3D and XR Studio offers basic elements like:
- Create Sketch
The Sketch feature in PictoBlox 3D and XR Studio allows students to create sketches of predefined shapes, fostering creativity and precision in designing their XR projects. This tool provides a variety of shapes and a pen tool for free-form sketching, making it easy to draw and customize objects in the virtual environment. - Create Path
The Create Path feature in PictoBlox 3D and XR Studio allows students to design predefined paths, enhancing the interactivity and movement within their XR projects. This tool provides a variety of path options and a pen tool for custom path creation, making it easy to define and customize object trajectories in the virtual environment. - Extrude
The Extrude feature in PictoBlox 3D and XR Studio allows students to transform any 2D sketch into a 3D object by extruding it. This powerful tool enables the creation of complex three-dimensional shapes from simple sketches, enhancing the depth and realism of XR projects. - Boolean Operations
The Boolean Operations feature in PictoBlox 3D and XR Studio allows students to perform advanced 3D modeling techniques by combining, intersecting, or subtracting two objects. This feature enhances creativity and precision in designing complex shapes and structures. - Joint
Joints are a way of connecting two or more layers. You can use joints to make your layers move and interact with each other. For example, you can use joints to make a door that swings open, adjacently place two buildings, and close a car with rotating wheels. - Align
Align is a way of adjusting the position and orientation of layers. You can use align to make your layers fit together neatly and precisely. For example, you can use align to make a ball stand perpendicular to that of a house or make a bench that has four legs that are coincident to the bed. - Library
The 3D library is a collection of resources that you can use to create and manipulate layers in a virtual or augmented reality environment. You can use the 3D library to make 3D models, animations, games, and more. The 3D library includes the following main categories:

- 3D Objects
Basic objects are the simplest and most common 3D shapes to build more complex objects. For example, you can use basic objects such as cubes, spheres, cylinders, cones, and planes to make a house, a car, or a robot. - Characters
Characters are pre-designed models representing people, animals, or creatures that you can add to your 3D scenes. These characters can be animated to perform various actions, making your scenes more lively and interactive. For example, you can add a walking human character or a flying bird to your scene. - Text
Text is a way of adding words or letters to your 3D scene. Text can create titles, labels, captions, or messages. For example, you can use text to write your name on a 3D object or display game instructions. - Lights
Lights are a way of adding brightness and color to your 3D scene. You can use lights to create different effects, such as shadows, reflections, or glows. For example, lights can make your 3D scene look more realistic, dramatic, or magical. - Camera
A camera is a way of controlling the view and the perspective of your 3D scene. You can use the camera to change the position, angle, zoom, or focus of your 3D scene. For example, you can use a camera to move around your 3D scene or to zoom in on a specific object. - Multimedia
Multimedia is a way of adding sound and video to your 3D scene. You can use multimedia to create different sounds, such as music, speech, or noise. You can also use multimedia to play videos on your 3D objects. For example, multimedia can make your 3D scene more interactive, engaging, or fun. - Materials
Materials are a way of changing the appearance and the texture of your 3D objects. You can use materials to apply different colors, patterns, or images to your 3D objects. For example, you can use materials to make your 3D objects look like wood, metal, glass, or fabric. - AR Tracker
AR stands for augmented reality. AR is a way of combining your 3D scene with the real world. Using your device’s camera, you can use AR to place your 3D objects in your physical surroundings. For example, you can use AR to make your 3D objects appear on your table, wall, or hand.
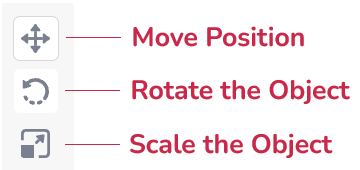
Transform Toolbar
Activity: Make your own city
In this activity, we will be designing our own city with houses, roads, and other items to make our city.
- Click Characters in the Library and inside the Building category choose any house you would like to add. (Add Floor)
💡You can either click on list item to drop the model at random position or you can drag and drop the object at your desired location.
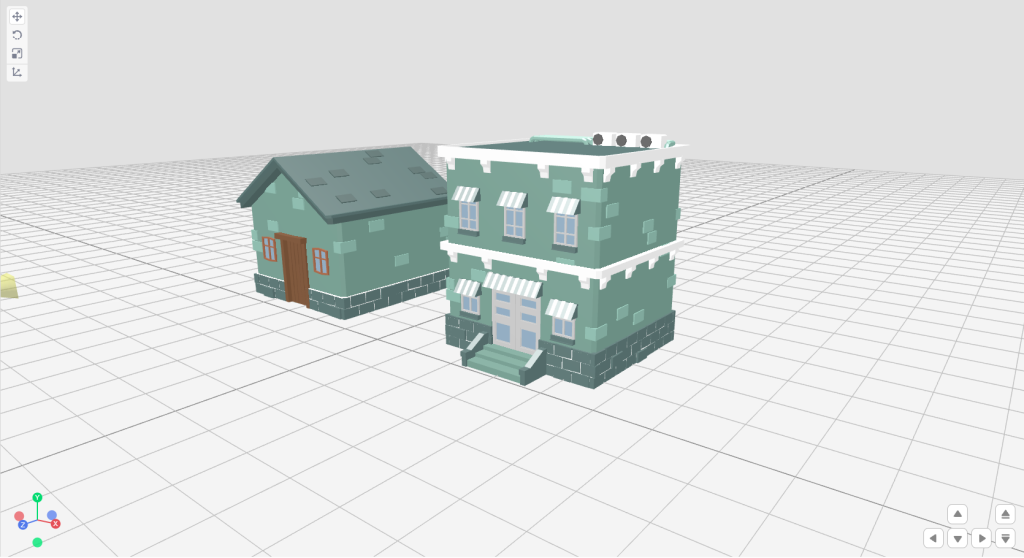
- Now we will understand how we can use the transfer tool to move, rotate and scale the selected object
- Move position
Let’s assume we have to move the house a little further away from the other house.
Step 1: Select the Position tool from Transform Toolbar
Step 2: Select the desired object. This will create a yellow color boundary box around the object and you will also observe 3 different colored axes representing different axes. You can refer to the left bottom view helper to identify color with associated axis.
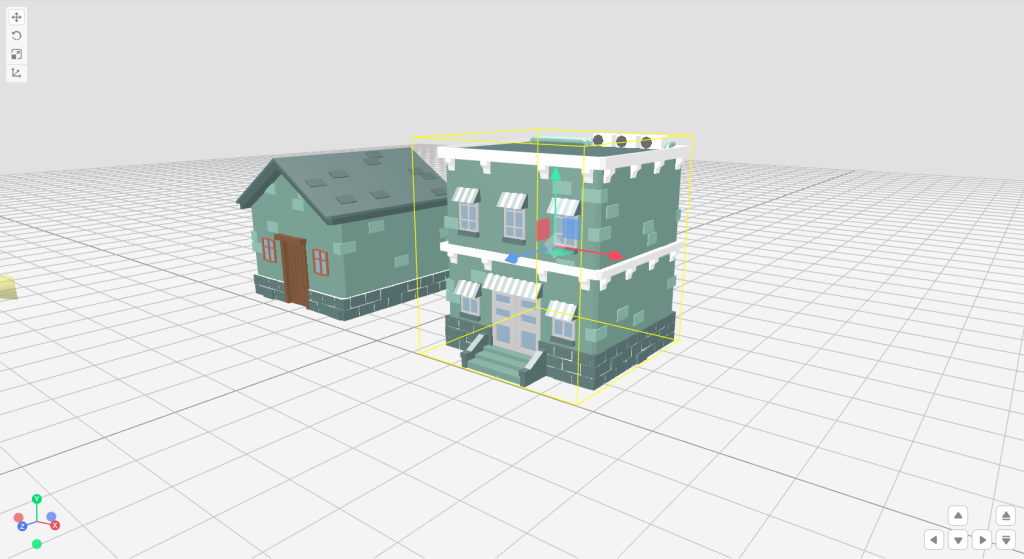
Step 3: Click and drag any axis to move the selected object in the respective axis. Image representing moving with red line along X-Axis.
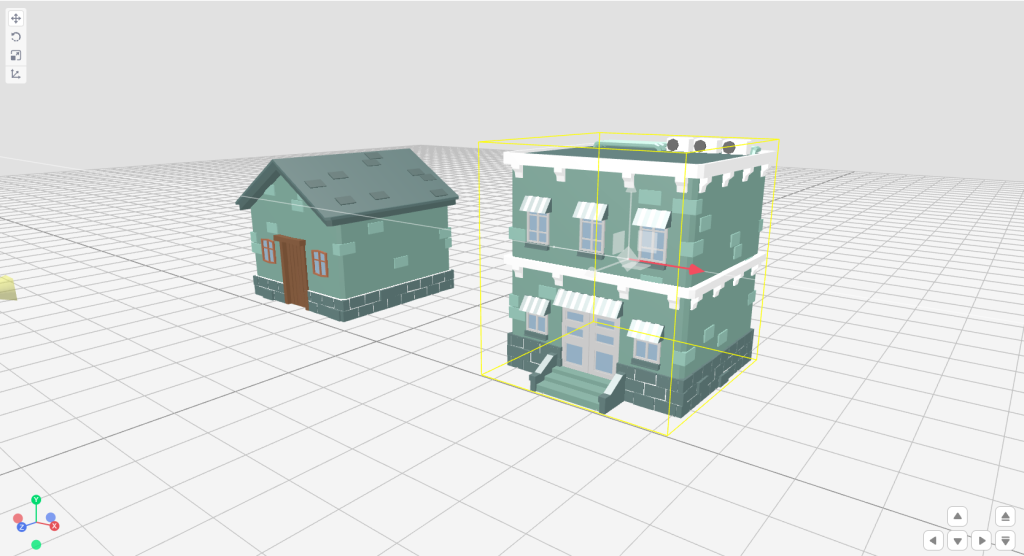
- Rotating the object
Step 1: Select the rotate tool from the transform toolbar.
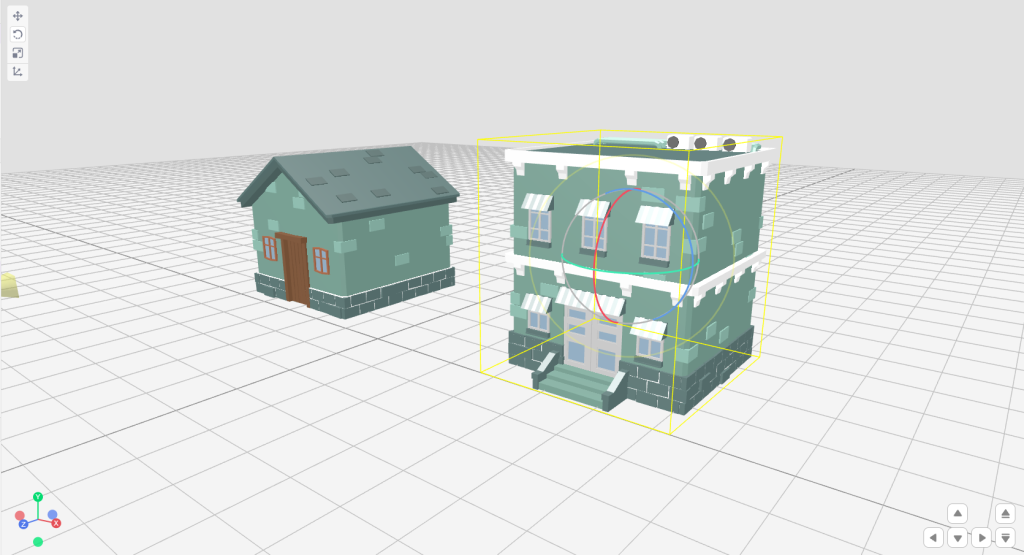
Step 2: Select the object and start rotating the object in any of the desired axes. Let’s try to make our object face another direction.
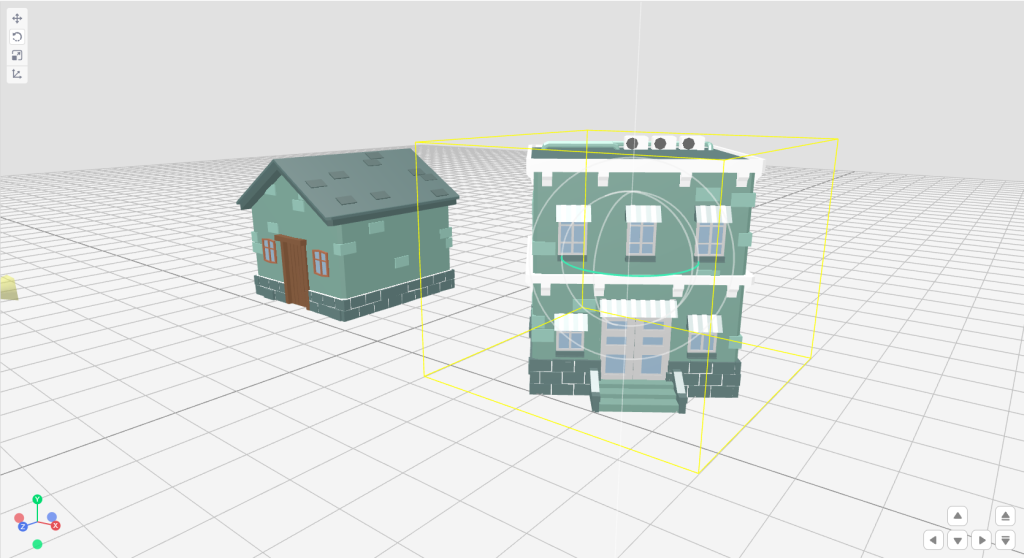
- Scale the object
Step 1: Select the scale tool from the transform toolbar.
Step 2: Select the desired object and start scaling the object in the desired direction or you can also scale the object uniformly by using an outlined circle.
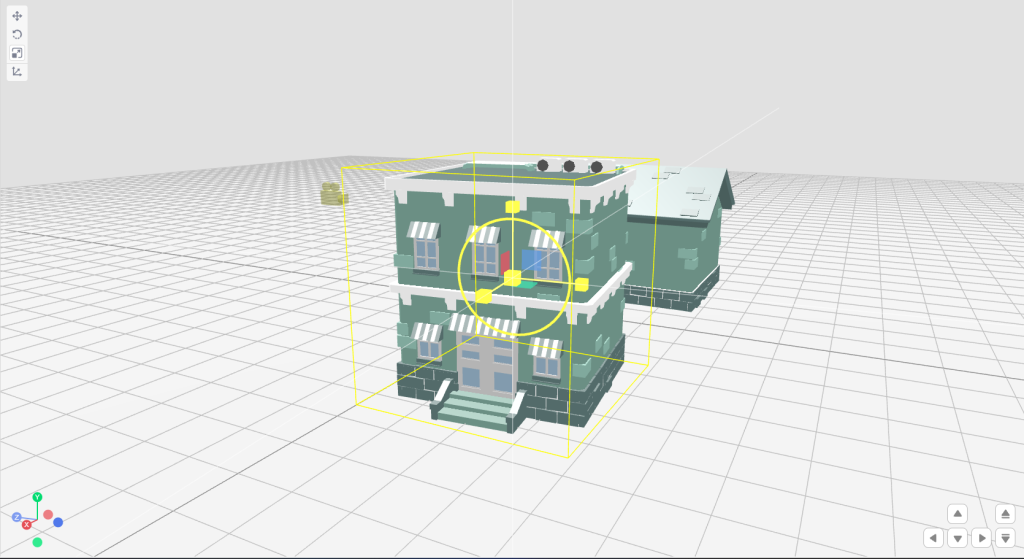
- Move position
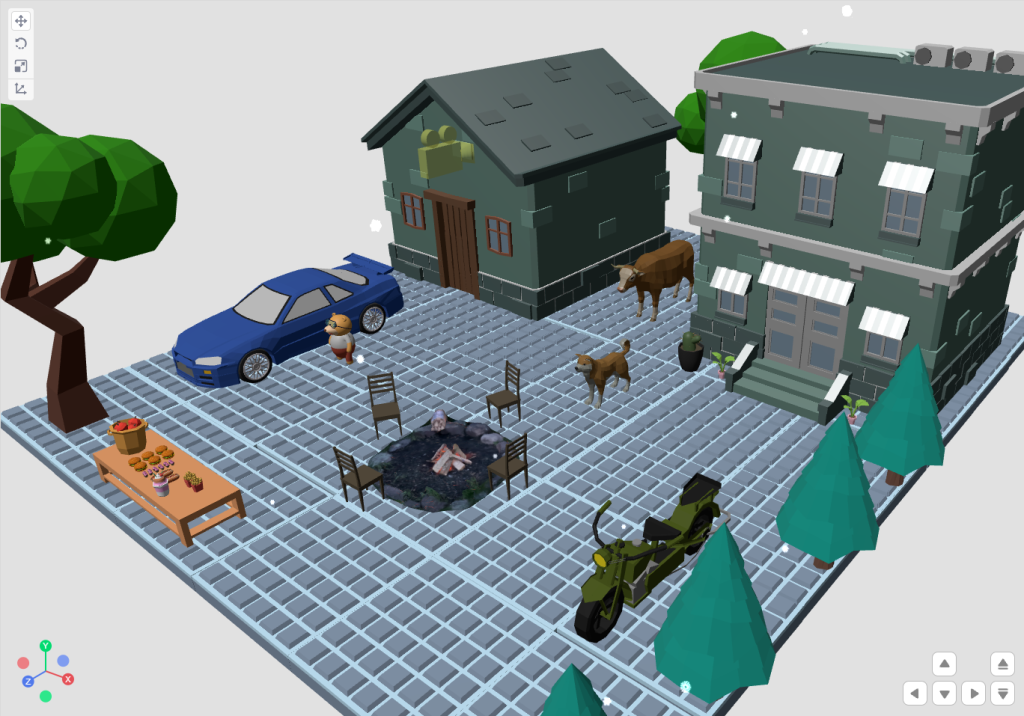
- Choose other objects available under different categories and use the same to design your landscape. By adding multiple objects, you can create scene like the one we have shown below:
- Keep Exploring the platform. We will come up with more getting started for you to understand the platform.

