Once Quarky Intellio is connected to PictoBlox via any of the four connection methods, you can begin exploring its real-time interactions.
Through a simple example project, you’ll learn how Quarky Intellio reacts when you run a program from PictoBlox. This will help you understand how to program its movements, sensors, and actions in response to different events.
Prerequisite Steps
Step 1. Quarky Intellio Getting Started.
Step 2. Quarky Intellio Connection Guide.
Open an Example in PictoBlox
Now that your Quarky Intellio is connected to PictoBlox, you can begin experimenting with example projects. These pre-built projects are designed to help you quickly understand how Quarky Intellio interacts with PictoBlox.
- In PictoBlox, go to the Learn menu.
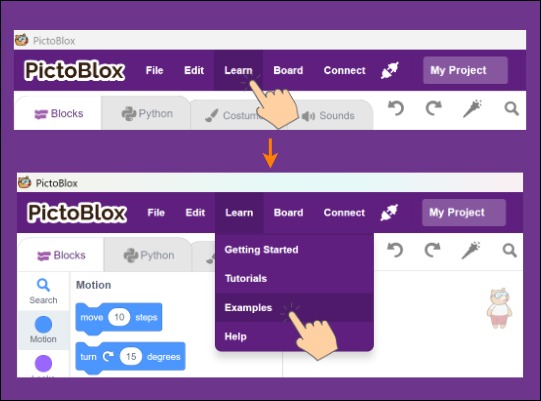
- Click Examples and select “Snap with a Filter” example.

Run Your Example
Step 1: Run Your First Program with Intellio
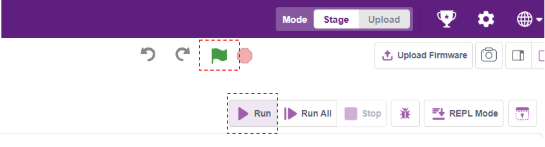
- Click the Green Flag in Block Coding or click the Run button in the Python Editor to execute your program and see Quarky Intellio in action.
- Smile at the camera Intellio’s AI will detect your face and automatically change filters.

- When you find a filter you like, press the Left (L) Button on Intellio to capture a photo.

- Use the Green Flag to restart the program and try different filters.
With the successful completion of the setup and the example project, you’ve confirmed that everything is working smoothly. Now, you’re ready to dive deeper into AI, AR, and robotics projects, using Quarky Intellio to create more advanced and interactive experiences. Happy building!