
This guide will walk you through the process of setting up and using a TFT Display with the Quarky Intellio. The steps include assembly, connection setup, software installation, and example projects to get you started with TFT display functionalities like displaying a clock.
Download and Install Arduino IDE
To use Quarky Intellio with a TFT Display, we need the Arduino IDE to program the device. Follow these steps to download and set it up:
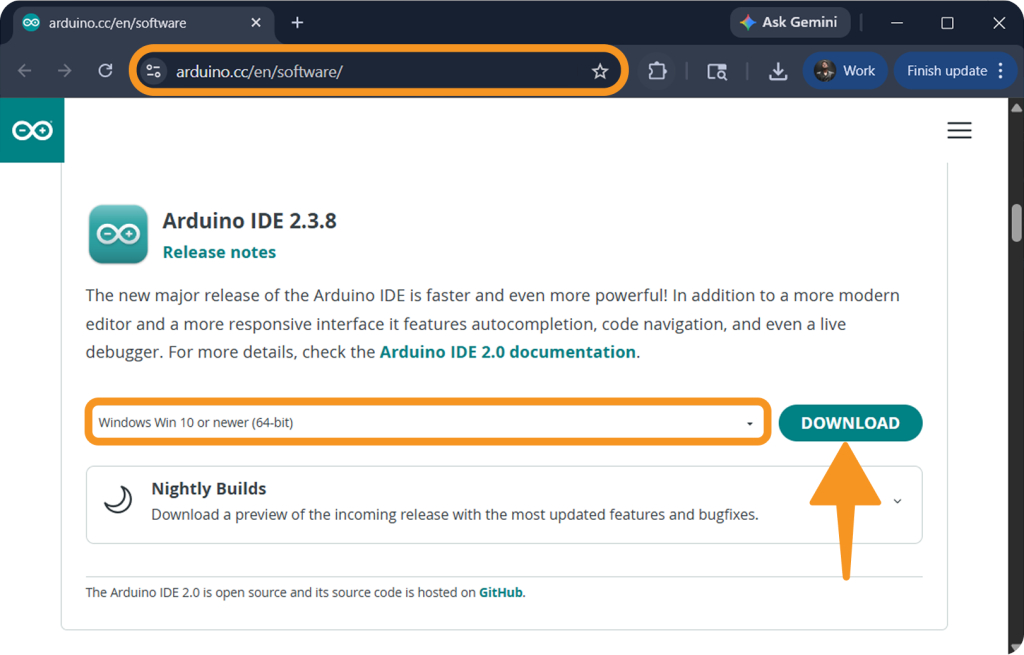
Step 1: Open your web browser and go to the official Arduino website: Arduino IDE Download Page.
Step 2: Click the Download button for the appropriate operating system.
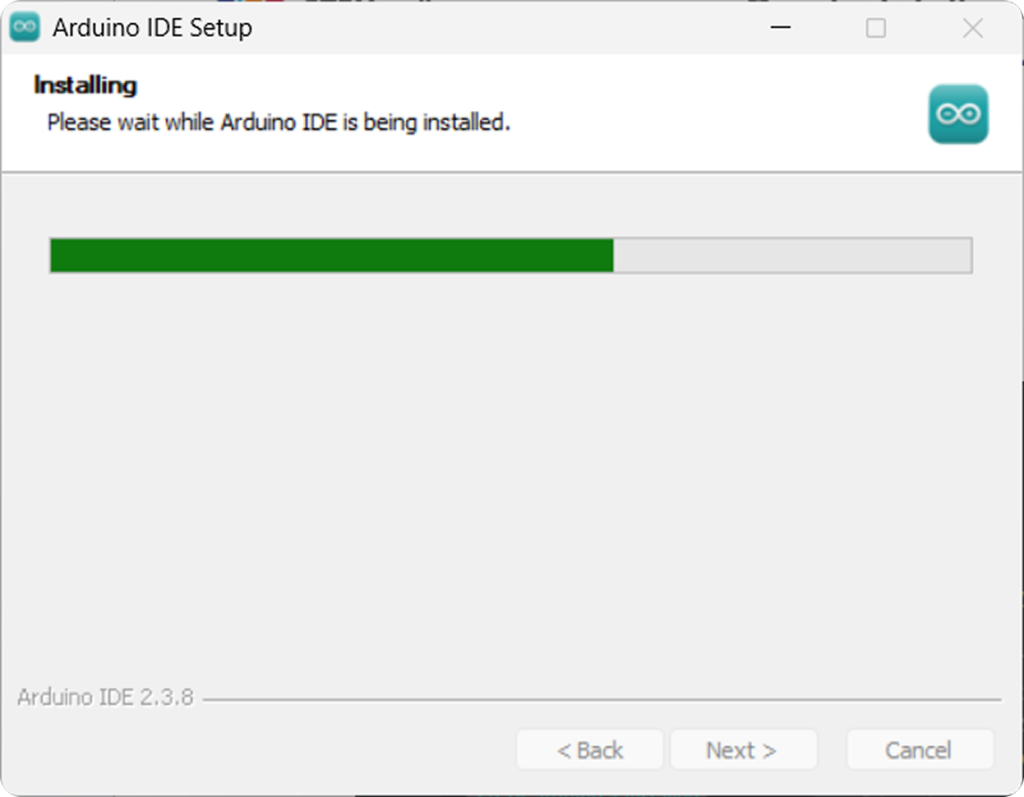
Step 3: Once the download is complete, find the file in your download folder and install it. The installer will set up Arduino IDE on your system.

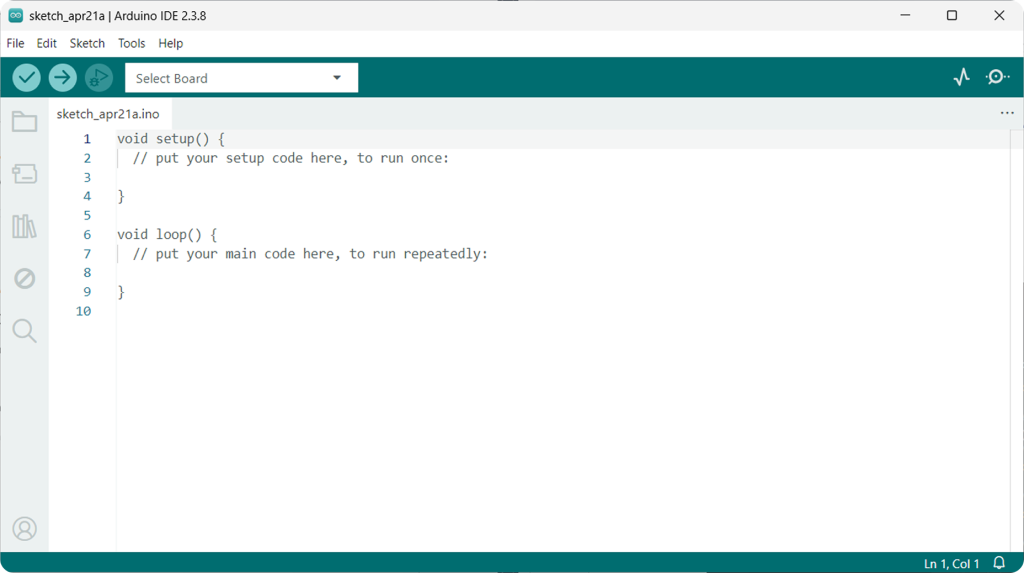
Step 4: Click on Finish to open the Arduino IDE.
Setting up the Boards Manager
Step 1: Open the Arduino IDE.
Step 2: Install the ESP32 Board
- Go to Boards Manager and in the search bar, type ESP32.
- Find ESP32 by Espressif Systems and select version 2.0.9, then click on Install.
- Wait for the installation to complete (it may take a few minutes).

Note: Ensure you install version 2.0.9 for ESP32 boards. The installation may take a couple of minutes.
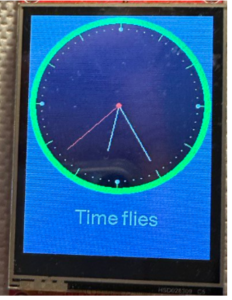
Example : Showing Clock on TFT Display
In this example, we will display a simple clock on the TFT Display.
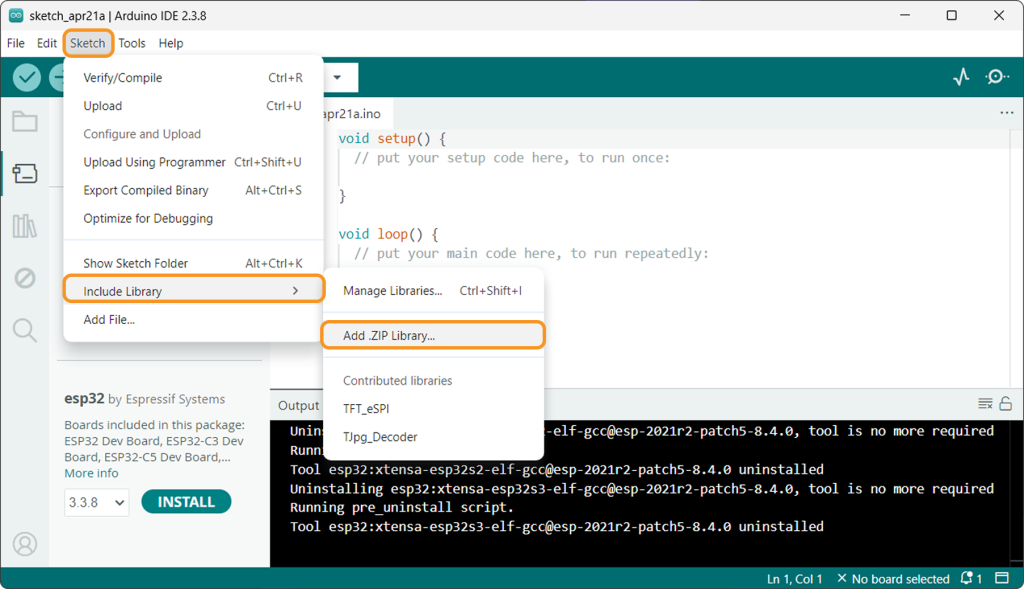
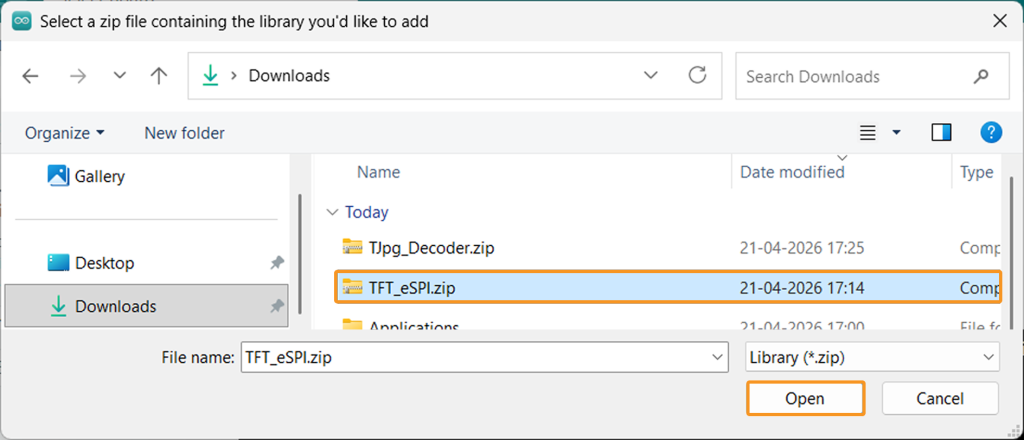
Step 1: Install TFT_eSPI Library:
- Download the TFT_eSPI.zip library.
- Navigate to Sketch > Include Library > Add .ZIP Library to install the library.
Step 2: Upload Code:
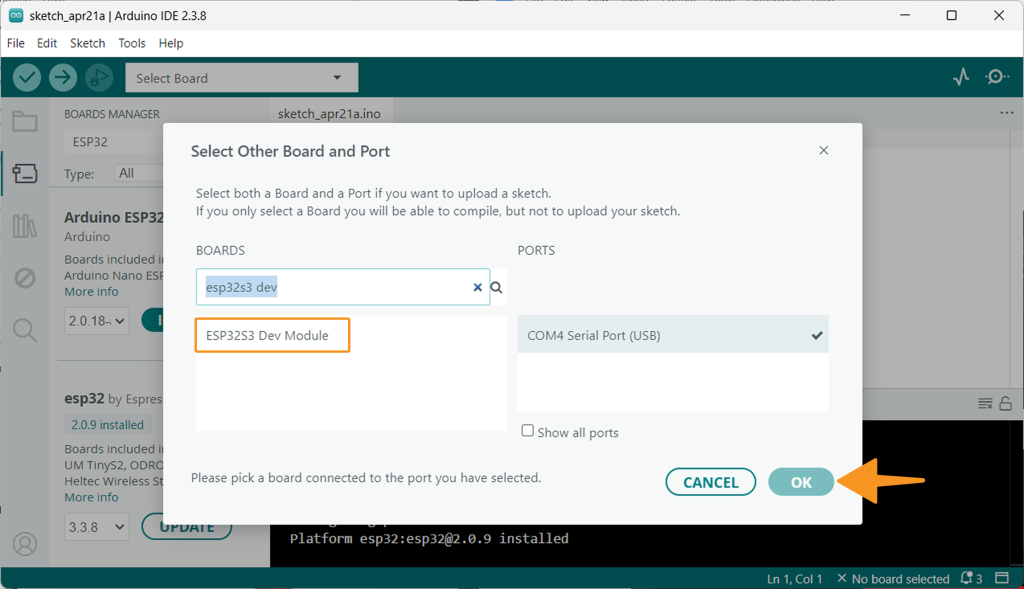
- Go to File > Examples > TFT_eSPI > 320 * 240 and select TFT_Clock.

- Choose the ESP32S3 Dev Module under Select Board and click on Ok.
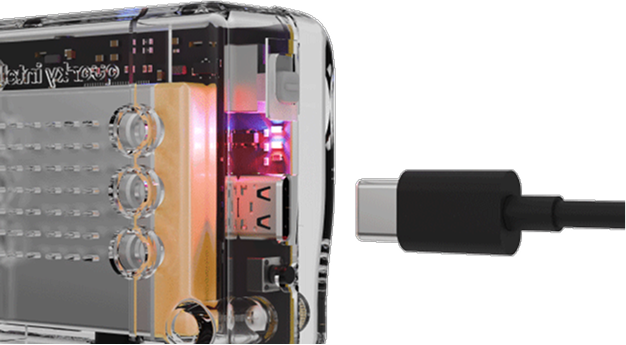
- Connect Quarky Intellio to your computer via USB.
- Click Upload (=>) to send the code to Quarky Intellio.
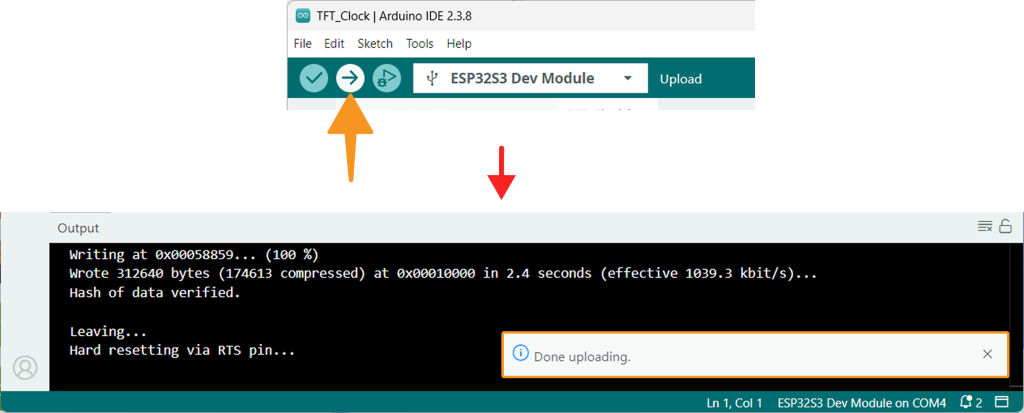
- Once the code uploads, the clock will start displaying on the TFT screen.
By following these steps, you can successfully set up and use a TFT Display with your Quarky Intellio. Whether you’re displaying a simple clock. With the Arduino IDE and the required libraries installed, you’re ready to build exciting projects that leverage the power of the TFT Display and Quarky Intellio. Enjoy creating interactive and visually engaging projects with ease!