Introduction
While working with evive there may be some chances that you may get stuck at someplace, but don’t worry we got you covered. In this document, we have covered the most frequently faced problems that you can face while working with evive, click on the related category to jump to your problem.
- Actuator Issues
- evive’s Component Issues
- Battery Issues
Actuators related problems
M1 and M2 LEDs are not working but the motors are not!
The motor/ Motor pump is not working with an external power
You need to check the VVR/VVS jumper(yellow jumper) on evive.
- The external power source should be on the VVS side. Also, make sure that the VAR is not too low.
- The internal power source should be on the VVR side.
The BO motor is not working
If your BO motor is not working, there are a few things that you need to check:
- Make sure that your motor wires are not broken or desoldered.
- Check if evive has an internal battery else, plug it into an external source.
Also, if you are already working with the S1 and S2 servo channel, you will not be able to motor channels M1 and M2 at the same time. Hence BO motors will not work on these channels at this time.
Once you follow all of the steps above, check it’s working with the help of evive menu.
The motor remains ON even after you exit the “Controls” option in the menu.
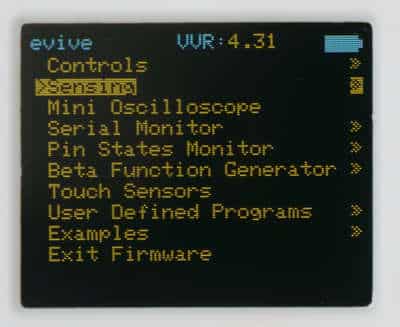
If you are controlling the motor using “Controls”, and you exit the firmware menu, the motor still keeps on rotating. In such a case,
- Re-enter the firmware, and select Controls.

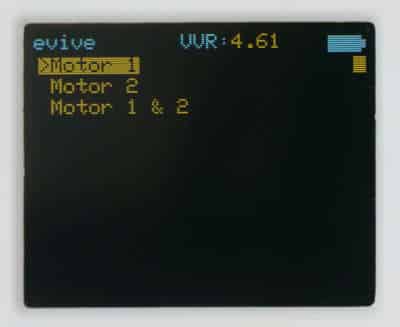
- Navigate from Motors to Motor 1.

- Now, set the speed of the motor to 0 by rotating the potentiometer also, make sure that the respective slide switch is in the center position.
The Servo motor is not working
If your Servo motor is not working, there are a few things that you need to check:
- Make sure that the servo wires are not physically damaged
- If on switching ON, the servo makes some sound or the servo head is not moving then the servo might have been damaged physically.
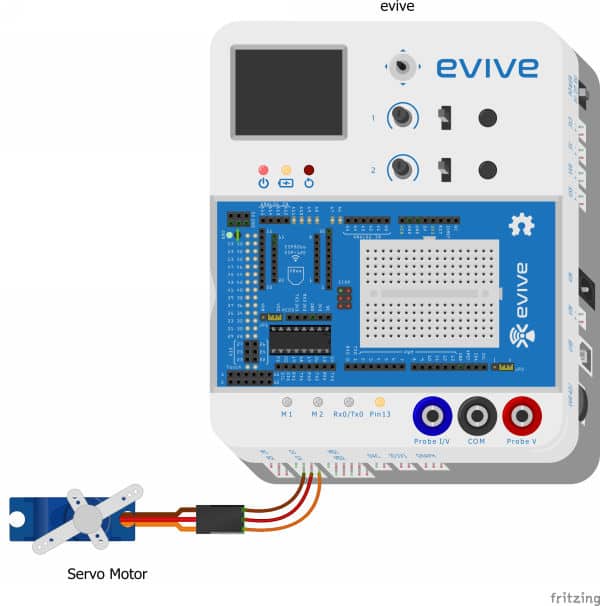
- While connecting the servo, make sure that the brown wire should be attached to the leftmost pin of the servo channels.

- Checking the VVR/VVS Jumper of evive.
- For the external power source, it should be on the VVS side, and make sure the VAR is not too low.
- The internal power source should be on the VVR side.
Also, if you are working with the M1 and M2 motor channel, you will not be able to use servo channels S1 and S2 at the same time. Hence the servo motor will not work on these channels at this time.
Issues Related to evive component
The touch sensors are not working
Whenever you are working with the touch sensors make sure that you are not touching the pins before running the script. Even while you are working with evive’s firmware, make sure you do not touch them while selecting the “Touch Sensors” option from the firmware. You can work with the sensors only after the “Touch Sensors” option is executed from the menu or the touch sensor code has been uploaded to evive.
You can even apply some water to your fingers to check it. It helps in better charge transfer.
If the touch sensors are not working even after you have taken the above precautions, then there might be some physical damage to the evive.
The navigation key is not working
Make sure that you have the latest firmware installed in evive, go to STEP 1 for the same. Try center pressing the navigation key and navigating through evive firmware.
If it is still not working, do check the code in which you were facing a problem. If you are sure that the code works correctly, there is probably some physical damage to the navigation key in evive.
VAR voltage not working
If your VAR is not changing even after turning the potentiometer knob or if it’s stuck and you are not able to rotate it, there might be some physical damage to evive.
Change in one potentiometer reflects changes in the value of both potentiometers
It might happen because there is an internal shortage on evive board.
Unable to mount all 4 screws of evive for the robot
Please be assured, it is enough to mount evive onto the acrylic chassis using two screws no need to fix it with 4 screws.
Issues related to Battery
evive is not turning ON
Check the battery, if the red LED is ON on evive, it means that evive is probably low on battery.
If it is not turning on for the first time make sure that you have installed the battery properly.
If none of the above ways can turn the evive ON, connect evive to the computer using a USB power source.
evive is not getting charged?
Please make sure you have a battery installed in your evive.
If you have already installed the battery but are still facing problems please refer to the video below.
evive is turned OFF suddenly.
If the power supply gets short inside the evive, the power automatically gets cut off. Connect evive to a USB power source or an external supply to restart it.
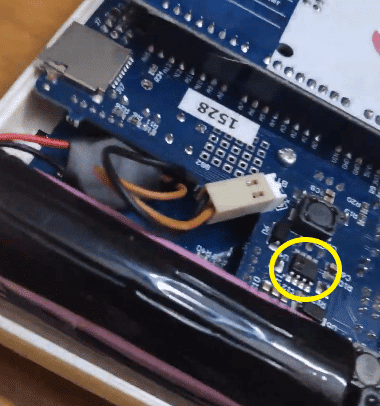
The charging LED glows, but evive not in a charging state.
Open the back of the evive and check this area for damage if the IC looks damaged please contact us.
Jumper wires are melting or are getting hot.
In this case, remove all connections and make connections properly and check if there is any short between 5V and Gnd.
If the problem persists, please remove all the existing connections and redo the connections step by step.
If you are facing problems related to evive’s firmware(menu) or Bluetooth connectivity you can look up the document here.
Contact Us
If you have queries except the above listed once or have doubts about any of the above steps, feel free to reach us by writing to [email protected].


