Introduction
In cases where your device is not working as expected, such as the camera not displaying properly, the servo not moving accurately, the speaker or mic not responding, or when you need to update firmware or change device settings, you can use Quarky Intellio Settings to troubleshoot and fix these issues efficiently.
Opening Quarky Intellio Settings
To access and configure your Quarky Intellio settings, follow these steps:
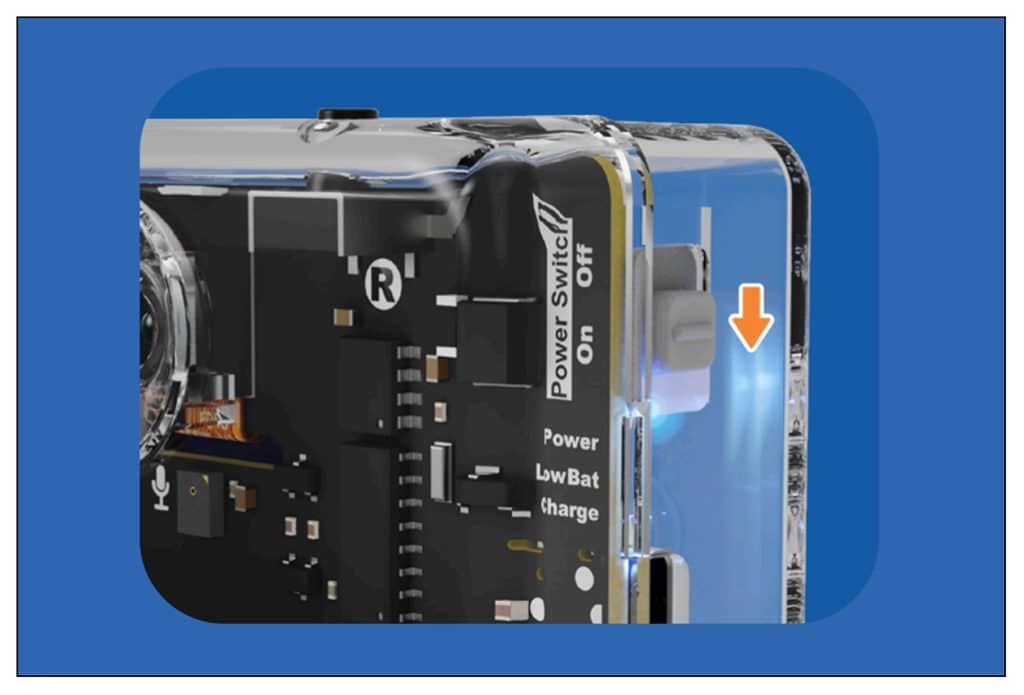
- Power on your Quarky Intellio device.
- Download and install PictoBlox (If it is not already installed on your device).
PictoBlox version 9.1.0 or later is required for Quarky Intellio support. Click Download PictoBlox to visit the download page, select your operating system (Windows, macOS, or Linux), and follow the on-screen instructions to install the latest version. Note: Web browser support for Quarky Intellio on pictoblox.ai is currently under development.
- Connect Quarky Intellio to your computer using any one of the available connection methods.

- Go to the Quarky Intellio Blocks section and click on the Settings button.
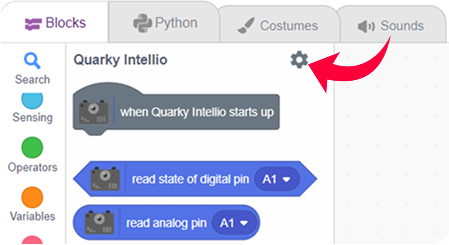
- A pop-up will open with the heading – Quarky Intellio Settings and Troubleshooting.
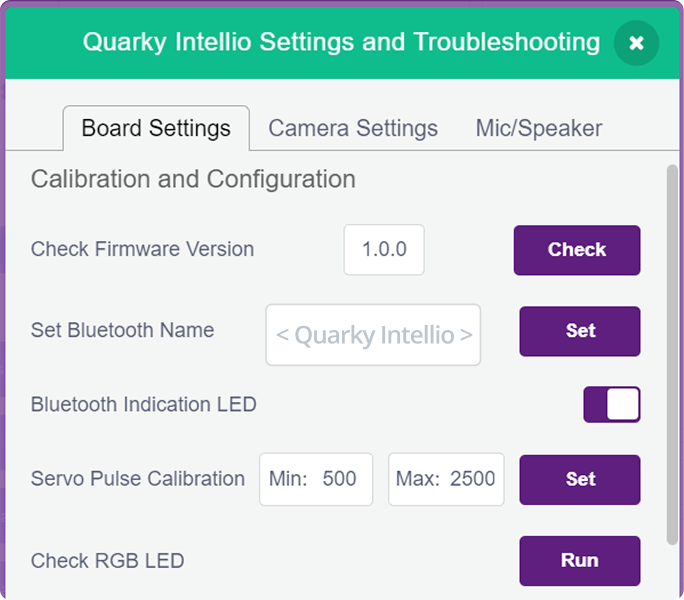
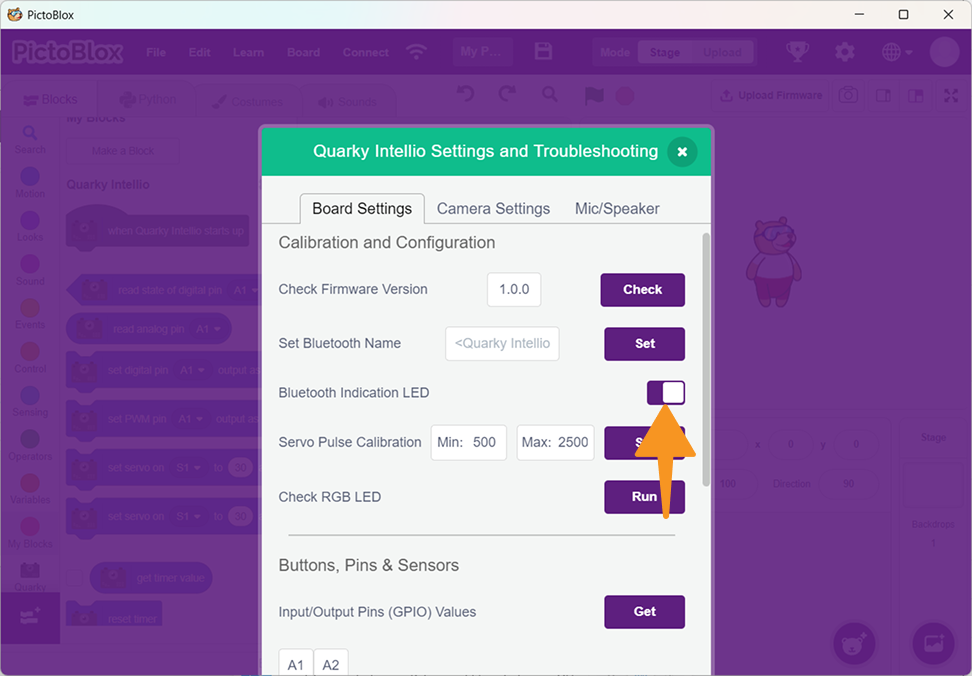
Board Settings
This section helps you manage the core functions of Quarky Intellio, including firmware, Bluetooth settings, and hardware calibration. It is useful for ensuring the device works properly and for fixing common issues.
Calibration and Configuration
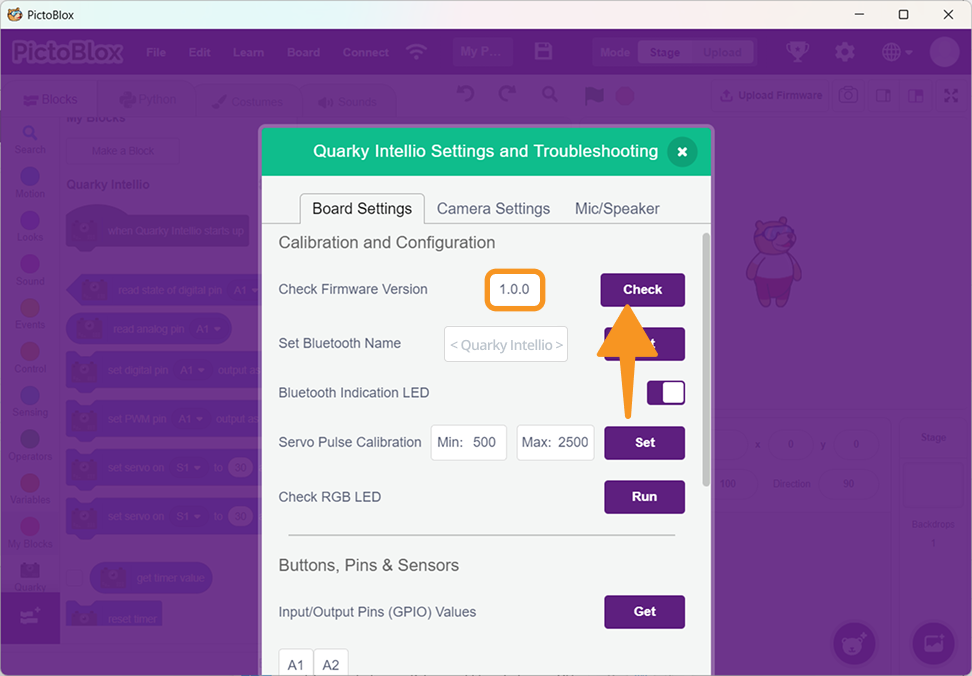
1. Check Firmware Version
Firmware is the internal software that controls the device. If the firmware is outdated or missing, some features may not work properly.
- Connect Quarky Intellio to your computer using any one of the available connection methods.
- Go to the Quarky Intellio Blocks section and click on the Settings button.
- Click on Check to view the current firmware version.
 Note: Ensure firmware is updated regularly.
2. Set Bluetooth Name
You can rename your Quarky Intellio device to make it easier to identify.
- Enter a custom name (up to 12 characters) and click Set. This helps you quickly recognise your device during Bluetooth connection.

3. Bluetooth Indication LED
Toggle the Bluetooth Indication LED:
- Turn ON → LED shows connection status.
- Turn OFF → LED remains off.
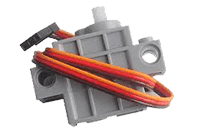
4. Servo Pulse Calibration
Servo motors work using pulse signals, and calibration defines their movement range.
- Go to Quarky Intellio Settings → Servo Pulse Calibration.
- Set the Min value (e.g., 500). This defines the servo’s starting position.
- Set the Max value (e.g., 2500). This defines the ending position of the servo and clicks on Set.
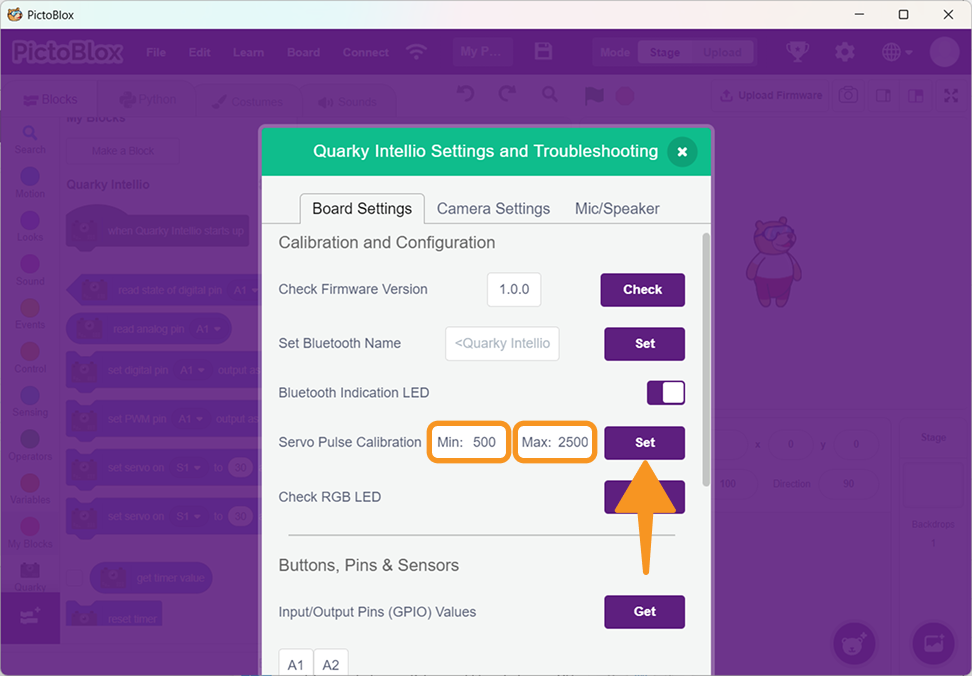
Note: Helps in achieving accurate servo movement.
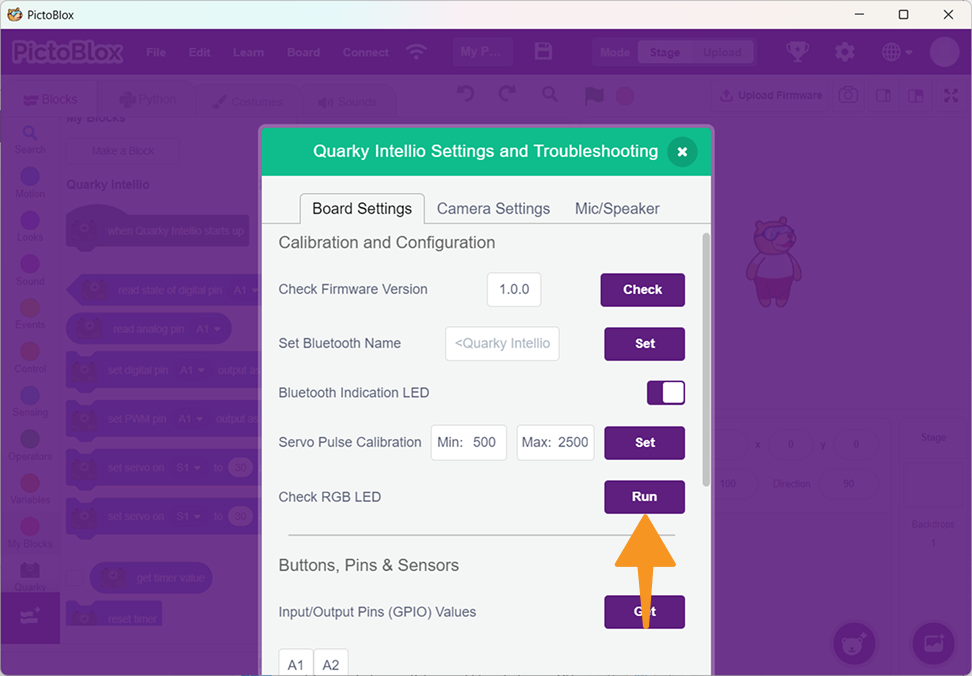
5. Check RGB LED
This option allows you to test the onboard RGB LED.
Click Run and observe the LED behaviour on the device. This helps confirm whether the LED is functioning correctly.
Buttons, Pins & Sensors
This section helps you check input values from hardware components.
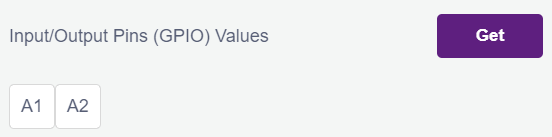
- Input/Output Pins (GPIO Values): Click Get to view live values from pins like A1, A2. Useful for debugging sensor connections.
- Push Button Values: Click Get to read button input values.

- Push Button L & R Range: Set minimum and maximum values and click Set Range.
This ensures accurate button response.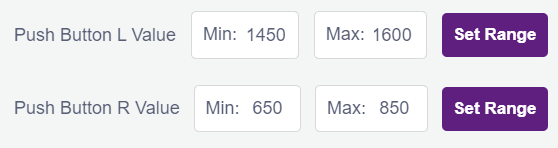
Hardware and Firmware Options
This section helps you to update hardware and firmware options.
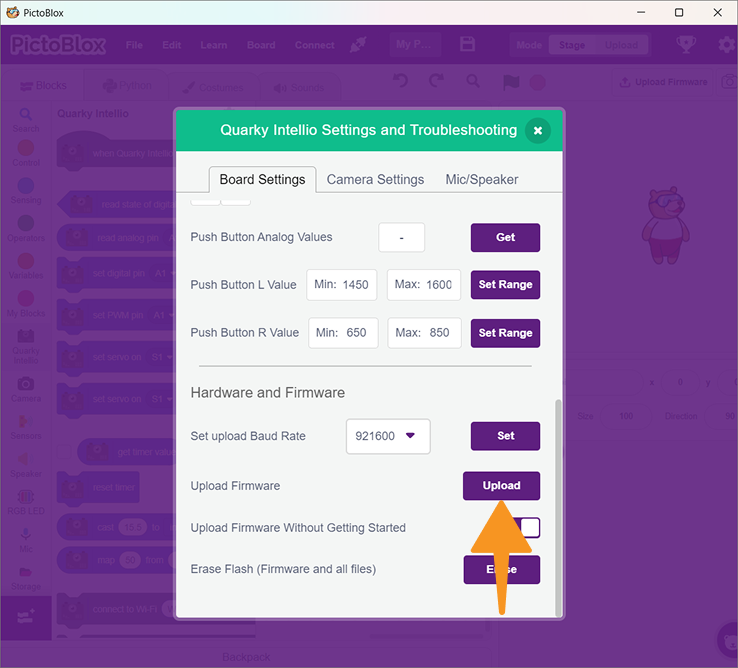
- Set Upload Baud Rate: Defines the firmware upload speed (default: 460800).
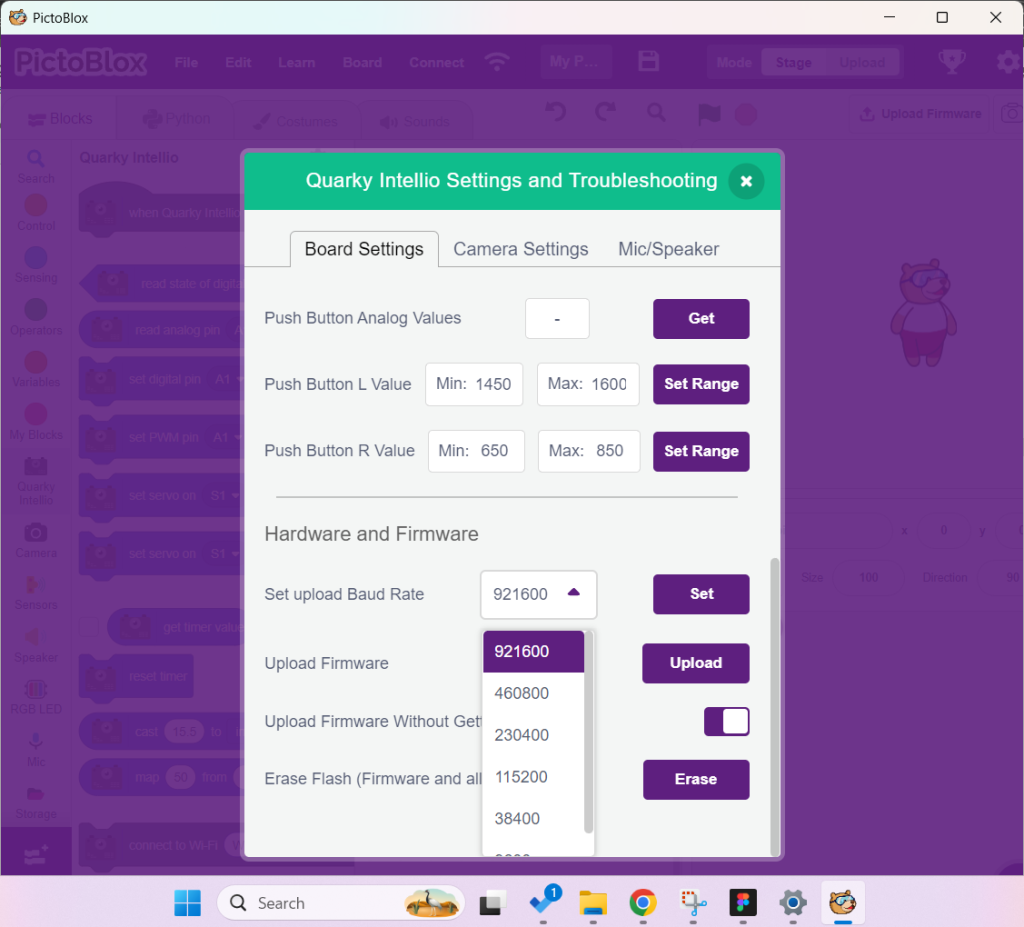
- Upload Firmware: Used to install or update firmware. Follow the steps below to upload the latest firmware.
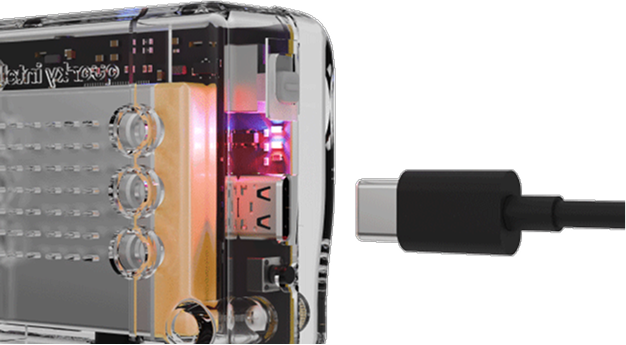
Step 1: Connect Quarky Intellio to your computer using a USB cable.
 Step 2: Go to the Quarky Intellio Blocks section and click on the Settings button.
Step 3: Go to the Hardware and Firmware Options section, then click the Upload button to upload the latest firmware.
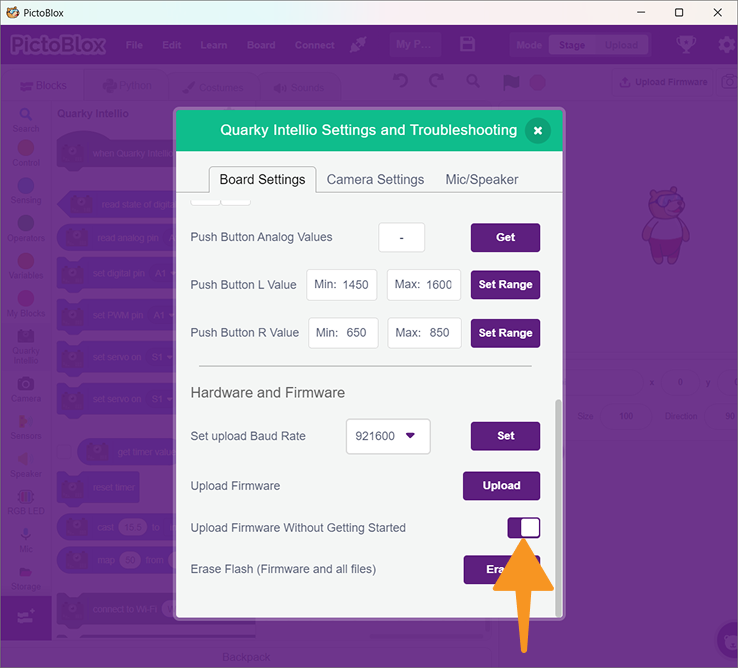
- Upload Firmware Without Getting Started: This advanced option allows you to upload firmware directly without going through the “Getting Started” interaction. It can be used when Quarky Intellio is already powered on, and you want to update the firmware quickly.
- Erase Flash (Firmware and all files): Option for erasing firmware and files on Intellio. Follow the steps below to upload the latest firmware.
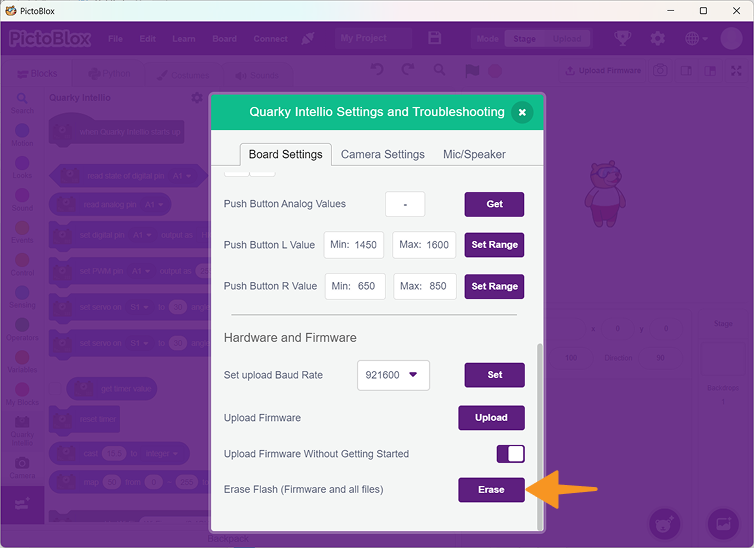
Step 1: Connect Quarky Intellio to your computer using a USB cable.
Step 2: Go to the Quarky Intellio Blocks section and click on the Settings button.
Step 3: Go to the Hardware and Firmware Options section, then click the Upload button to upload the latest firmware.
Camera Settings
Camera settings allow you to control image quality, orientation, and visual adjustments.
When you open the Camera Settings, if Quarky Intellio is connected, the system automatically fetches the current camera configuration.
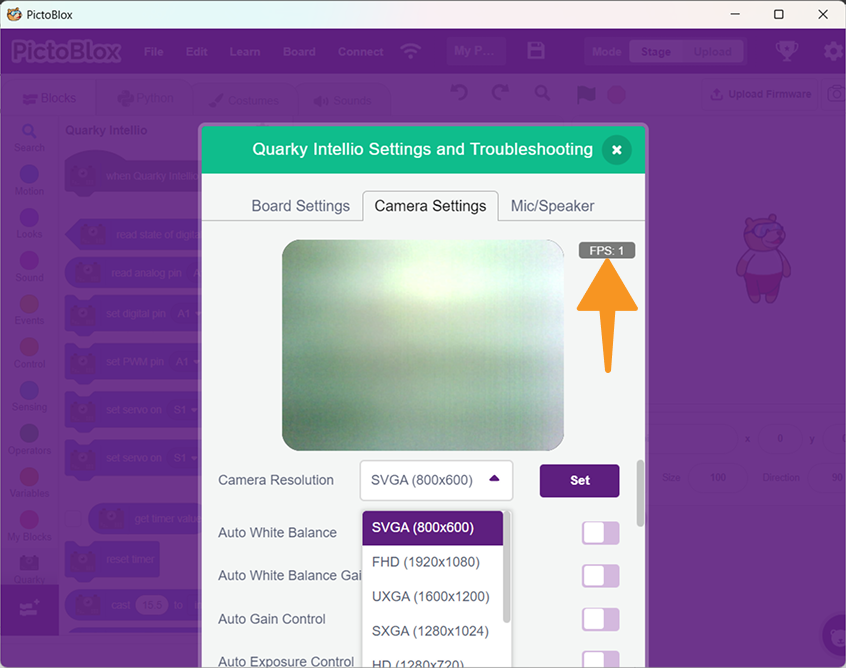
1. Set Camera Resolution
- Connect Quarky Intellio to your computer using any one of the available connection methods.
- Go to the Quarky Intellio Blocks section and click on the Settings button.
- You can select the desired image quality based on your requirement:
- SVGA (800×600)
- FHD (1920×1080)
- UXGA (1600×1200)
- SXGA (1280×1024)
- HD (1280×720)
- XGA (1024×768)
- XGA (1024×768)
- CIF (352×288)
- QVGA (320×240)
After selecting the resolution, click Set.
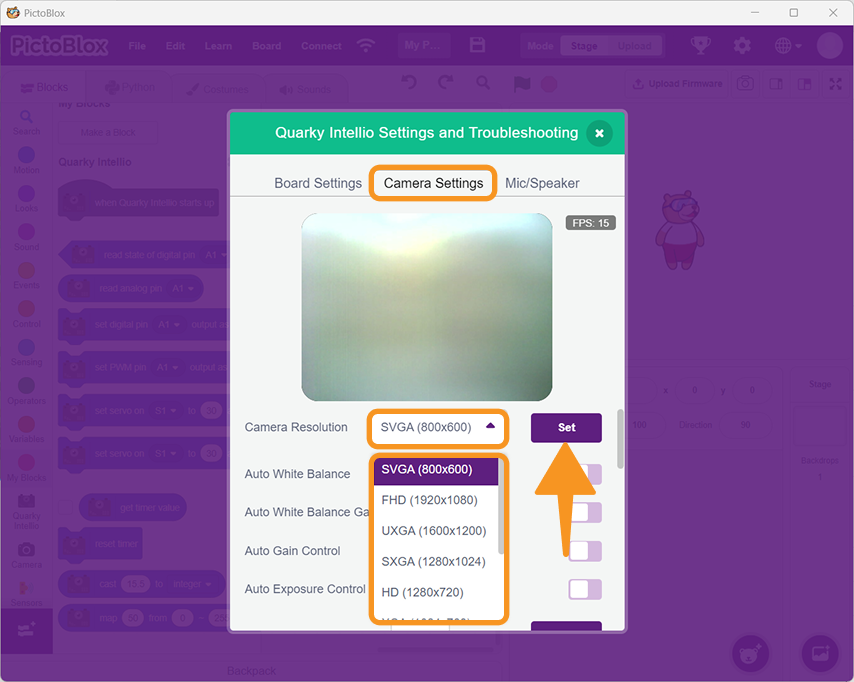
When you open the Intellio Camera Settings, if the Intellio is connected, it will automatically fetch the current camera settings.
Note: Higher resolution gives better image quality but results in lower FPS (frames per second).
Camera Adjustment Controls
These settings help you fine-tune the camera output based on lighting conditions and usage.
- Auto White Balance: Automatically adjusts colours based on surrounding light to maintain natural colour tones.

- Auto White Balance Gain: Controls how strongly the system adjusts colour balance when Auto White Balance is enabled.

- Auto Gain Control: Automatically increases or decreases brightness based on lighting conditions.

- Auto Exposure Control: Adjusts how much light the camera captures to maintain proper image brightness.

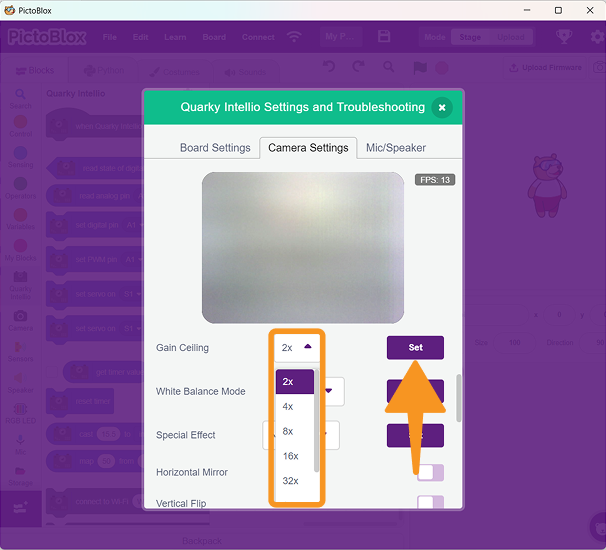
- Gain Ceiling: Sets the maximum limit for brightness amplification (e.g., 2x to 128x). Higher values increase brightness but may add noise.
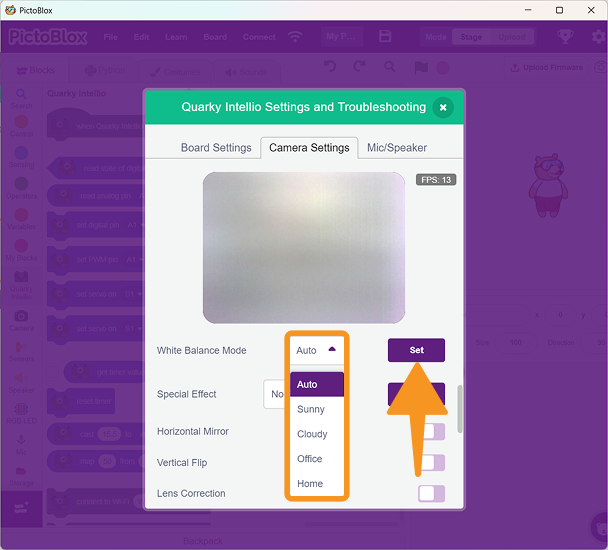
- White Balance Mode: Allows you to select between automatic and manual colour adjustment modes.
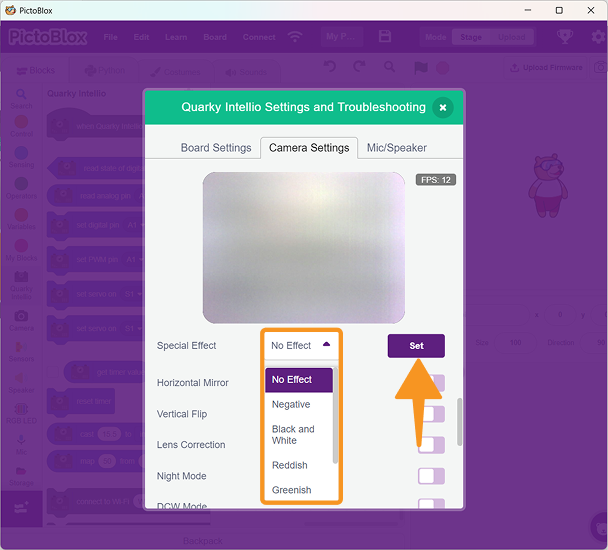
- Special Effect: Applies visual effects to the camera output (e.g., Negative or other available options).
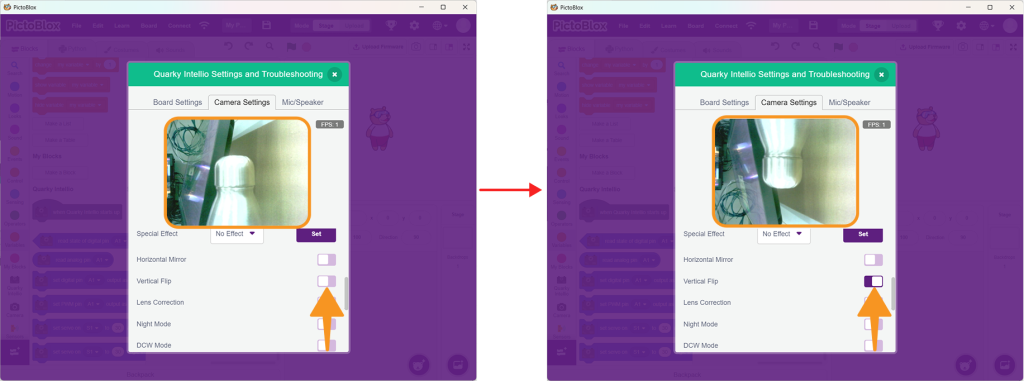
Orientation and View Controls
These settings help correct the camera view if it appears reversed or inverted.
- Horizontal Mirror: Flips the image left to right.
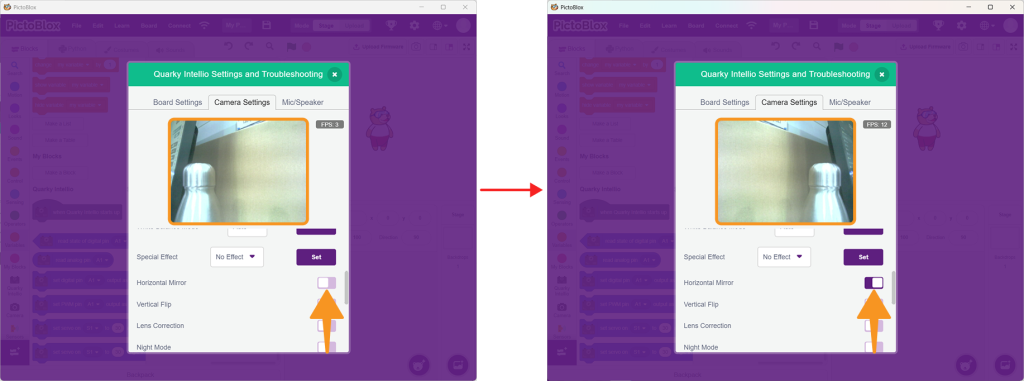
- Vertical Flip: Flips the image top to bottom.
Advanced Camera Controls
These options provide deeper control over camera behaviour and image quality.
- Lens Correction: Corrects distortion caused by the camera lens.

- Night Mode: Enhances visibility in low-light conditions.

- DCW Mode: Improves image quality by optimising resolution and scaling.

- Black Point Compensation: Enhances dark areas to improve visibility.

- White Point Compensation: Adjusts bright areas to avoid overexposure.

- Raw Gamma Mode: Adjusts brightness and contrast levels for more natural output.

Manual Adjustment Controls
These settings allow precise manual control of brightness and exposure.
- Exposure Value: Sets the amount of light captured by the camera (Range: 0–1200).
Higher values → brighter image.

- Gain Level: Controls signal amplification (Range: 0–30).
Higher values → brighter image, but may introduce noise.

Mic and Speaker Settings
This section allows you to test and adjust audio functionality.
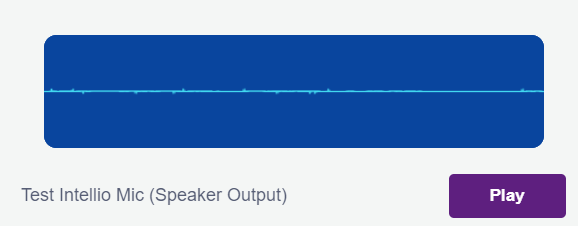
- Test Mic: Click Play or Pause to check the microphone input.
- Test Speaker Output: Click on the Start button of Test Speaker.

- Set Speaker Volume: Enter a volume value (e.g., 0 to 100) and click Set to adjust the sound level.

- Get Speaker Volume: Click Get to check the current volume level. (Before getting Speaker Volume, please set the speaker volume.)

- Set and Get Mic Gain: Adjust microphone sensitivity using Set (Upto 0DB to 42DB), and verify it using Get.

Need Assistance?
If you encounter any difficulties while troubleshooting or have any questions regarding Quarky Intellio, feel free to reach out to us!
- For detailed inquiries or further assistance, please visit our Contact Us page.