Introduction
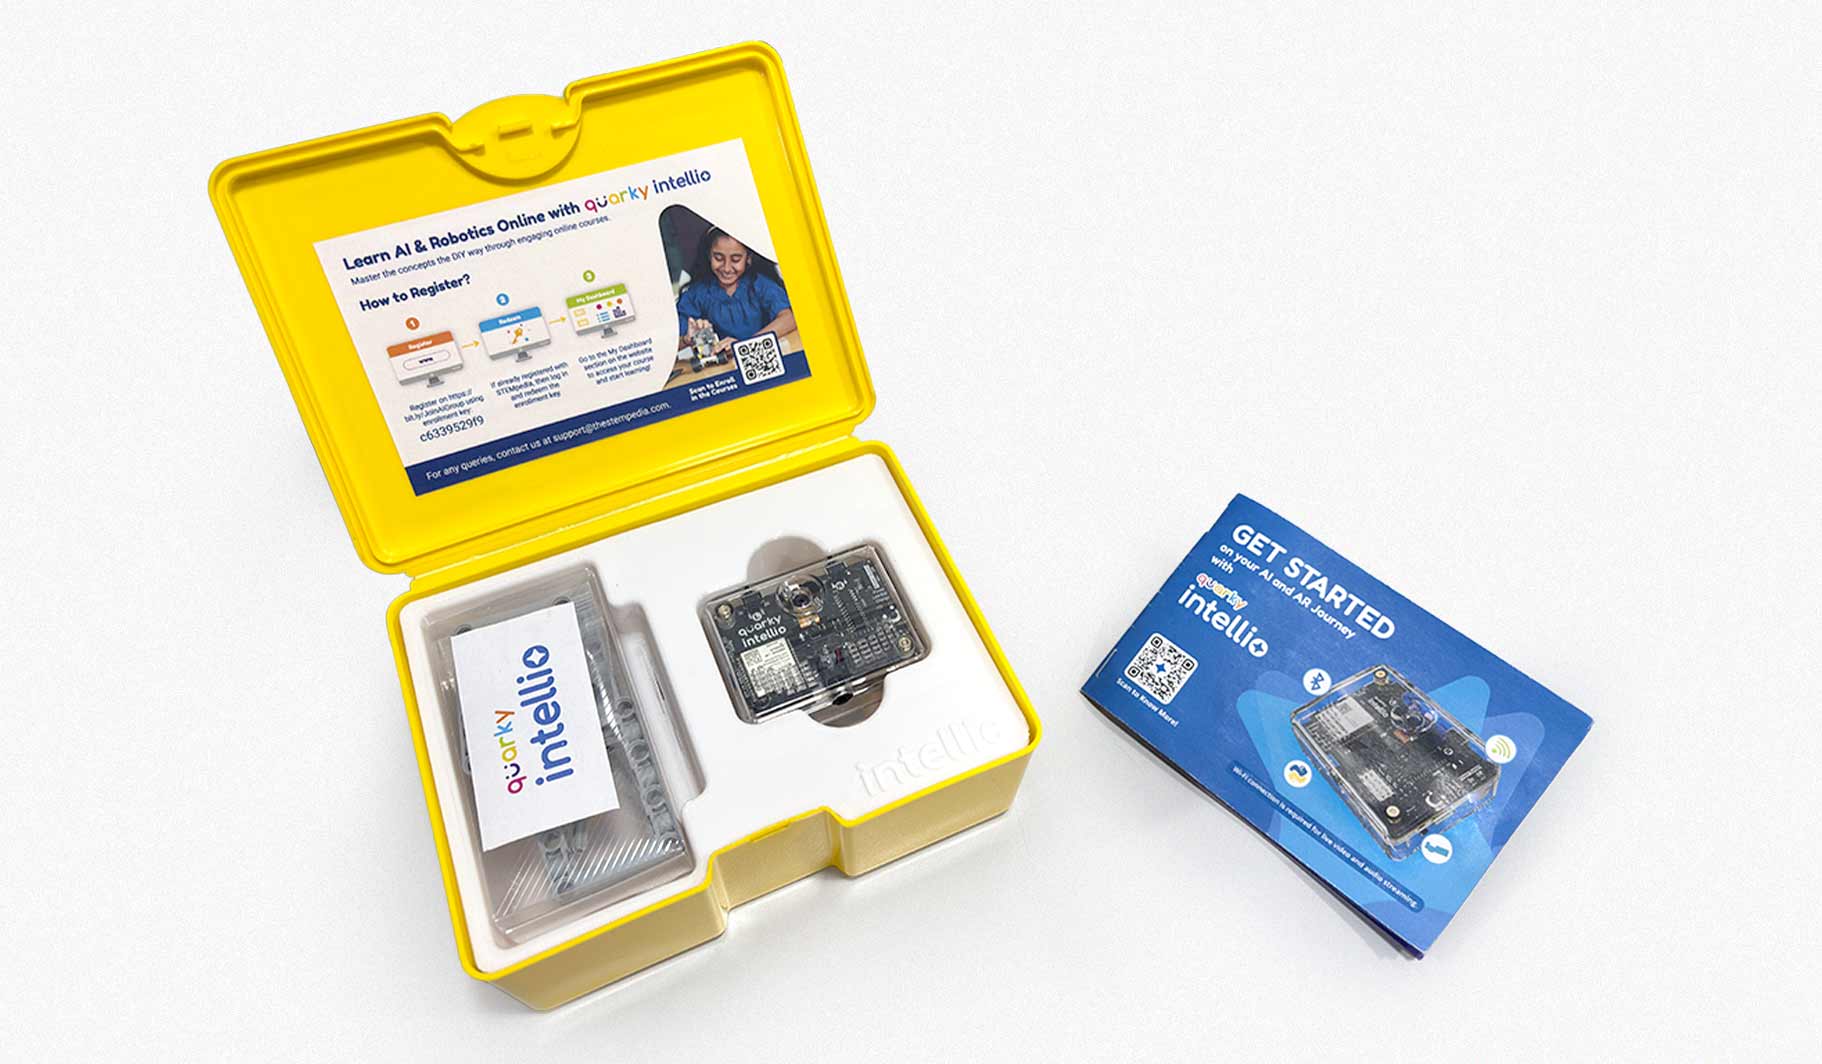
Quarky Intellio is an AI module that brings vision, sound, and augmented reality to hands-on projects. With a built-in Camera, Microphone, and Speaker, it makes learning creative and interactive.
It supports Block Coding and Python, works with platforms such as Arduino, Raspberry Pi, and ESP32, and features LEGO-compatible construction, making it easy to connect sensors, servos, and displays for real-world AI and robotics projects.

Quarky Intellio is available in the following kit options:
- Quarky Intellio Discovery Kit
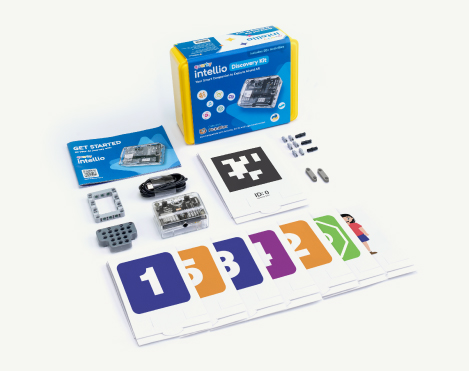 Here are the components included in the Quarky Intellio Discovery Kit:
- Quarky Intellio
- USB-C Cable
- 2 × AR Markers (Double Sided)
- 7 × Recognition Markers (Double Sided)
- Set of Building Blocks
- Getting Started Booklet
- 5 × Self-Paced Online Courses
- 5000 × PictoBlox Credits
- Quarky Intellio Rover Kit
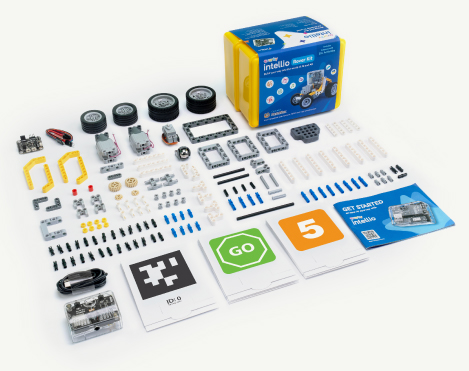 Here are the components included in the Quarky Intellio Rover Kit:
- Quarky Intellio
- USB-C Cable
- 2 × AR Markers (Double Sided)
- 7 × Recognition Markers (Double Sided)
- Set of Building Blocks
- Quarky Mini Expansion Board with Cables
- 180° Servo Motor
- 2 × Motors
- Set of Big Wheels
- Set of Small Wheels
- Set of Axles
- Set of Gears
- Getting Started Booklet
- 10 × Self-Paced Online Courses
- 10,000 × PictoBlox Credits
First Interaction with Quarky Intellio
When you power up Quarky Intellio for the first time, it automatically runs a short interactive demo to introduce its key features. Let’s go through it step by step.
- Power On Quarky Intellio
- Slide the Power Switch to turn ON your Quarky Intellio.
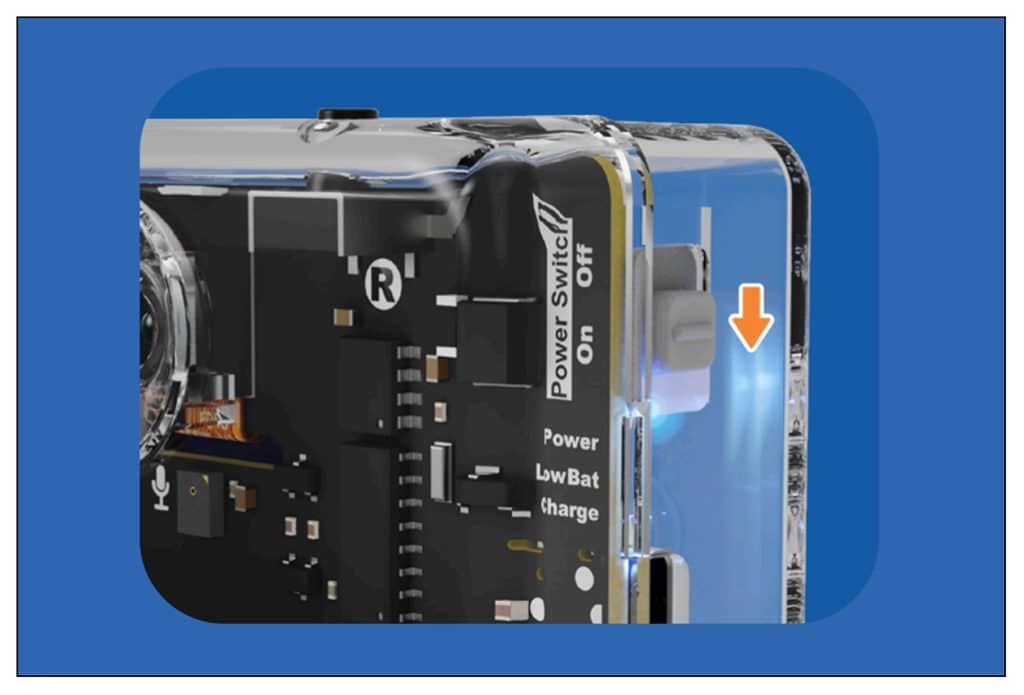
- Rainbow-coloured lights flash on Quarky Intellio’s LED, and then it greets you using its built-in speaker.

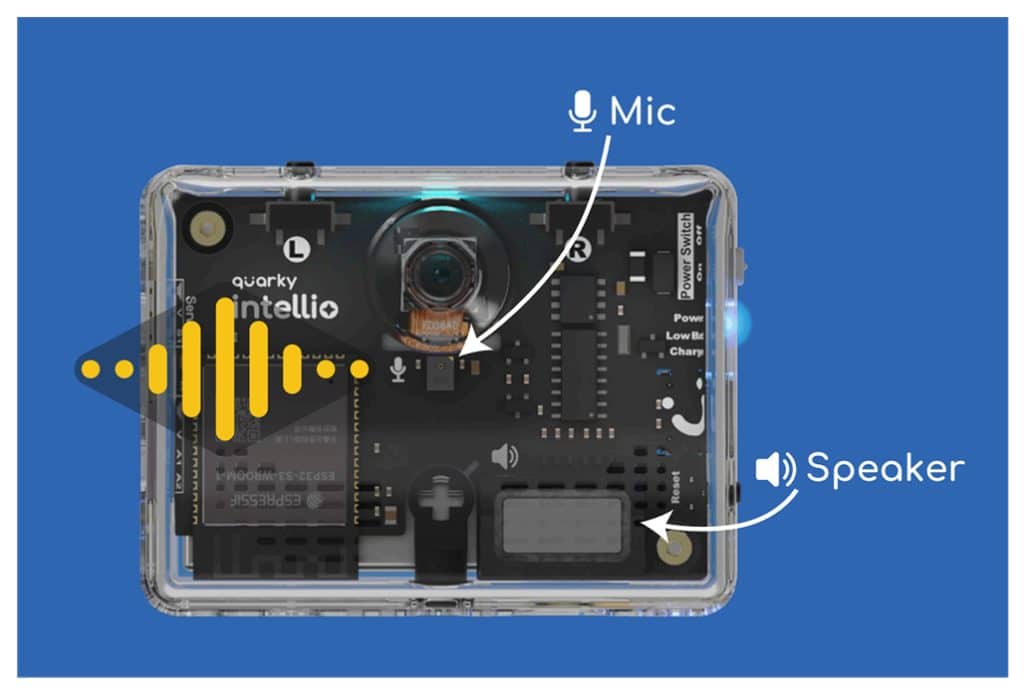
- Quarky Intellio can listen and speak using its built-in microphone and speaker, letting you record your voice and hear it played back instantly.
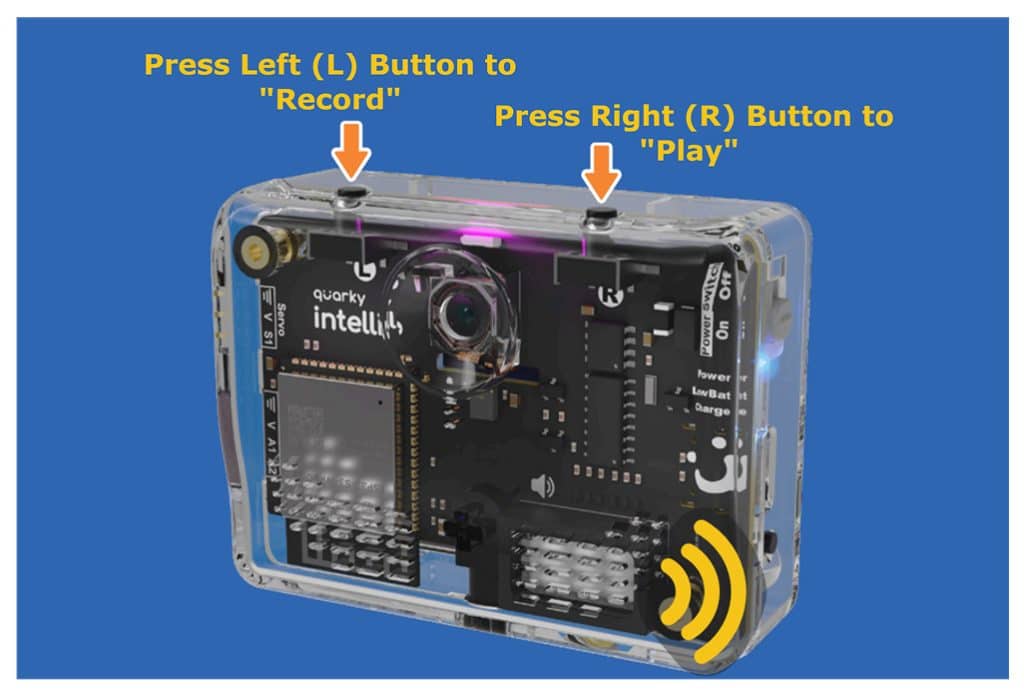
- Press the Left (L) button to start recording audio and the Right (R) button to play back your recording.
 This is your first interaction with Quarky Intellio, in which you explored how it listens and speaks through its microphone and speaker.
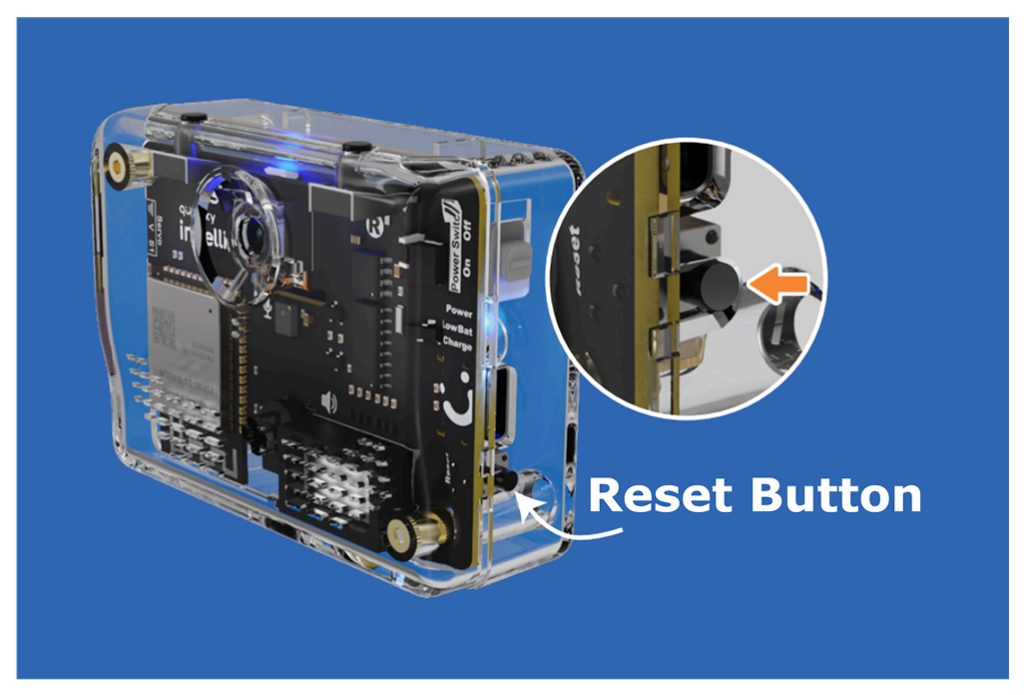
 - Press the Reset Button on the right side of Quarky Intellio. When the LED turns blue, you can pair Quarky Intellio with PictoBlox.
- Slide the Power Switch to turn ON your Quarky Intellio.

Download and Install PictoBlox Software
Ready to explore projects with Quarky Intellio? Start coding with Block Coding or Python.
To start coding with Quarky Intellio, you’ll need to install PictoBlox on your device.
PictoBlox version 9.1.0 or later is required for Quarky Intellio support. Click Download PictoBlox to visit the download page, select your operating system (Windows, macOS, or Linux), and follow the on-screen instructions to install the latest version.

Connect Quarky Intellio with PictoBlox “Via Wi-Fi Router”
Now that you’ve powered up Quarky Intellio, explored its basic features, and installed PictoBlox, the next step is to connect Quarky Intellio to your device to start coding.
In this guide, we use the Via Wi-Fi Router method to connect Quarky Intellio and your computer to the same 2.4 GHz Wi-Fi network. This enables real-time camera streaming, AI processing, and interactive project control.

- PictoBlox Configuration Steps
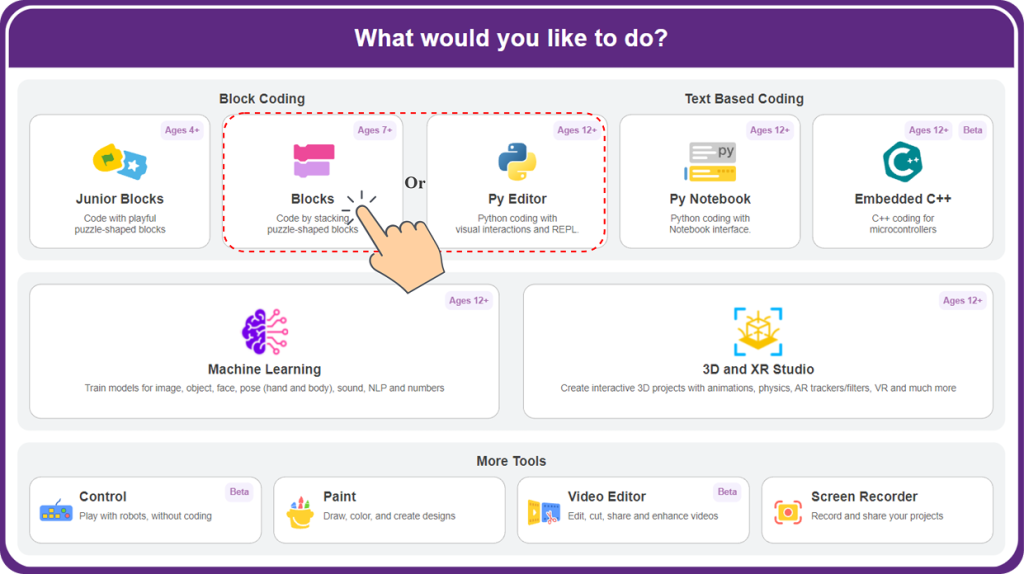
- Open PictoBlox and choose Blocks or Py Editor.
- Go to the Board and select Quarky Intellio.
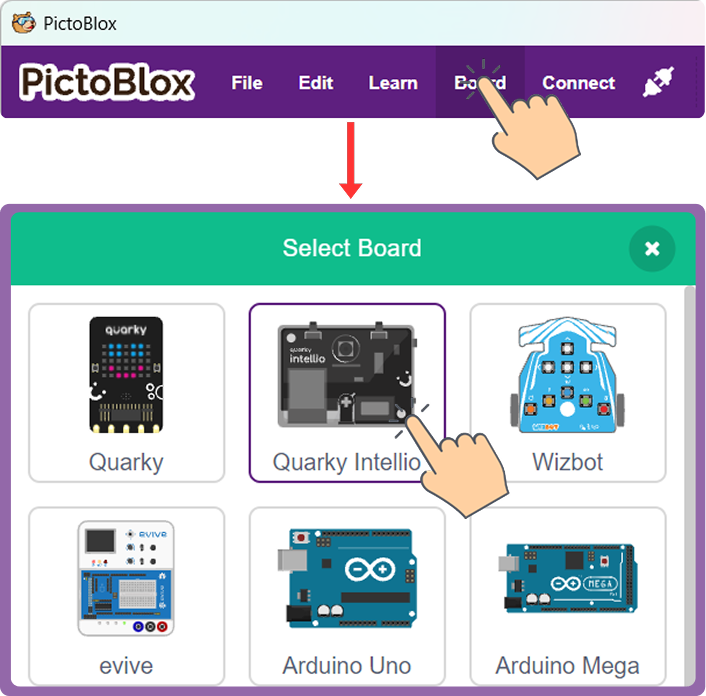
- Click Connect to begin connecting Quarky Intellio to PictoBlox.

- Select the Via Wi-Fi Router connection method.
Note: Use the Wi-Fi tab to complete this connection. Support for connecting via Bluetooth Ports will be available in a future update.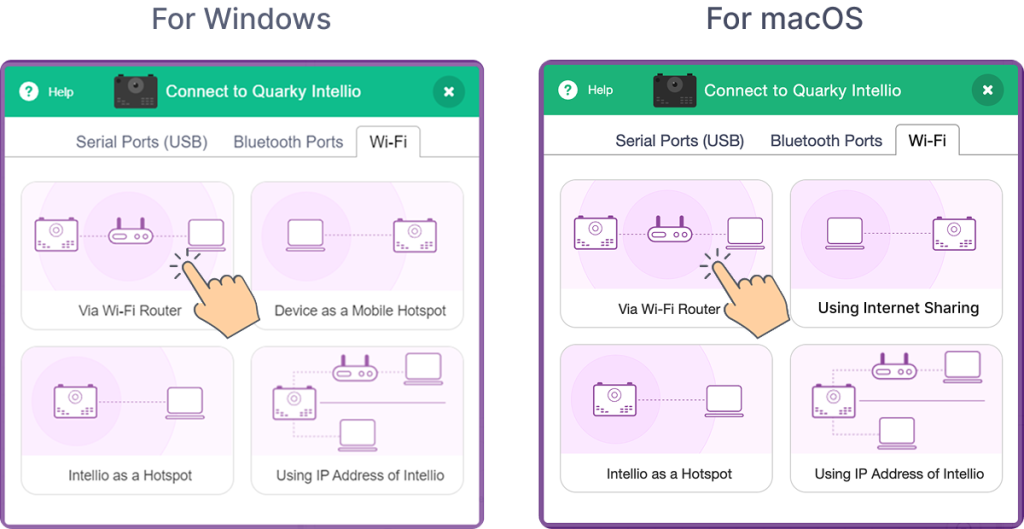
- When you reach this screen, connect your device to a 2.4 GHz Wi-Fi network.
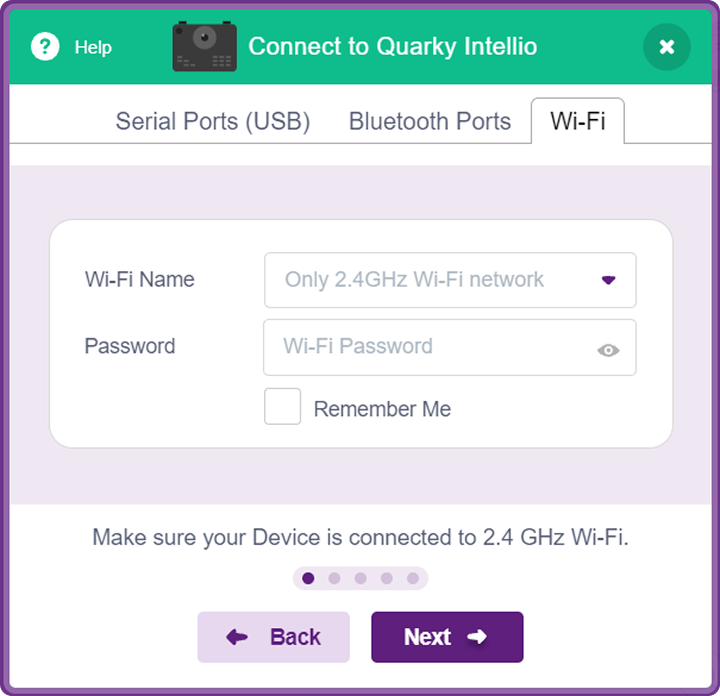
- If Quarky Intellio is not yet turned on, slide the Power Switch to turn it on.
- Open PictoBlox and choose Blocks or Py Editor.
- Turn On Wi-Fi and Bluetooth on Your Device.
Quarky Intellio connects to PictoBlox over Wi-Fi to access the camera feed. PictoBlox uses Bluetooth (or the USB Serial Port) to securely transfer the Wi-Fi network details. Once the credentials are shared, Intellio joins the Wi-Fi network and connects to PictoBlox.
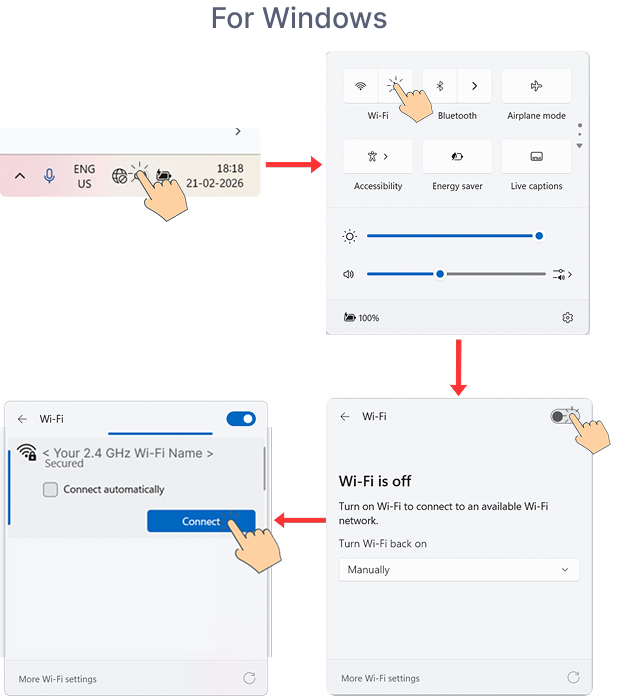
Follow the steps below based on your operating system to enable Wi-Fi and Bluetooth on your device.- For Windows
- Open Quick Settings from the bottom-right corner of your taskbar, turn on Wi-Fi, and connect to a 2.4 GHz network.
- Open Quick Settings from the bottom-right corner of your taskbar, and turn on Bluetooth.
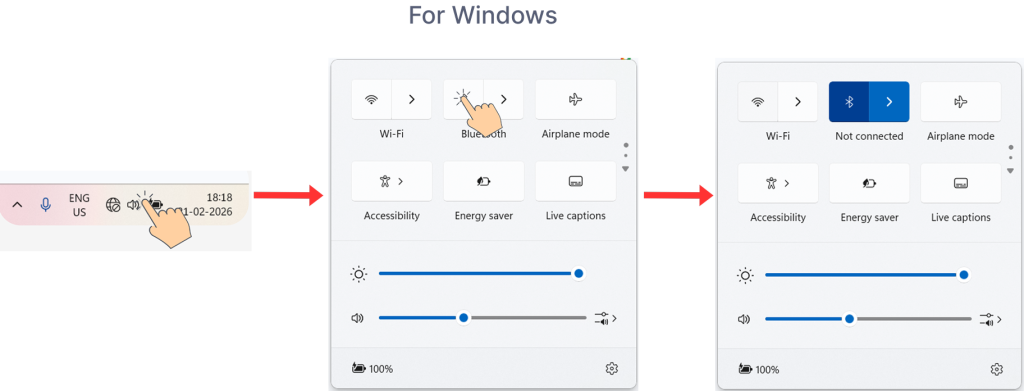
- Open Quick Settings from the bottom-right corner of your taskbar, turn on Wi-Fi, and connect to a 2.4 GHz network.
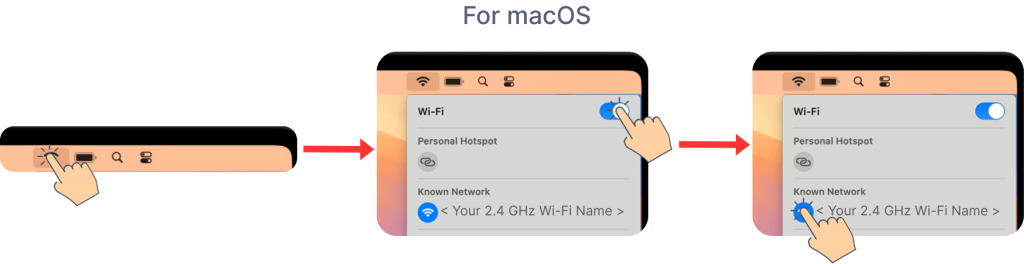
- For macOS
- Click the Wi-Fi icon in the top-right corner of your macOS screen, turn on Wi-Fi, and connect to a 2.4 GHz network.
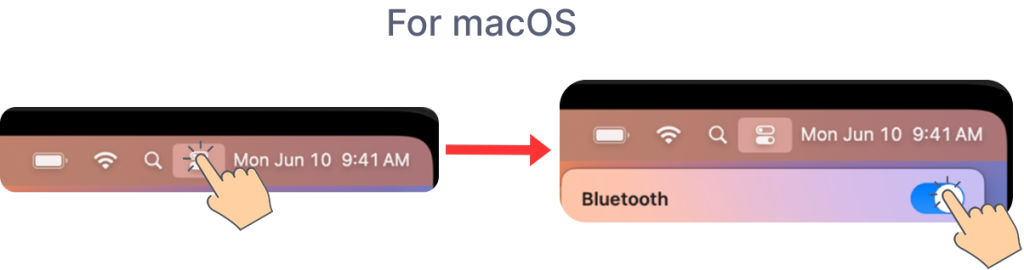
- Open the Control Center from the top-right corner of your macOS screen, then turn on Bluetooth.
- Click the Wi-Fi icon in the top-right corner of your macOS screen, turn on Wi-Fi, and connect to a 2.4 GHz network.
- For Windows
- Find and Connect Your Quarky Intellio
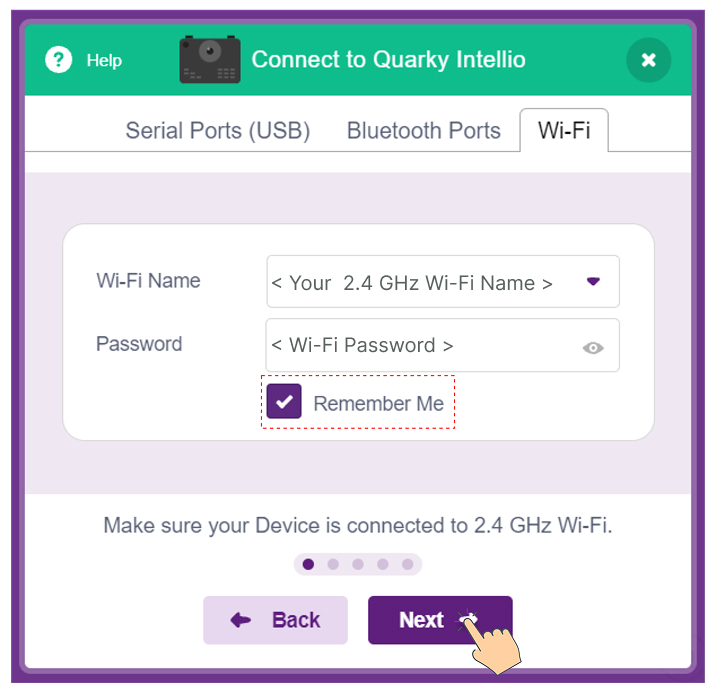
- After turning on Wi-Fi and Bluetooth, enter the Wi-Fi Network Name and Password you connected to in the previous step, then click Next. Enable “Remember Me” to save your credentials for future connections.
- PictoBlox is searching for your Quarky Intellio.
Note: Can’t find your Quarky Intellio? Ensure Bluetooth is turned ON on your device, then press the Reset button on Quarky Intellio and click Refresh to scan again.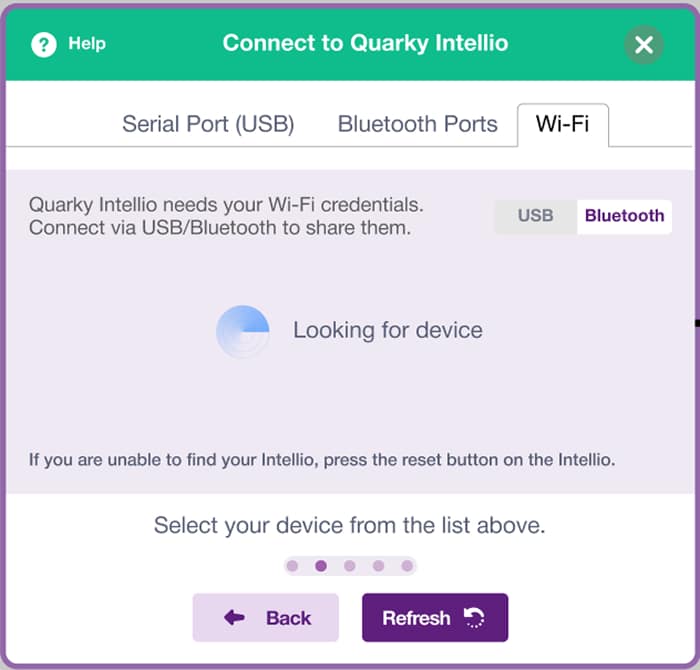
- Select your Quarky Intellio (for example, Quarky Intellio <****>) and click Connect.
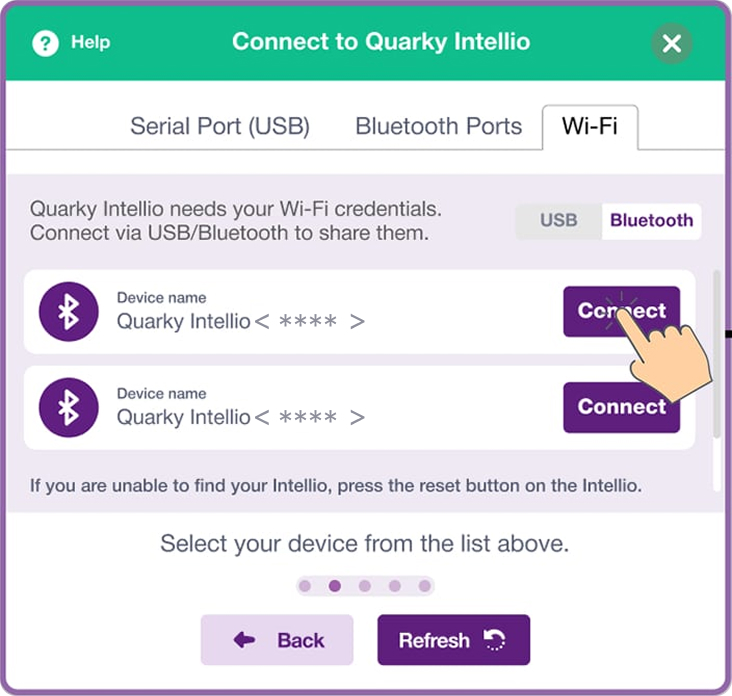
Note: You can find your Quarky Intellio Name (For example, Quarky Intellio<****>) printed on the right side of the device, as shown below.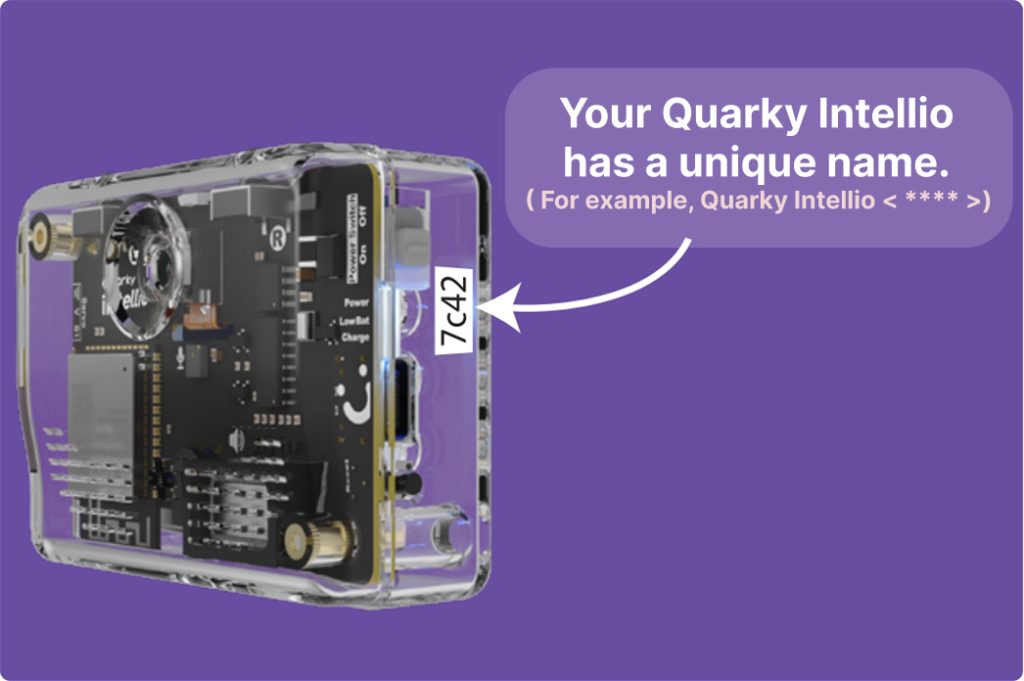
- Once you reach this screen, click “Go to Editor” to close the pop-up and continue coding with Quarky Intellio in the PictoBlox.
 You’ve successfully connected Quarky Intellio to PictoBlox using the Via Wi-Fi Router method. Let’s test Quarky Intellio with a camera feed interaction.
- After turning on Wi-Fi and Bluetooth, enter the Wi-Fi Network Name and Password you connected to in the previous step, then click Next. Enable “Remember Me” to save your credentials for future connections.
- Test Quarky Intellio with a Camera Interaction
- In PictoBlox, open the Quarky Intellio block panel on the left and select the Camera blocks palette.
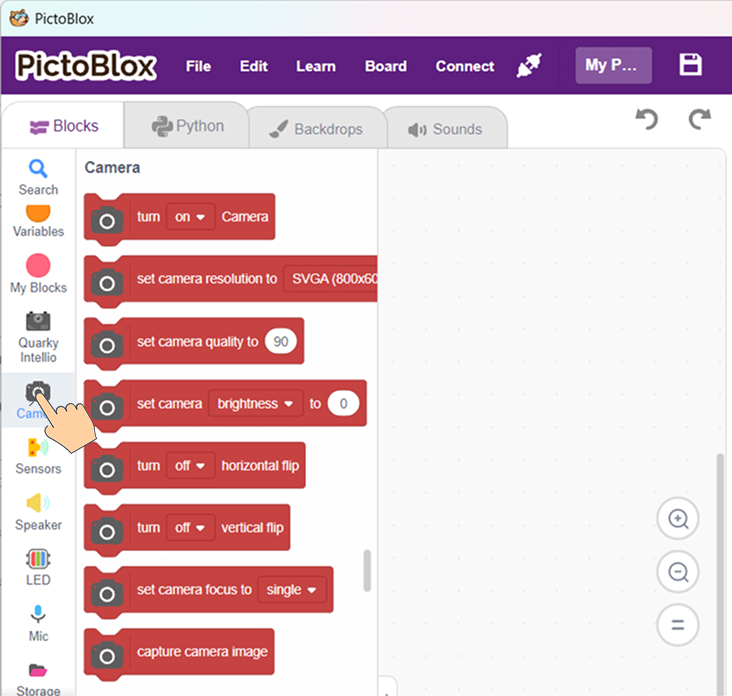
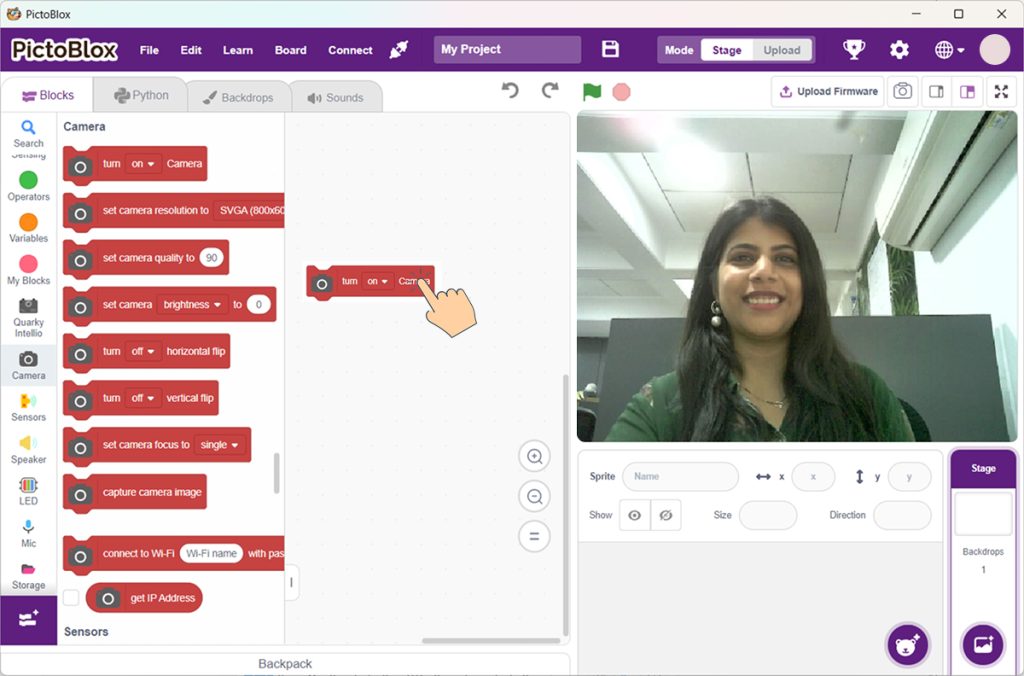
- Drag the Turn On Camera block to the scripting area and click on it. The Quarky Intellio camera feed will appear live on the Stage, as shown below.
- In PictoBlox, open the Quarky Intellio block panel on the left and select the Camera blocks palette.
Run Your First Quarky Intellio Example Project
Let’s run a simple example and explore how Quarky Intellio sees and reacts instantly.
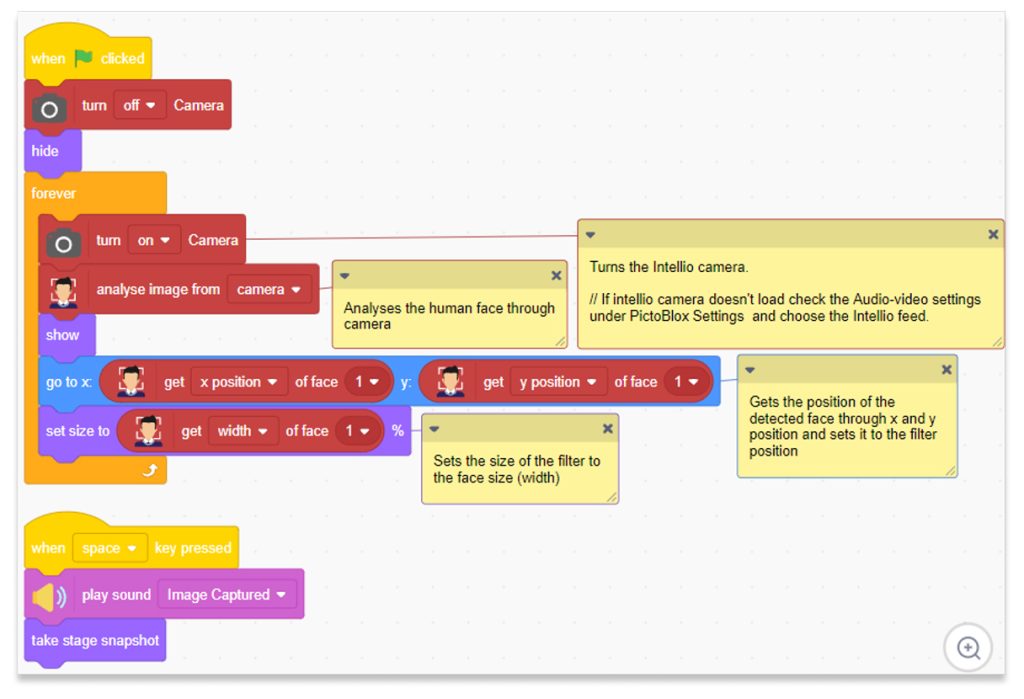
- Open the “Snap with a Filter” Example
- In PictoBlox, go to the Learn section from the top menu and navigate to Examples.
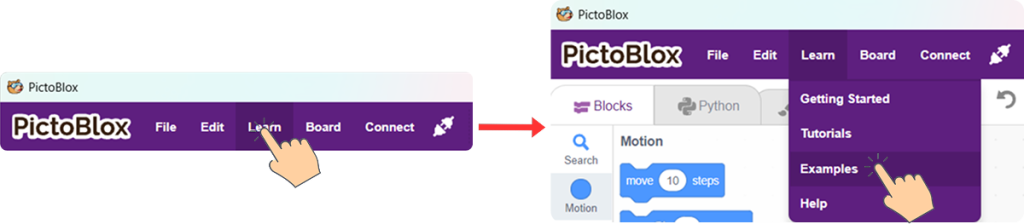
- Select the “Snap with a Filter” example.
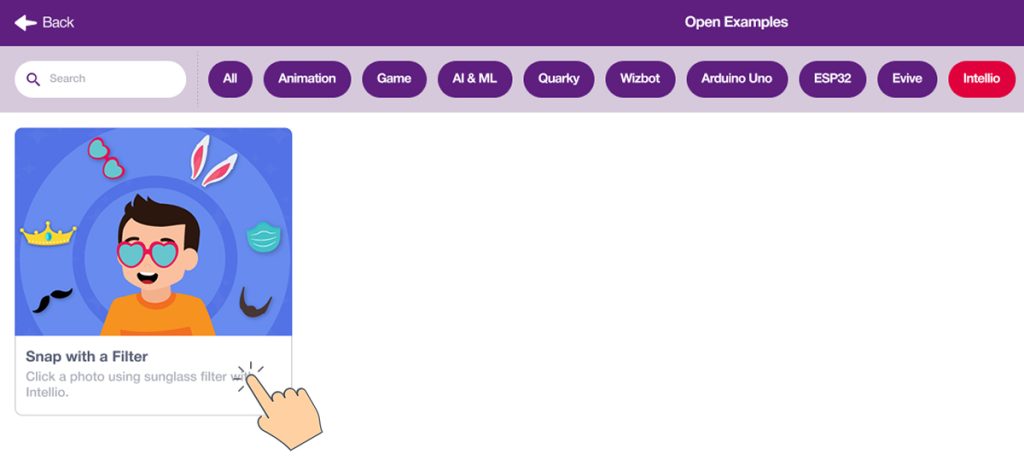
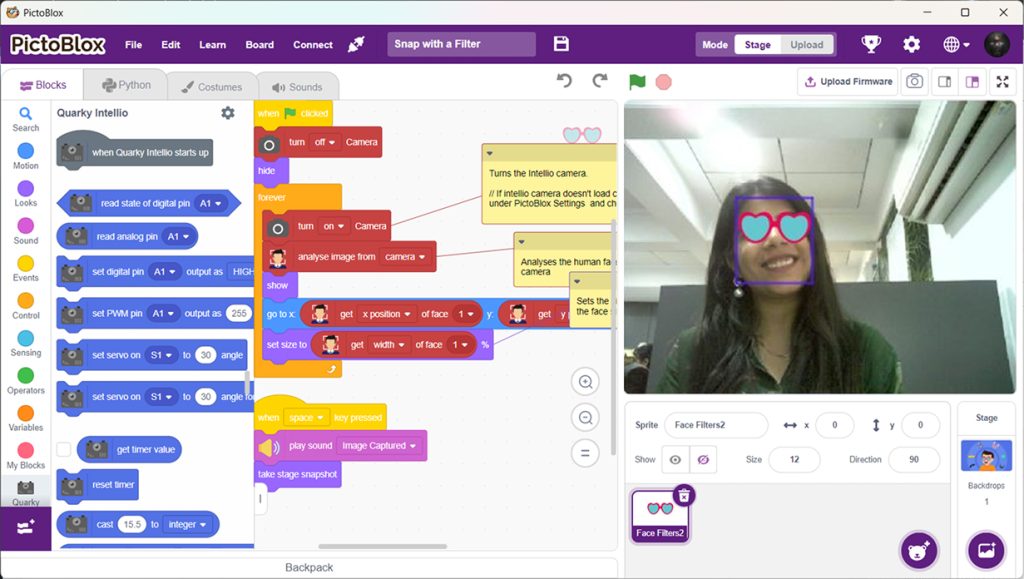
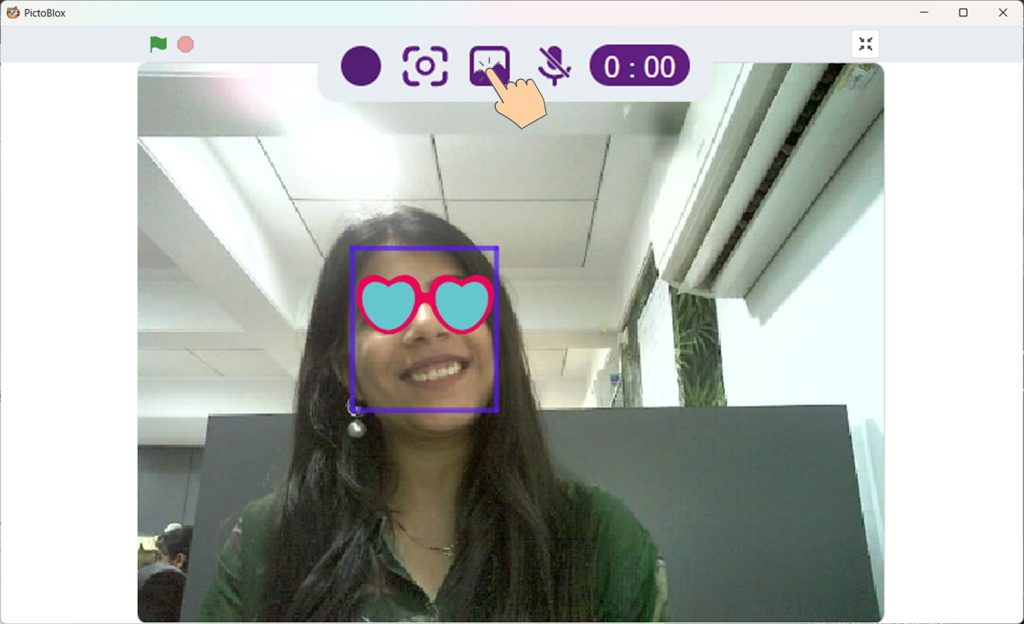
- Once selected, the example loads in PictoBlox. Here’s what it does:
- Detects your face and tracks its position in real time.
- Applies a filter accurately over your face.
- Lets you capture a photo with a single key press.
- In PictoBlox, go to the Learn section from the top menu and navigate to Examples.
- Run and Interact with the Example
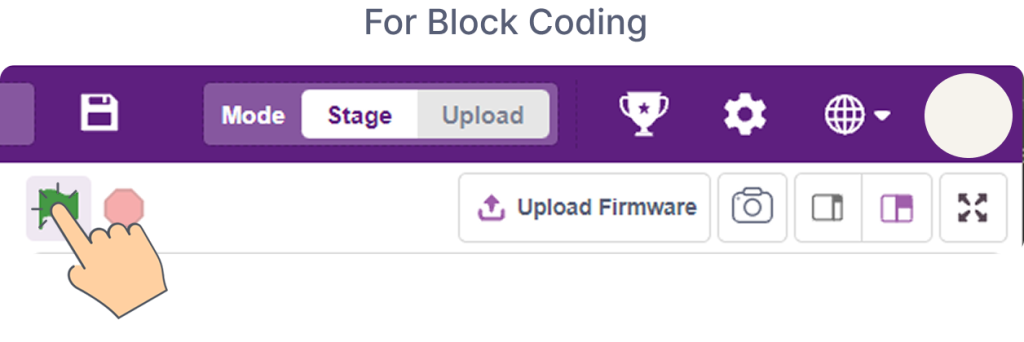
- In Block Coding, click the Green Flag to execute the program.
- Stand in front of the camera of Quarky Intellio and watch the filter follow your face.
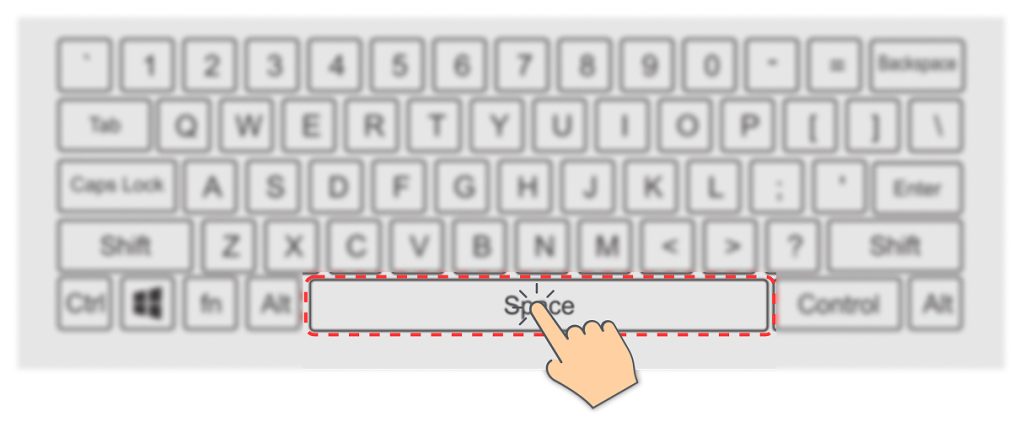
- Press the Space key on your keyboard to capture a photo with the filter applied.
- In Block Coding, click the Green Flag to execute the program.
- To view the captured photo, follow the steps below:
- Click the Maximize icon in the top-right corner of PictoBlox if it is not already maximized.
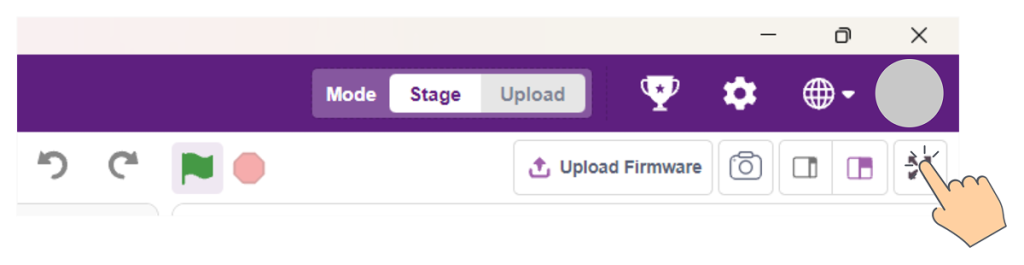
- In the maximized view, click the Gallery icon at the top-center of the screen, as shown below.
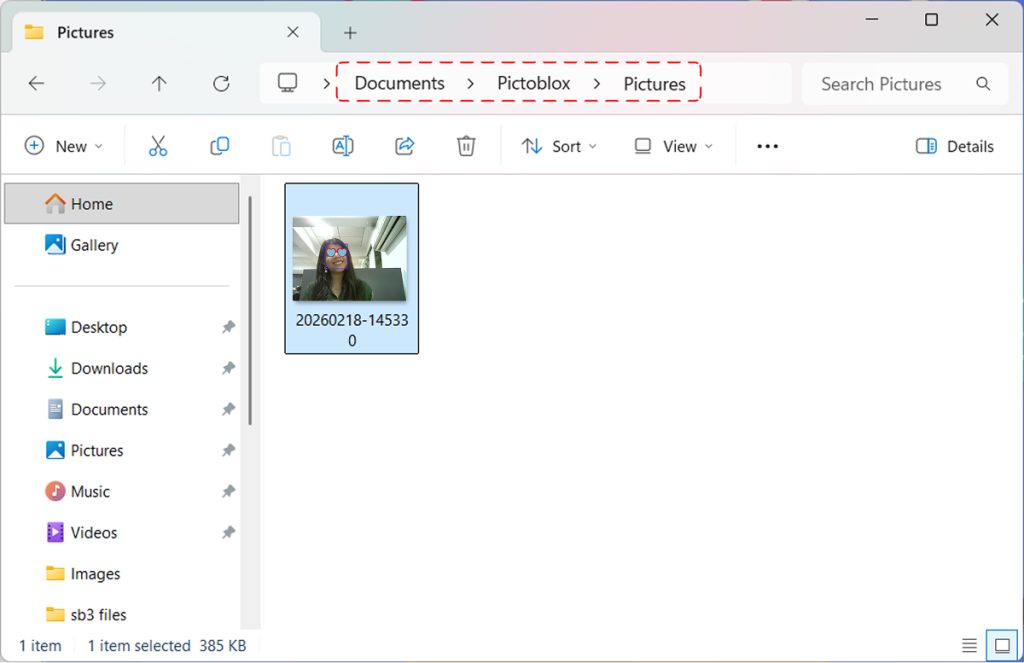
- Open the Pictures folder in PictoBlox to view your captured photos.
- Click the Maximize icon in the top-right corner of PictoBlox if it is not already maximized.
- To re-execute the program, click the Green Flag in Block Coding.
Well done! You’ve powered up Quarky Intellio, connected it to PictoBlox, and successfully run your first interactive project, Snap with a Filter. You’ve experienced how Quarky Intellio uses AI and camera vision to see, react, and capture moments in real time.
You’re now ready to explore more examples, customize projects, and begin building your own Robotics Creations with Quarky Intellio.