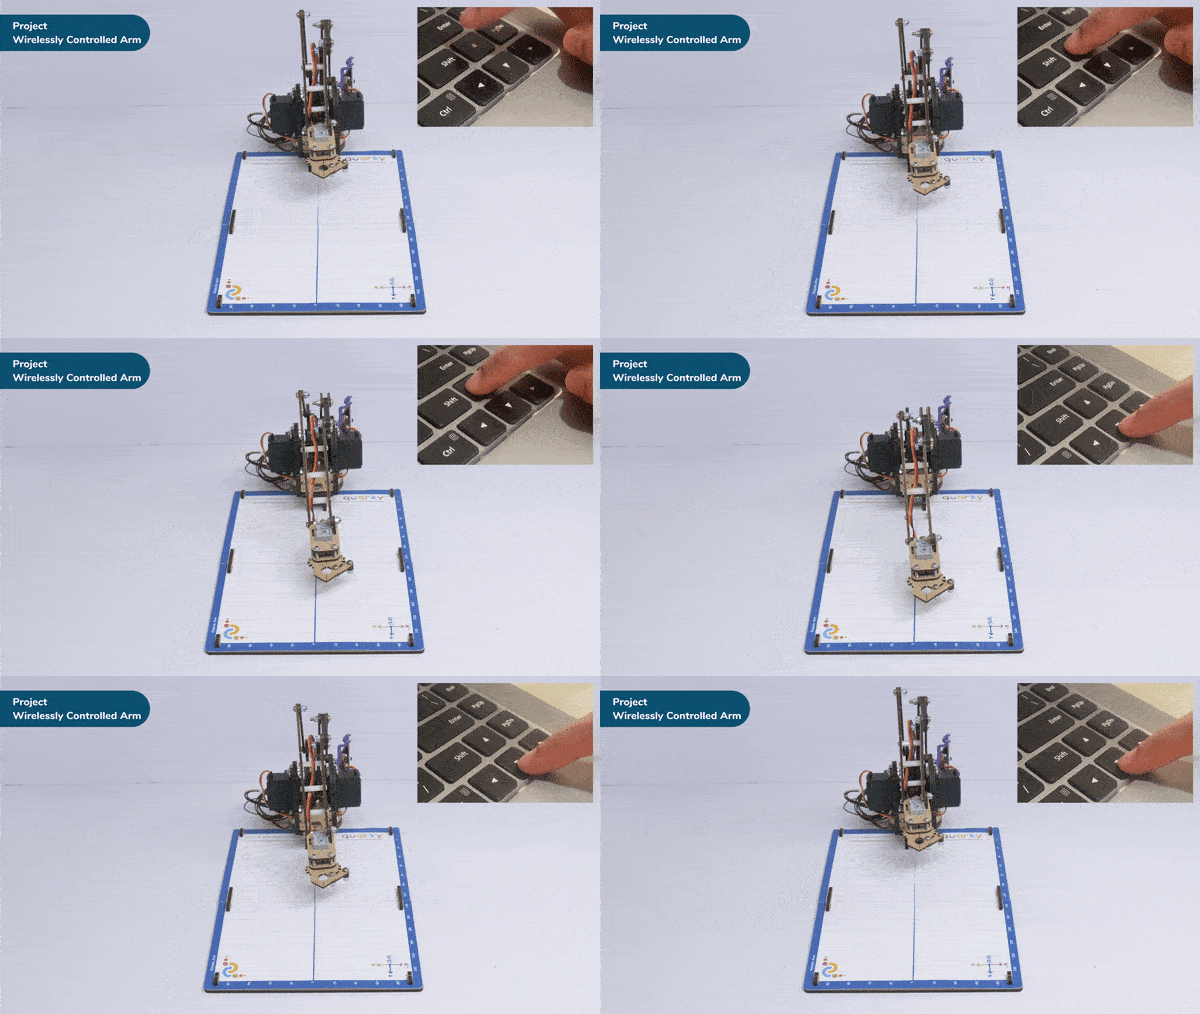
This activity will teach you how to control a Quarky robotic arm using the Bluetooth communication extensions of Quarky and PictoBlox. With this technique, you’ll be able to provide precise control over its movement and actions from a remote location.
The robotic arm can be used for various tasks, such as picking up objects or manipulating tools. It can also be used for applications like manufacturing, medical, research, and exploration. This type of robotic arm will increase the productivity and safety of operations that would otherwise be too hazardous or inaccessible for humans.
Code:
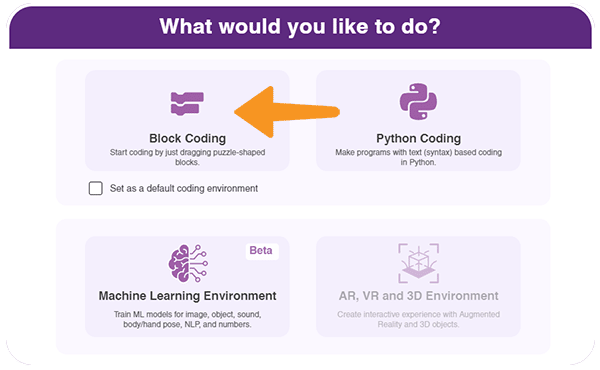
- Open pictoblox and create a new file in the block coding environment.
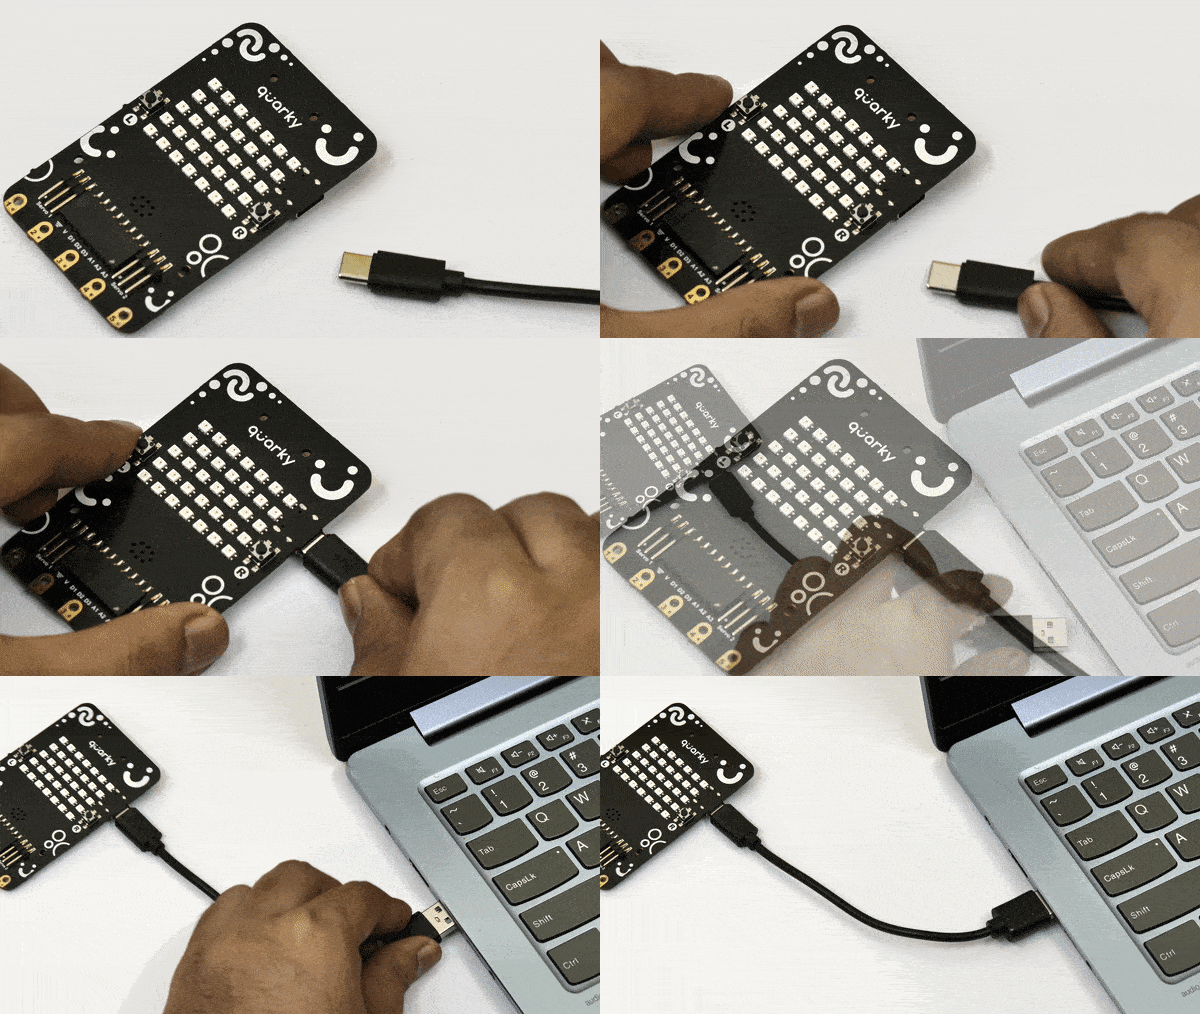
 Connect your Quarkly with the PC using the USB cable.
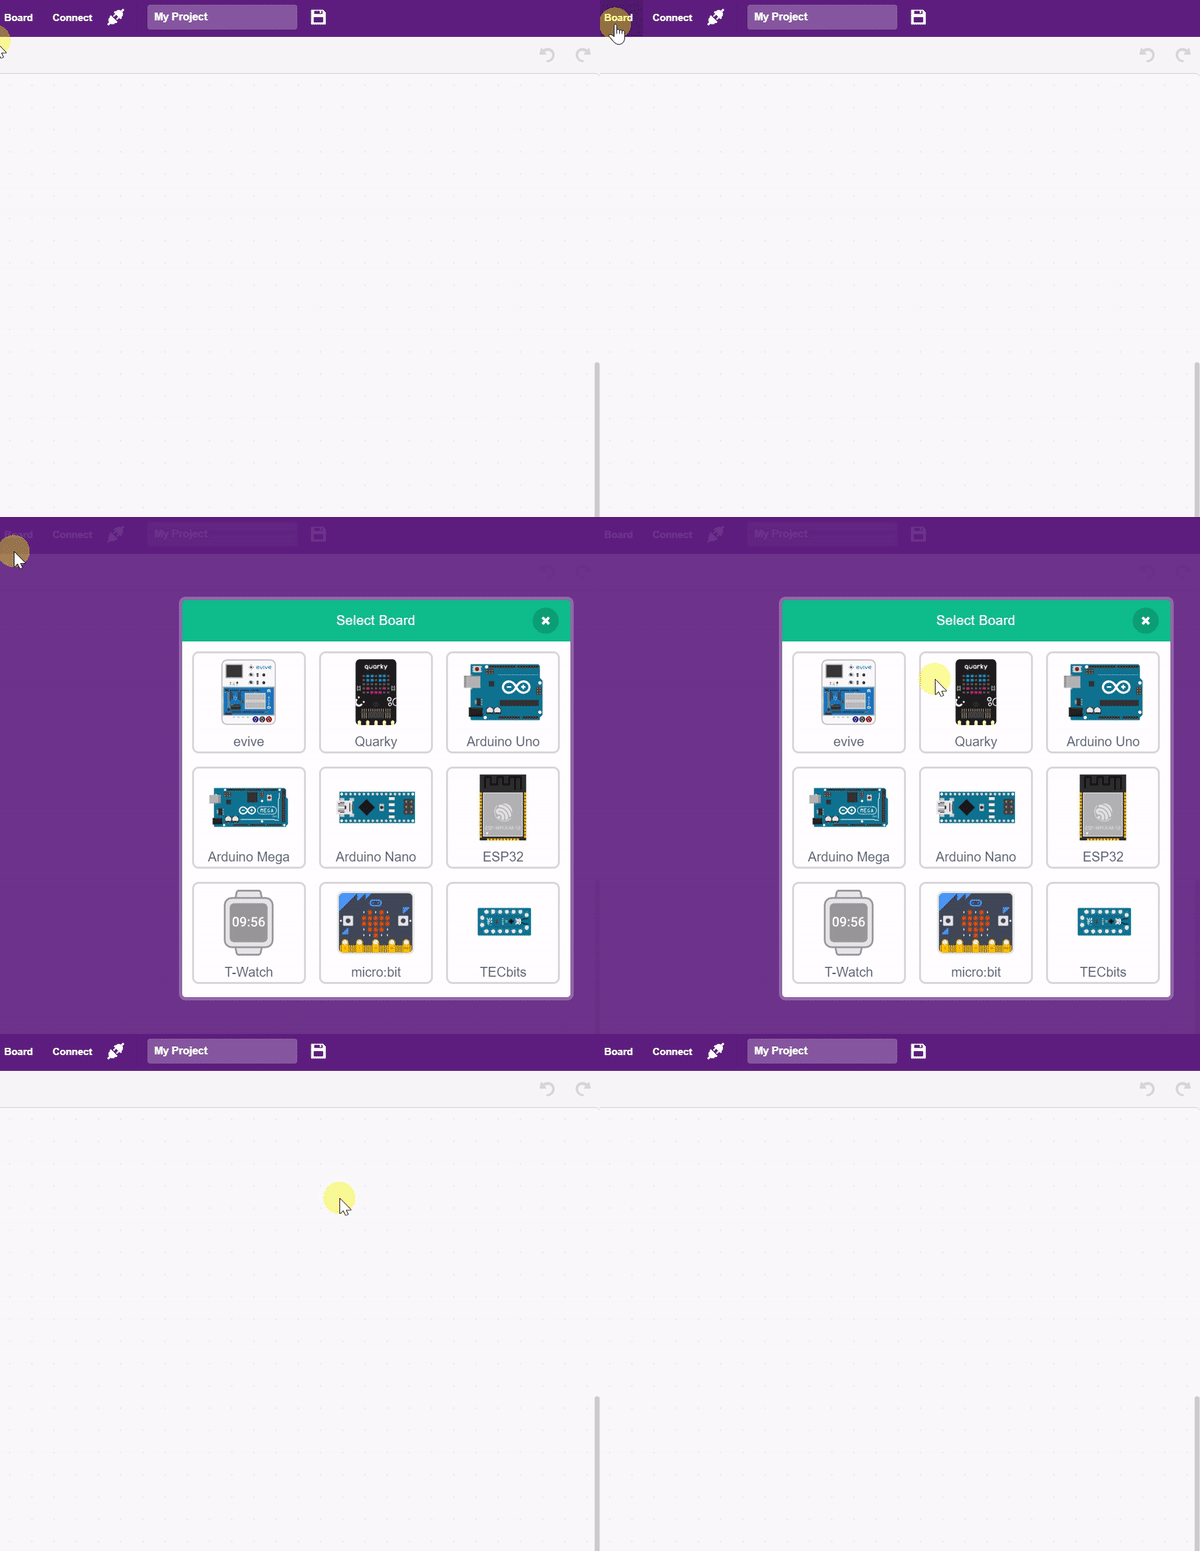
3. Go to the board tab and select Quarky from the listed boards.
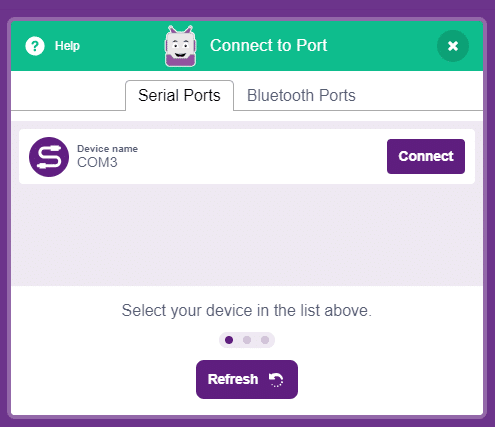
4. Connect your quarky under serail port and upload the firmware.
5. Now click on add extension button and add Robotic Arm extension from the list.
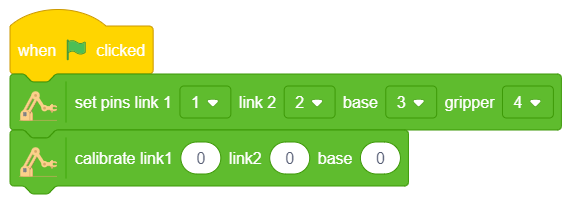
6. Go to the event palette and drag when flag clicked into the scripting area.
7. From Robotic arm extension, we need to initialize the pins for different servo motors so drag the first block and connect below the event block. as shown below.

8. Add the calibration block for like !, link 2 and base. this block helps to tackle the errors that appear due to poor wrong alognments during the assembly.
9. Select the open and close angles for gripper and set the arm to home position using the home block

10. Create a time variable from variable palette and set it to 0

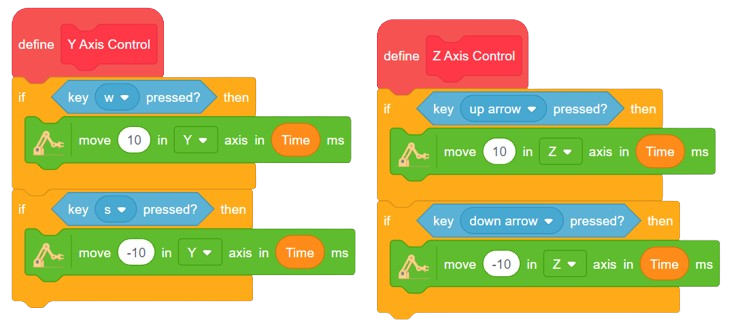
11. let’s create the script for the different movements of the robotic arm. create a block named as “X Axis Control” and define the control under this block. as shown below.

12. Do the same for Y and Z axis.
13. Now define the controls for the gripping operation.
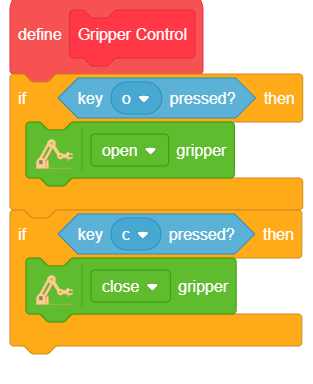
14. Till this point we have defined the controls for all the axes and gripper operation as well. No add forever loop in the main script and and call all the above define blocks inside the forever block.

15. Lastly, add a wait of o.1 seconds after the gripping operation, this wit will ensure the correct tracking of putton pressing.
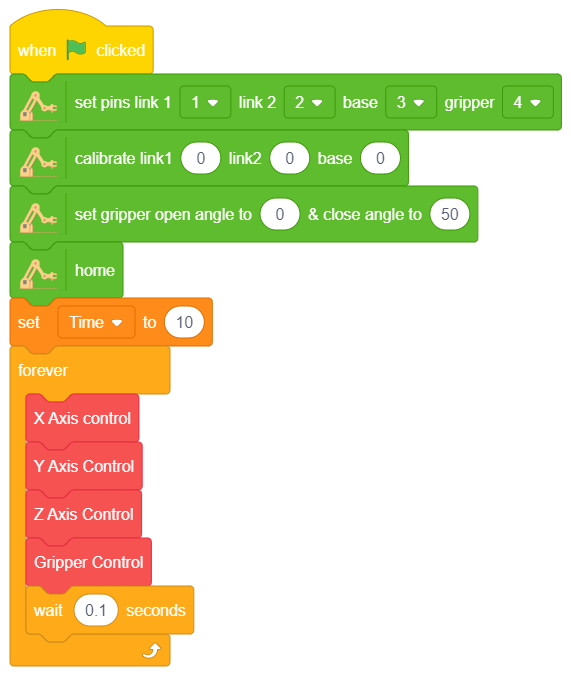
With this, your script is complete, now run the code and control your Robotic arm Wirelessly. this activity equips you with the skills to wirelessly control a Quarky robotic arm using Bluetooth and PictoBlox. By following the detailed steps, you can precisely manage the arm’s movements across all axes and its gripper functionality. Whether for educational, industrial, or research purposes, this hands-on project showcases how robotics can enhance productivity and safety in challenging environments. Explore, experiment, and unlock the full potential of robotic technology! Happy Coding


